Gatsby is a React framework that allows you to create static, Serverless applications. The Gatsby sites are different from traditional sites because they are often deployed on a content distribution network (CDN) and are content-independent.
The advantage of deploying from a CDN is that there is less latency and sites are generally served to the client faster.
Gatsby is often described as a content mesh. A content mesh means that, as a user, you can extract data from a variety of sources, such as a WordPress site, a CSV file, and a variety of external APIs; as a result, Gatsby is data agnostic.
This is different from a traditional content management system (CMS) such as WordPress and Drupal, where data usually comes from a single source – a database. When you build an app in Gatsby, you don’t have to worry about maintaining and provisioning a database. Also, by using Gatsby, you can create a structure known for its speed and flexibility.
These Serverless sites are also known as JAMStack. In a JAMStack architecture, there is still a server involved, but the developer does not need to provision or maintain the server. Some developers see Serverless servers as a desirable feature because they can focus more attention on their application’s business logic.
For example, if they were creating an e-commerce store, they could focus on code that is directly related to creating and selling products. JAMStack helps developers quickly develop websites that are safer, more efficient, and less expensive to deploy than traditional CMS frameworks.
At the end of this tutorial, you will be able to create and modify a Gatsby site. You’re going to get your first Gatsby e-commerce site up and running, but we’ll only create this site on your local machine and not deploy it.
Read: Best CMS Platforms for Web Developers
Below you can find the prerequisites for working with Gatsby in React:
- Node.js version > 10.
- An understanding of JavaScript will be helpful. Although Gatsby uses React, you do not need to know React to get started, but it would be helpful to be familiar with the basics.
How to Install Gatsby and Project Setup
In this step, you will install a new Gatsby site from a template. Gatsby provides users with starter templates, so you don’t have to worry about building a website from scratch.
Download the Gatsby CLI package. This Gatsby command-line interface will allow you to create and customize a new website:
npm install -g gatsby-cli
The flag -g means that you are installing the Gatsby command-line interface globally and that will allow you to use the tool in any directory.
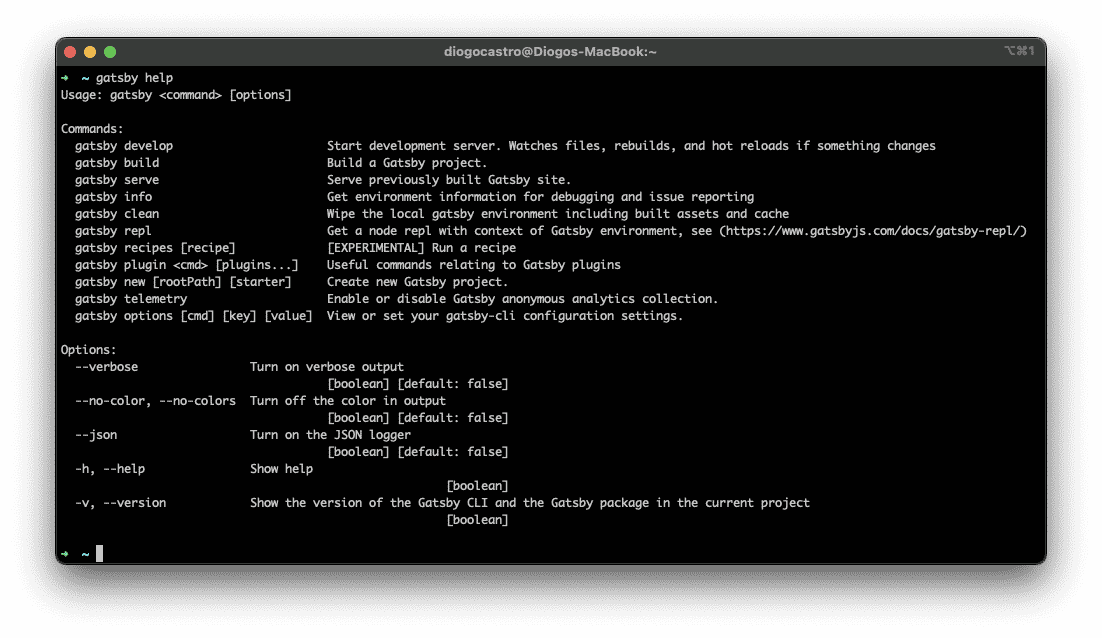
If you type the following command it will show several commands that can be used when working with Gatsby:
gatsby help
This will produce the following output:
Gatsby help command options
Now with Gatsby command-line tools installed, you still need a website. One of the advantages of Gatsby is that you do not have to code a site from scratch.
Gatsby has several starter templates that you can use to get your site up and running. There are hundreds of models out there, and many of those contributions come from the community.
For this web development and Gatsby tutorial, we will use one of the early models of the official Gatsby, the Gatsby Starter Default. The first thing to do is install a Gatsby starter through the terminal:
gatsby new gatsby-starter-default https://github.com/gatsbyjs/gatsby-starter-default
This command creates a new website using the template gatsby-starter-default and names the project after the template.
Watch out for the logs until you see the project successfully created.
Now that we’ve created a new Gatsby project and explored the file structure, let’s go into the project and customize the website’s metadata.
Read: Angular vs React: Feature Comparison
How to Modify Gatsby Configs
If you want your site to be discovered by a search engine, it is important to correctly format your metadata. In this section, you will configure the title, description, and author metadata in your app.
Open gatsby-config.js in a text editor to see the Gatsby configuration. The following is gatsby-config.js with the settings that come with the Gatsby Default Starter model:
module.exports = {
  siteMetadata: {
    title: `Gatsby Default Starter`,
    description: `Kick off your next, great Gatsby project with this default starter. This barebones starter ships with the main Gatsby configuration files you might need.`,
    author: `@gatsbyjs`,
    siteUrl: `https://gatsbystarterdefaultsource.gatsbyjs.io/`,
  },
  plugins: [
    `gatsby-plugin-react-helmet`,
    `gatsby-plugin-image`,
    {
      resolve: `gatsby-source-filesystem`,
      options: {
        name: `images`,
        path: `${__dirname}/src/images`,
      },
    },
    `gatsby-transformer-sharp`,
    `gatsby-plugin-sharp`,
    {
      resolve: `gatsby-plugin-manifest`,
      options: {
        name: `gatsby-starter-default`,
        short_name: `starter`,
        start_url: `/`,
        background_color: `#663399`,
        // This will impact how browsers show your PWA/website
        // https://css-tricks.com/meta-theme-color-and-trickery/
        // theme_color: `#663399`,
        display: `minimal-ui`,
        icon: `src/images/gatsby-icon.png`, // This path is relative to the root of the site.
      },
    },
    // this (optional) plugin enables Progressive Web App + Offline functionality
    // To learn more, visit: https://gatsby.dev/offline
    // `gatsby-plugin-offline`,
  ],
}
Gatsby’s configuration file also contains its plugins. Plugins are packages you install to add functionality to your Gatsby app.
This Gatsby installation comes with gatsby-plugin-react-helmet, gatsby-plugin-image, gatsby-transformer-sharp, gatsby-plugin-sharp, and gatsby-plugin-manifest plugins.
Each Gatsby Default Starter template contains the same generic metadata. Let’s customize this data by replacing the text with title, description, and author updating the following code object:
siteMetadata: {
    title: `HtmlGoodies - Getting Started with Gatsby`,
    description: `A quick overview of Gatsby features and setup.`,
    author: `@htmlgoodies`,
    siteUrl: `https://gatsbystarterdefaultsource.gatsbyjs.io/`,
},
Save and exit the file.
Now, when Google or another search engine crawls your website, it retrieves the data associated with your app. Let’s move on and update one of the website’s pages.
Modifying a Gatsby Index Page
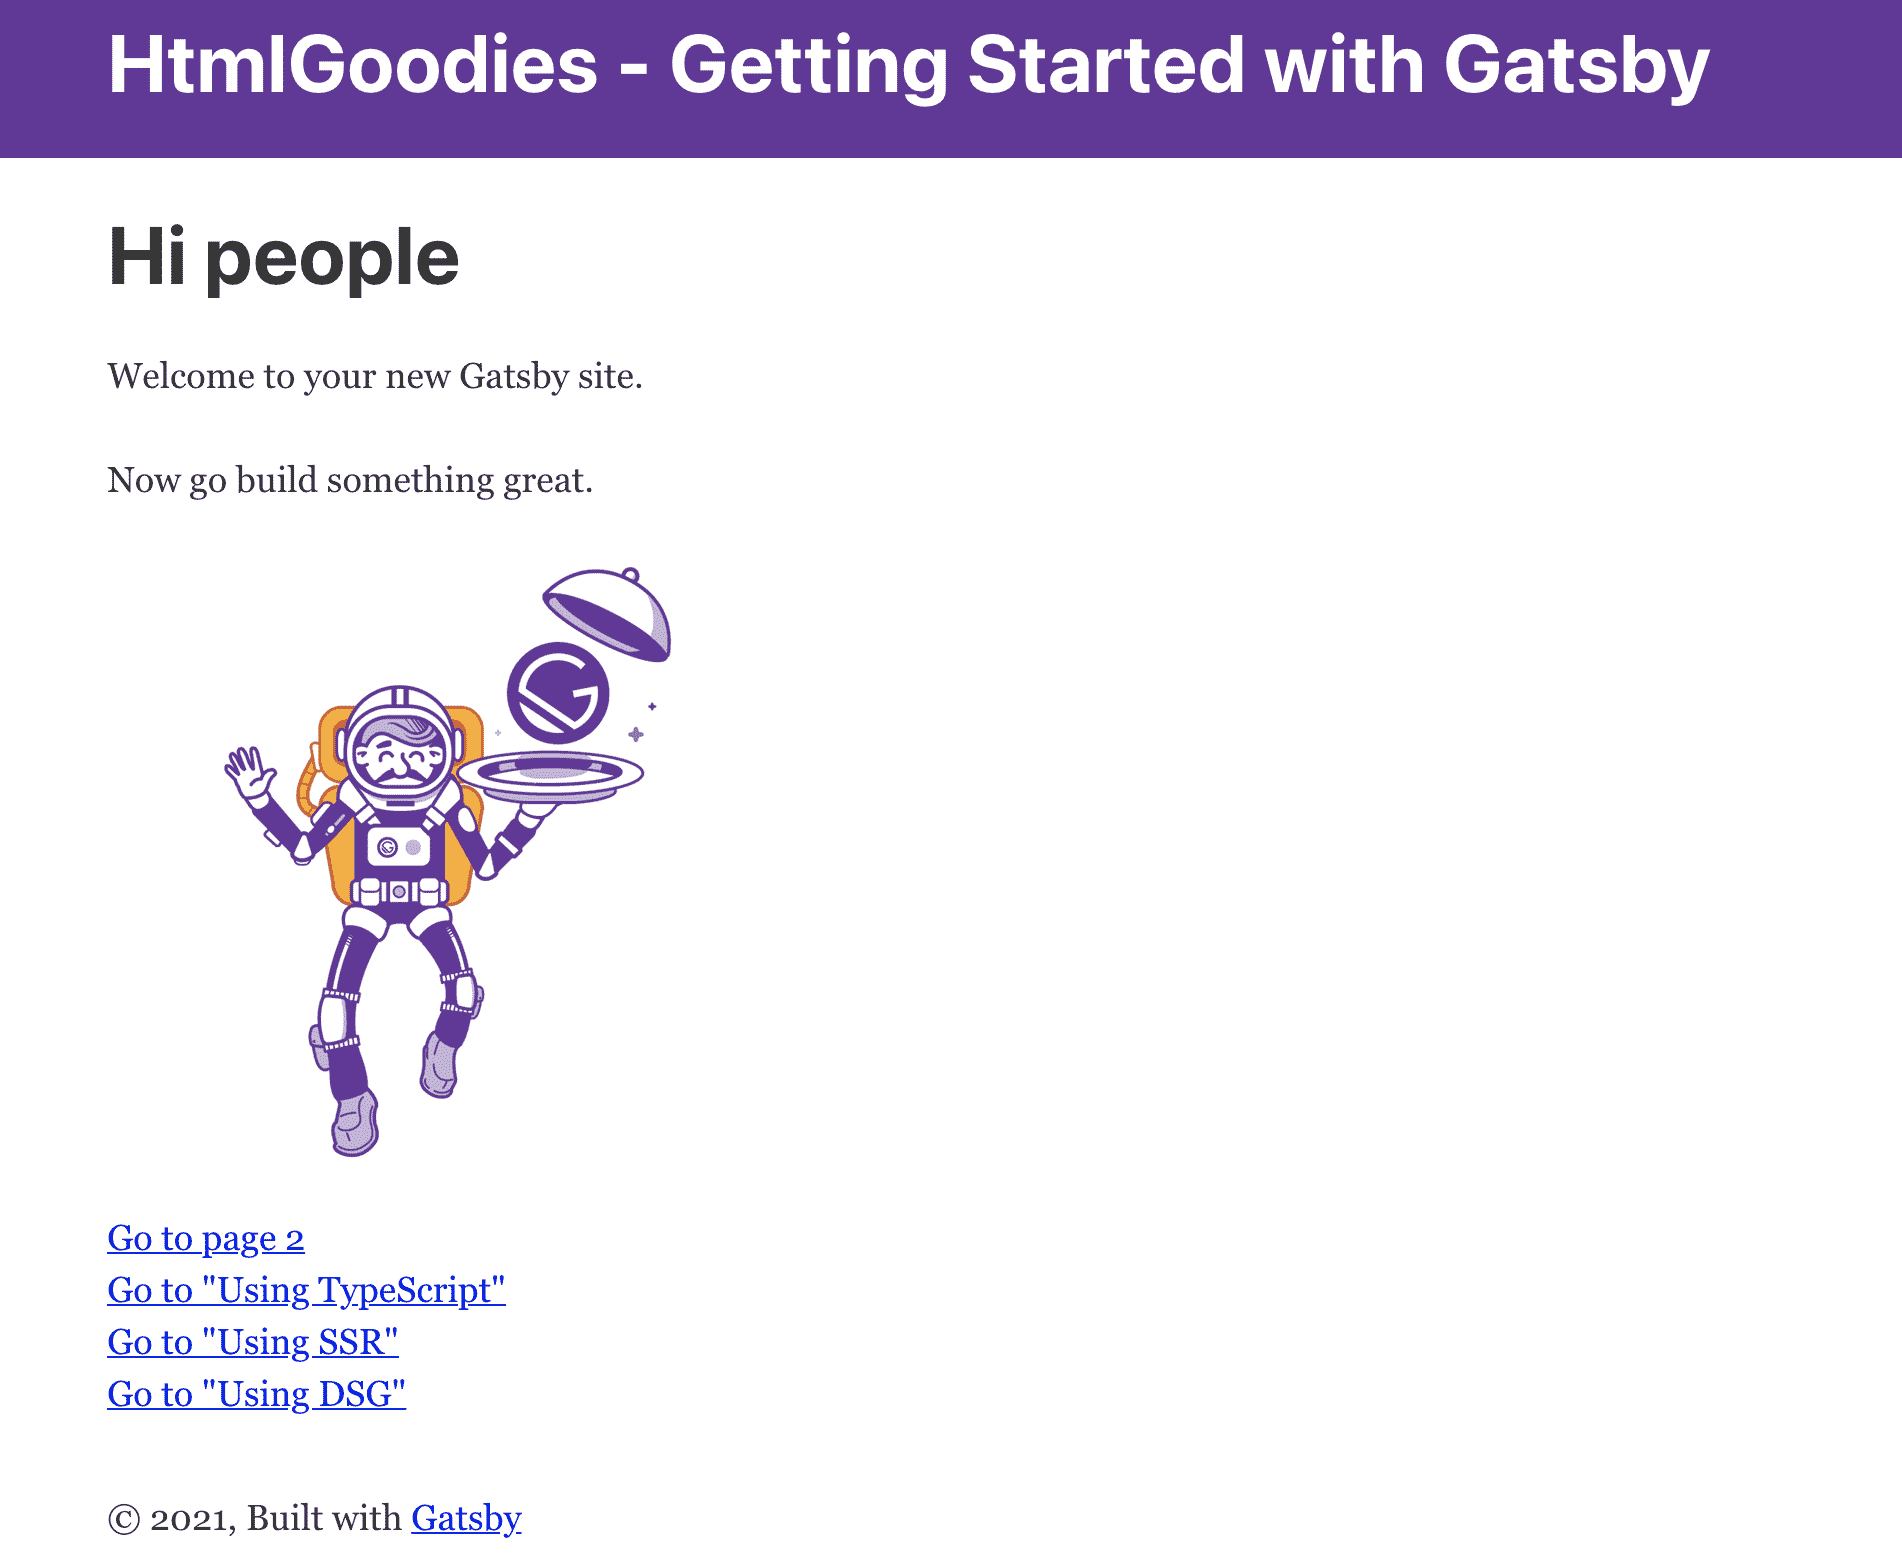
It is time to see what the Gatsby website looks like in your browser. Open a new terminal window and type the following command to view the local version of the site:
gatsby develop
This command triggers the download of all required Node dependencies, sets up the development bundle, and starts the development server which can be accessed at http://localhost:8000/.
Default Gatsby initial home page
Let’s change the markup on the page to make it more like the content you would find on an e-commerce site. Change its content to the following:
import * as React from "react"
import { Link } from "gatsby"
import Layout from "../components/layout"
import Seo from "../components/seo"
import Product from "./product"

const products = [
  {
    id: 1,
    title: "Hand sanitizer",
    price: 12.39,
    photo: "hand_sanitizer.png",
  },
  {
    id: 2,
    title: "Thermometer",
    price: 23.99,
    photo: "thermometer.png",
  },
  {
    id: 3,
    title: "Disinfectant spray",
    price: 5.0,
    photo: "disinfectant_spray.png",
  },
  {
    id: 4,
    title: "Alcohol spray",
    price: 9.99,
    photo: "alcohol_spray.png",
  },
]

const IndexPage = () => (
  <Layout>
    <Seo title="Home" />
    <h1>Welcome to your web pharmacy</h1>
    <p>Choose among the best online products for your personal hygiene.</p>
    <div
      style={{
        display: "grid",
        gridTemplateColumns: "1fr 1fr",
      }}
    >
      {products.map((prod, i) => (
        <Product key={i} product={prod} />
      ))}
    </div>
  </Layout>
)
export default IndexPage
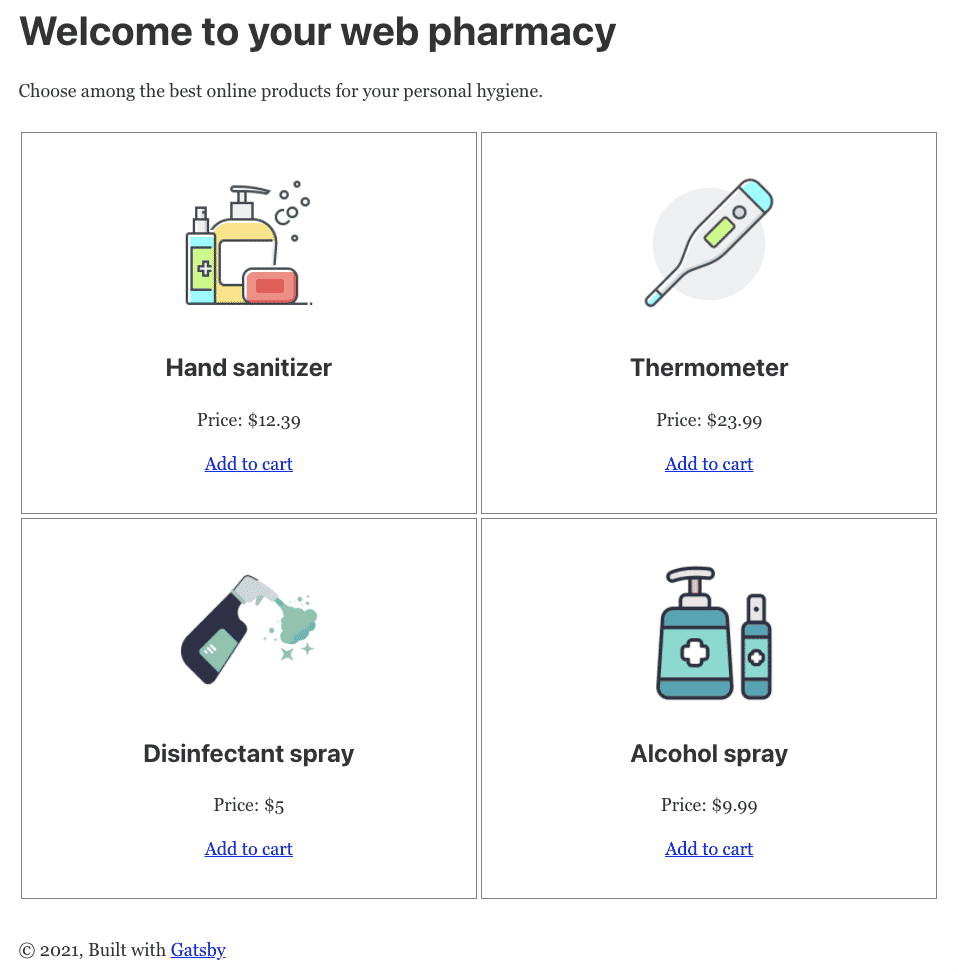
Notice that we are using a bit more React power here. We created an array of products to emulate the data coming from your server. Then, we iterate over its values to create for each one a new Product component.
The Product component needs its file. So, go ahead a create a new file called product.js and add this content to it:
import { Link } from "gatsby"
import * as React from "react"

const Product = ({ product }) => (
  <div
    style={{
      padding: "2rem",
      margin: "2px",
      border: "1px solid grey",
      textAlign: "center",
    }}
  >
    <img
      src={product.photo}
      width={150}
      quality={95}
      alt={product.title}
      style={{ marginBottom: `1.5rem` }}
    />
    <h3>{product.title}</h3>
    <span style={{ marginBottom: "1rem", display: "block" }}>
      Price: ${product.price}
    </span>
    <Link to="#">Add to cart</Link> <br />
  </div>
)
export default Product
Notice how we are making use of each element from the products array to create a new item on the e-commerce listing, such as shown below:
New e-commerce items pulled from the hardcoded array of products
The images must be inserted into the /static folder at the root of your Gatsby project. You can add your own versions to see how it works out.
Conclusion to Gatsby for Beginners
In this tutorial, you created your first Gatsby website. You learned how to set up a basic Gatsby site on your local machine. Now that you can create and customize a Gatsby app, go ahead and play with it, add more components, and go through the docs to see what else Gatsby can offer to you.


