This HTML web development tutorial is intended to provide detailed knowledge of HTML attributes, using concrete code examples to help you understand them more quickly and easily. With that in mind, let’s start by saying that elements in the DOM tree, called tags, can have HTML attributes. These HTML attributes provide additional information about HTML elements. There are different types of attributes, some of which are mandatory, some are standard, or optional, and some are event attributes. The purpose of using HTML attributes is to modify the elements that contain the DOM tree and to provide them with additional information about those elements.
Mandatory attributes are those that are necessary for an element type; they make sure that its function works correctly. Optional attributes, meanwhile, are used to change the default functionality of certain types of elements.
Standard attributes are accepted for a large number of element types and are the most often encountered attribute type. Event attributes are used to determine the types of elements that can specify scripts to run in certain situations.
Attributes are used as pairs – more precisely, name and value – and are inserted at the beginning, after the element name. For the correct use of attributes, we must always separate the name and value by the “=” sign.
Below you will find the most important HTML attributes, which include: href, lang, alt, style, src, title, width, and height.
Read: HTML, CSS, and JavaScript Tools and Libraries
The href Attribute in HTML
The HTML href attribute is used to specify the URL of a particular page to which the link goes. Once the link has been added to the href attribute, it is linked to the text displayed in the a tag (this tag defines a hyperlink). When the user clicks it, it will be redirected to the address of the mentioned link. Here is some example code showing how to use the HTML href attribute:
<html>
    <html lang="en">
        <body>
            <h2>The href Attribute</h2>
            <p>Please click on the link to visit it</p>
            <a href="https://www.htmlgoodies.com/">Visit Html Goodies</a>
            <p>Using the target attribute, we can specify where to open the page we want to access</p>
            <a href="https://www.htmlgoodies.com/" target="_blank">Visit Html Goodies</a>
            <p>
                This attribute can have the following values: _self which is default, _black which opens the link in a new window, _parent which opens the document within the parent and _top which opens the document in the whole body of the
                window
            </p>
        </body>
    </htm>
The lang Attribute in HTML
The HTML lang attribute helps to declare a language. You should always use the lang attribute inside the html tag to declare the language of your webpage. Here is an example showing how to use the HTML lang attribute:
<!DOCTYPE html>
<html lang="ro">
    <body>
        ...
    </body>
</html>
We can also use characters that determine the language of your web page, but also characters that can define the country, more precisely country codes. Let’s see the next lines:
<!DOCTYPE html>
<html lang="ro">
    <body>
        ...
    </body>
</html>
We can also use characters that determine the language of your web page, but also characters that can define the country, more precisely country codes. Let’s see the next lines:
<!DOCTYPE html>
<html lang="ro-RO">
    <body>
        ...
    </body>
</html>
The alt Attribute in HTML
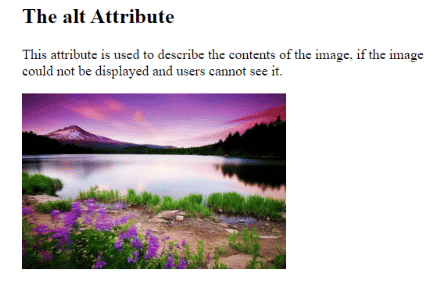
The HTML alt attribute is used as an alternate label in order to display something if the main attribute, namely the img tags, fails to display the original value given to it. In other words, if the main image fails to be displayed, the other attribute is used as an additional alternative. It can also be used to describe the image that is being used. Here is an example of how to use the alt attribute in HTML:
<!DOCTYPE html>
<html>
    <body>
        <h2>The alt Attribute</h2>
        <p>This attribute is used to describe the contents of the image, if the image could not be displayed and users cannot see it. </p>
        <img src="https://mcdn.wallpapersafari.com/medium/13/40/sTDbOH.jpg" alt="Lake at sunset" width="300" height="200" />
    </body>
</html>
Read: Some of the Coolest, Lesser Known HTML Tags
The HTML style Attribute
With the style attribute, web developers can specify the Cascading Style Sheet (CSS) rules within any element of the DOM tree. With it, programmers can insert styles, such as font-family, font-size, background-color, color, text alignment, and more. Here is an example of how to use the HTML style attribute:
<!DOCTYPE html>
<html>
    <body>
        <h2>The style Attribute</h2>
        <p style="color: white; font-family: verdana; font-size: 100%; background-color: powderblue;">
            "Lorem ipsum dolor sit amet, consectetur adipiscing elit, sed do eiusmod tempor incididunt ut labore et dolore magna aliqua. Ut enim ad minim veniam, quis nostrud exercitation ullamco laboris nisi ut aliquip ex ea commodo
            consequat. Duis aute irure dolor in reprehenderit in voluptate velit esse cillum dolore eu fugiat nulla pariatur. Excepteur sint occaecat cupidatat non proident, sunt in culpa qui officia deserunt mollit anim id est laborum."
        </p>
    </body>
</html>
The HTML src Attribute
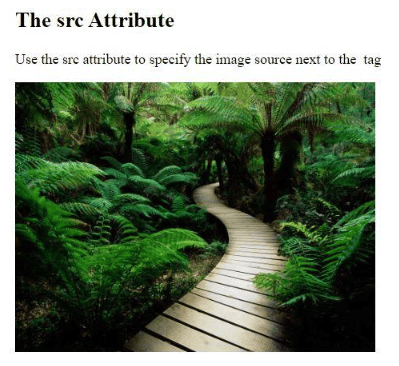
The HTML src attribute is used when it is necessary to add an image to the web page, using the img tag in front of – and after – this attribute. Within this attribute, we can add the address of an image inside the quotation marks. Simply put, specify the path to the image that will be displayed on the page. Here is an example of how to use the HTML src attribute:
<!DOCTYPE html>
<html>
    <body>
        <h2>The src Attribute</h2>
        <p>Use the src attribute to specify the image source next to the <img /> tag</p>
        <img src="https://cdn.wallpapersafari.com/1/28/Taoxg9.jpg" width="400" height="300" />
    </body>
</html>
The HTML title Attribute
The HTML title attribute is used to give additional information about an item. The value of the title attribute will be displayed when you move the mouse over the item – this method is known as the tooltip.
<!DOCTYPE html>
<html>
    <body>
        <h2>The title Attribute</h2>
        <p title="Using a tooltip">If you hover your mouse over the paragraph, the title will appear absolutely. </p>
    </body>
</html>
The width and height Attributes in HTML
The width and height attributes give you the ability to resize an image, shrink it, or enlarge it as needed. These are very useful attributes, so you can control the size of an image within the img tag. Here is an example of how to use the width and height attributes in HTML:
<!DOCTYPE html>
<html>
    <body>
        <h2>Width and Height Attributes</h2>
        <p>An example in which we change the height and width of the images as needed:</p>
        <img src="https://mcdn.wallpapersafari.com/medium/84/92/dDWHj5.jpg" width="300" height="200" />
        <img src="https://mcdn.wallpapersafari.com/medium/29/51/X39hlN.jpg" width="310" height="200" />
        <img src="https://mcdn.wallpapersafari.com/medium/55/8/JdBhVz.jpg" width="295" height="195" />
        <img src="https://mcdn.wallpapersafari.com/medium/88/66/lpaQ3r.jpg" width="315" height="195" />
    </body>
</html>
Final Thoughts on HTML Attributes
HTML is used to create various web applications, the technology gradually evolving and offering a lot of features for DOM elements. It also offers a variety of HTML attributes to make web pages very interactive. These attributes include basic attributes, which are the most commonly used, internationalization attributes, through which we can change the language, data attributes that help store and personalize them, and, last but not least, the event attributes that are triggered when a certain type of event occurs. So, using all the attributes that are present will help web developers create a very beautiful web application in a very simple way.
Read: HTML Formatting Tabs


