
I recently worked on a site that had a requirement to show nearby restaurants on a map. It’s functionality that’s so commonplace these days, I just knew that someone must have already come up with a way to achieve this functionality with only a modest effort on my end (I’m efficient that way). Sure enough, I found just what I was looking for in Bjorn Holine’s excellent jQuery Store Locator plugin. Now that he just released version 2.7.3, I thought that this would be the ideal time to share his work with my readers. For today’s tutorial, we’ll extract location data from our MySQL database as JSON and set up a free Google Maps API account. In part 2, we’ll construct a simple search for nearby toy stores, as I happen to have some data on hand for those.
About the jQuery Store Locator
According to Holine’s blog, the jQuery Store Locator was born out of necessity when he was tasked with creating a Web-based locator for a local financial institution. The problem was that they could not grant him access to their server or database. That, along with a tight deadline, convinced Holine to create the locator using only JavaScript against the Google Maps API. Due to a lack of solid examples to work from, Holine wound up writing most of the code himself combined with some helpful snippets of code that he managed to find here and there. Once completed, he decided to post his work so that anyone else looking to do the same had an example to follow.
Since then, Holine has had so many update suggestions and requests that he eventually created a new version of the locator using Google Maps API version 3 and turned it into a full-fledged jQuery plugin. In doing so, Holine re-worked almost everything in the code and included several configuration options.
Preparing the Data
Location information can be encoded in XML, JSON or KML. In case you’re wondering, KML stands for Keyhole Markup Language. It’s an XML notation created specifically for expressing geographic annotation and visualization within Internet-based, two-dimensional maps and three-dimensional Earth browsers. KML was initially developed for use with Google Earth, which was originally named Keyhole Earth Viewer. We’re going to use JSON for today’s demo.
Once you’ve decided on a data format, it’s just a question of exporting your data into your format of choice. On his site, Holine shows how to pull the data from a MySQL database using PHP. It’s a great choice because it has the json_encode() function.
No matter what the original format of your data is, as long as you can create a query or view to map it into the following fields, you’re good to go:
SELECT sl.id,
       CONCAT( s.NAME, ' - ', sl.location_name )      AS name,
       sl.latitude                                    AS lat,
       sl.longitude                                   AS lng,
       sl.address1                                    AS address,
       sl.address2                                    AS address2,
       c.city                                         AS city,
       'ON'                                           AS state,
       sl.postal_zip_code                             AS postal,
       IFNULL( sl.toll_free_phone, sl.primary_phone ) AS phone
       /* also supports 'web', 'hours1', 'hours2', and 'hours3' fields */
FROM   store_locations sl,
       stores          s,
       cities          c
WHERE sl.store_id = s.id
AND   sl.city_id  = c.id;
To convert the SQL result set into a JSON object in PHP, you first have to iterate over it and push each location onto the final locations array:
//query_sql contains the above statement
$results = $db->query(query_sql);
$locations = array();

foreach($results as $location){
    array_push($locations, $location);
}

//Output JSON
echo json_encode($locations);
You can either echo the JSON object to the screen (as above) and copy and paste it into a file or create the file in code.
Some database management tools include JSON as an export option. I personally use Navicat Premium. (There is also Navicat for MySQL.)
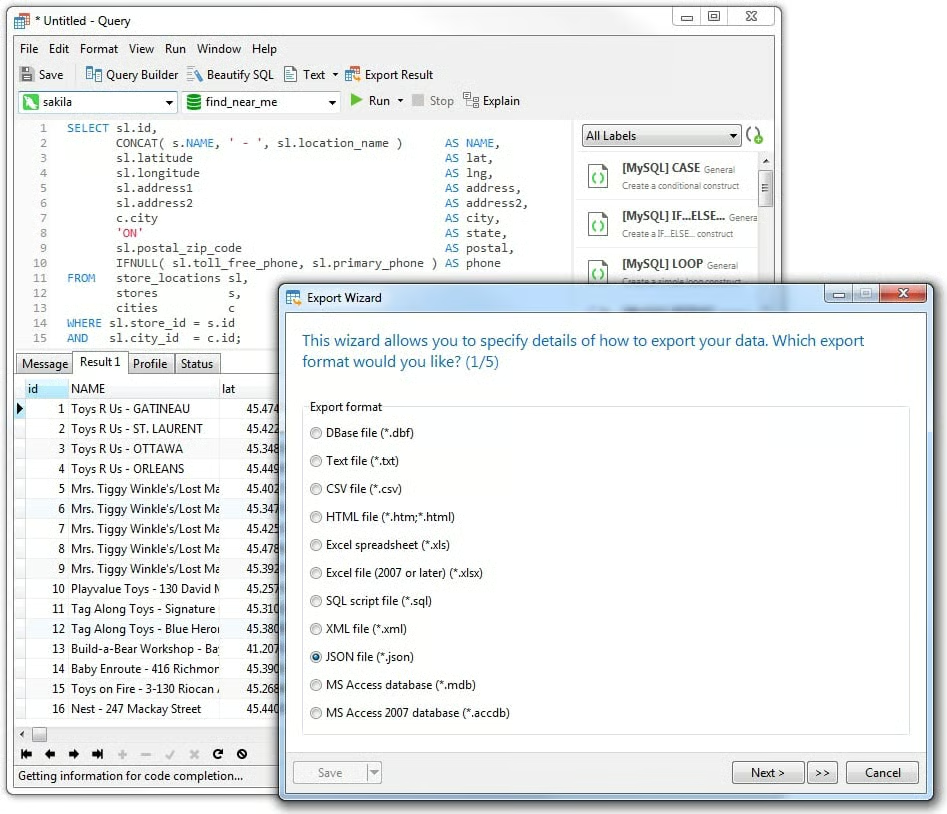
Here is the JSON that my export process generated:
[{
        "id": "1",
        "name": "Toys R Us - GATINEAU",
        "lat": "45.474770",
        "lon": "-75.704040",
        "address": "25, CHEMIN DE LA SAVANE",
        "address2": "",
        "city": "ottawa",
        "state": "ON",
        "postal": "J8T 8A4",
        "phone": ""
}, {
        "id": "2",
        "name": "Toys R Us - ST. LAURENT",
        "lat": "45.422010",
        "lon": "-75.639100",
        "address": "1200 SAINT LAURENT",
        "address2": "SAINT LAURENT SHOPPING CENTRE",
        "city": "ottawa",
        "state": "ON",
        "postal": "K1K 3B8",
        "phone": ""
},
...
{
        "id": "18",
        "name": "Walmart - Trainyards Supercentre",
        "lat": "45.413148",
        "lon": "-75.649878",
        "address": "450 Terminal Avenue",
        "address2": "Trainyards",
        "city": "ottawa",
        "state": "ON",
        "postal": "K1G 0Z3",
        "phone": "613-562-0500"
}, {
...Registering With Google Maps APIs
Under the covers, the jQuery Store Locator plugin utilizes the Google Maps APIs to generate the Map points. Therefore, you must obtain an API key and enable the relevant APIs. That gives you 25,000 map loads per 24 hours. If you expect higher traffic than that, you can enable pay-as-you-go billing at $0.50 USD per 1000 additional requests, up to 100,000 per 24 hours.
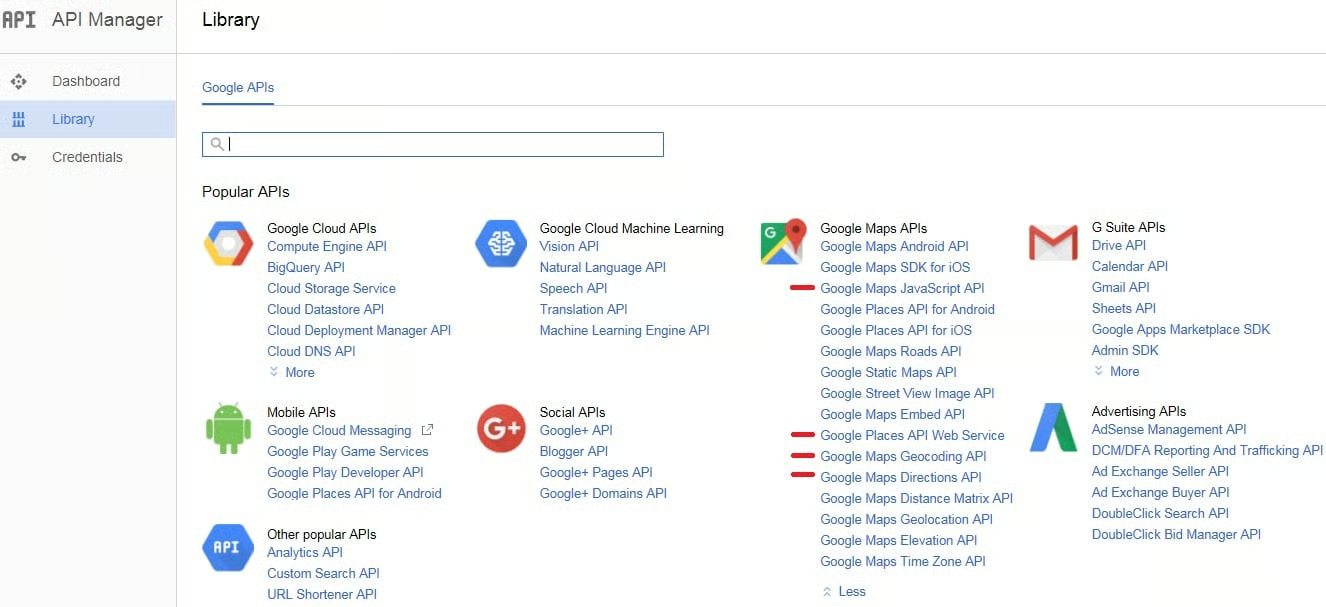
Once you’ve created a new Google Maps API key, go to the Google API Console and enable the:
- Google Maps JavaScript API
- Google Places API Web Service
- Google Maps Geocoding API
- Google Maps Directions API

Conclusion
We are now ready to reference the jQuery Store Locator from our Web pages. In the next installment, we’ll set up a local server environment, as well as construct the Web page that will lookup stores by area and display them in a map.
See Part 2, “Referencing the jQuery Store Locator from Your Web Pages“.
