If you’ve ever been looking to create a web-based location search using only front-end code against the Google Maps API, I’ve got just the thing: Bjorn Holine’s jQuery Store Locator plugin. It works off of KML, XML, and JSON data using jQuery and the Handlebars template engine. In the Configure Location Data and the Google Maps API for the jQuery Store Locator tutorial, we extracted location data from our MySQL database as JSON and set up a free Google Maps API account. In today’s follow-up, we’ll construct a jQuery Store Locator-driven search for nearby toy stores.
Setting up the Server Environment
The jQuery Store Locator is meant to be run from a web server, so opening a page locally will issue a stern reminder:
Error: Could not load plugin templates. Check the paths and ensure they have been uploaded. Paths will be wrong if you do not run this from a web server.
I use WampServer for many of my web projects. I like it because it’s available for free (under GPML license) and runs on both 32 and 64 bit Windows machines. It allows you to create web applications with Apache2, PHP with an optional MySQL backend. PhpMyAdmin is included with the distribution for managing your MySQL databases.
Coding the Search Page
Now we’ll create the Web page that will display our store locations on a map. You’ll find the toystores.json data file in the “FindNearMe\data” folder in the demo archive.
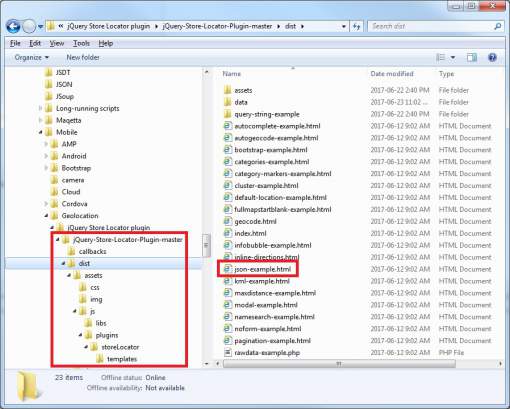
Now would probably be a good time to download the plugin from GitHub because the plugin distribution contains a number of useful examples, including one for JSON data, named “json-example.html”:
Using it as a guide, we can tailor the search form description to our data:
<div class="bh-sl-container">
  <div id="page-header">
    <h1 class="bh-sl-title">Toy Store Search</h1>
    <p>Locations are limited to the Ottawa area. Therefore, "Ottawa", "Nepean", <br/>
    "Gatineau", "Kanata", "Bells Corners", and "Stittsville" would be valid locations.</p>
    <p>Postal Codes (e.g. "K1L 6E6") and more exact addresses<br/>
     (e.g. "380 Sussex Dr, Ottawa, ON") also work.</p>
  </div>

  <div class="bh-sl-form-container">
    <form id="bh-sl-user-location" method="post" action="#">
        <div class="form-input">
          <label for="bh-sl-address">Enter Address or Postal Code:</label>
          <input type="text" id="bh-sl-address" name="bh-sl-address" />
        </div>

        <button id="bh-sl-submit" type="submit">Search!</button>
    </form>
  </div>

  <div id="bh-sl-map-container" class="bh-sl-map-container">
    <div id="bh-sl-map" class="bh-sl-map"></div>
    <div class="bh-sl-loc-list">
      <ul class="list"></ul>
    </div>
  </div>
</div>
Name the page “storeSearch.html” and save it in a new folder named “FindNearMe”, under the www root folder of the server, i.e: {WampServer install dir}\www\FindNearMe\storeSearch.html.
If you like, you can also reference the StoreLocator\assets\css\storelocator.min.css file to make the page look more like Holine’s example.
Beneath the form, you’ll have to include the following four SCRIPT tags:
<script src="https://code.jquery.com/jquery-3.2.1.min.js"></script> <script src="js/handlebars.min.js"></script> <script src="https://maps.google.com/maps/api/js?key=***INSERT_YOUR_KEY_HERE***®ion=Canada"></script> <script src="js/jquery.storelocator.min.js"></script>
You’ll need to grab the “js” folder from the library distribution and copy it to the FindNearMe folder because it contains a couple of required script files and templates.
Also, notice that the google maps api references our unique API key. If you don’t have one, please see the Registering with Google Maps APIs section in part 1. If you don’t, you’ll get a message like this one:
ApiNotActivatedMapError
Google Maps API error: ApiNotActivatedMapError https://developers.google.com/maps/documentation/javascript/error-messages#api-not-activated-map-error

see the docs for the full list.
The final step is to activate the plugin. As you can see, we are setting the dataType to JSON and pointing to our data file:
<script>
$(function() {
  $('#bh-sl-map-container').storeLocator({
    'dataType': 'json',
    'dataLocation': 'data/toystores.json',
    'infowindowTemplatePath': 'js/templates/infowindow-description.html',
    'listTemplatePath': 'js/templates/location-list-description.html'
  });
});
</script>
Performing a Search
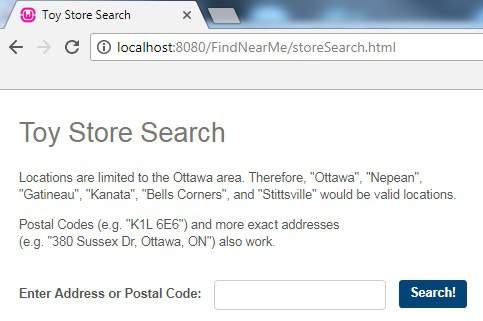
Wamp listens on port 8080 by default so you have to enter “http://localhost:8080/FindNearMe/storeSearch.html” in the browser address bar. You should then see something like this:
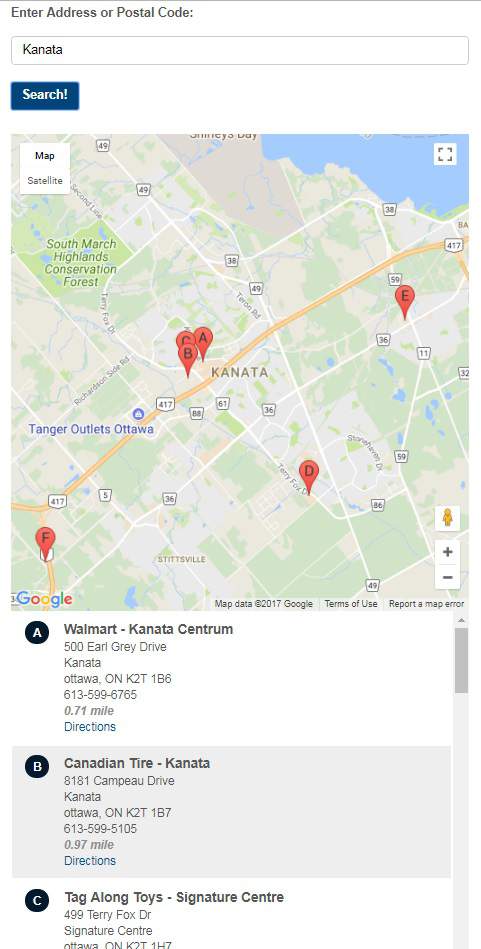
Try one of the suggested searches and see what happens!
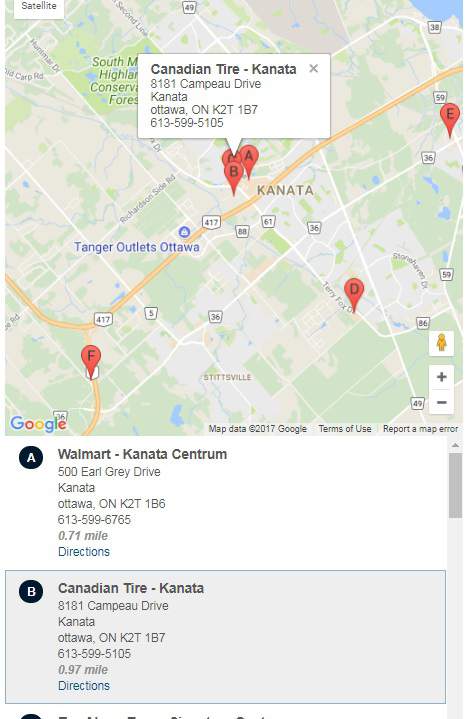
Selecting a location highlights it on the map:
Along with our location data, there is also a directions link, thanks to Google.
Conclusion
Bjorn Holine’s jQuery Store Locator plugin is a great way to add Google Maps functionality to your web apps using nothing but front-end coding. It’s not only versatile, but really easy to implement as well!


