Part 1: Introducing the MatTree
Traditional SELECT elements have long allowed multiple selections via the multiple attribute. The means for selecting multiple options can vary depending on the operating system and browser.
For example:
- For windows, users would hold down the control (Ctrl) button to select multiple options.
- For Mac, one would hold down the command button to select multiple options.
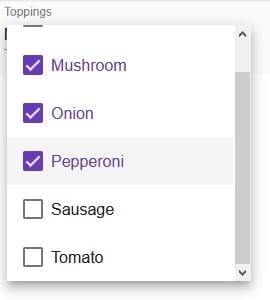
This was not the easiest or most accessible solution, so the makers of the Angular Material mat-select employed checkboxes in multi-select mode. In fact, we used such a control in the Angular Mat-Select Text: Customize the Appearance article:
In this series, we are going to be working with a control that behaves much in the same way, but is better suited for displaying hierarchical data: the MatTree. In this installment, we are going to learn about the different types of MatTrees as well as how to configure the underlying data source. From there, we will incorporate checkboxes into our tree. Finally, we will open the tree inside of a MatMenu as a stand-in for the MatSelect.
Grouped Data vs. Hierarchies in Angular
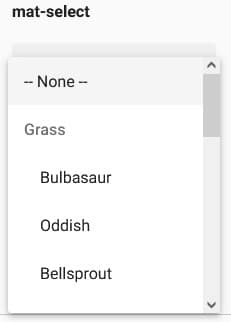
The MatSelect can display hierarchical data to a point using the <mat-optgroup> element. Here is a select that shows types of grass:
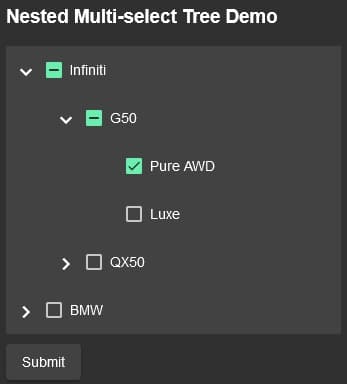
The obvious limitation of the <mat-optgroup> element is that it’s only suitable for displaying a hierarchy of two levels. For greater depths, you need to switch over to something like the MatTree. It can represent an unlimited number of levels as well as differing numbers of levels on each node. The demo app that we’ll be building today is comprised of a hierarchy three levels deep that represents a vehicle’s manufacturer, model, and trim level:
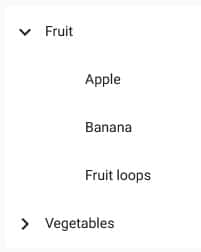
As you can see, it looks similar to a multi-select MatSelect in that our control employs checkboxes as its selection mechanism. In contrast, basic mat-tree-nodes only contain text bereft of any means of selecting them:
Read: Create a MatMenu with Checkboxes
Flat Trees and Nested Trees in Angular
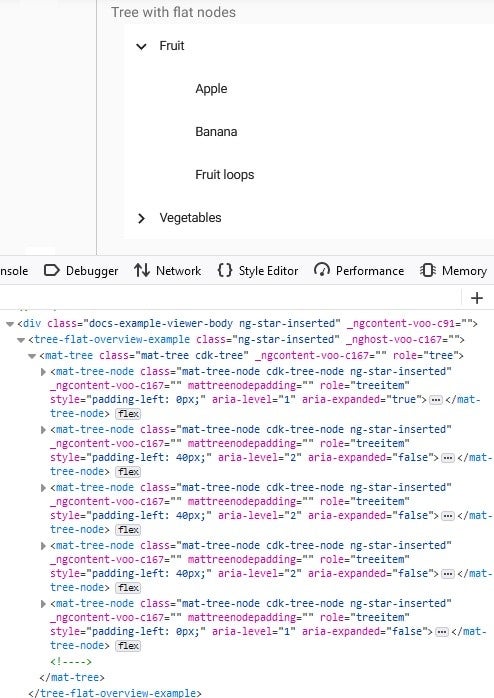
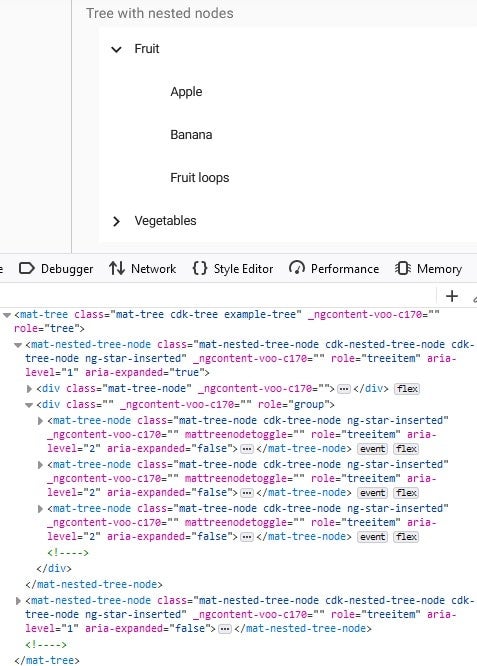
There are two types of trees: Flat tree and nested tree. Each of these two types of trees employ different DOM structures:
- Flat TreeIn a flat tree, the hierarchy is flattened so that nodes are not rendered in a parent-child configuration, but rather as siblings in sequence. The “level” of each tree node is read through the getLevel() method of the TreeControl; this level can be used to style the node such that it is indented to the appropriate level.
- Nested TreeIn a nested tree, children nodes are placed inside their parent node in DOM. The parent node has an outlet to keep all the children nodes.
At this point you are probably wondering why would someone use a nested tree if the flat tree provides the same functionality? I personally like the fact that the DOM of the nested tree better approximates its hierarchy. Moreover, whether the HTML is static or rendered dynamically, there are some definite major benefits to a nested tree:
- You can take advantage of event bubbling, which can greatly reduce the amount of code required to capture user interaction with the DOM. Nesting also makes it easier to capture multiple events.
- You have more control over formatting by being able to apply styling to parent nodes that will be inherited by child elements.
- Nested trees are highly beneficial when using CSS preprocessors like LESS or Sass, as they greatly reduce the amount of styles needed to be written.
- While performance between rendering the two trees may be the same, when you have to consider users with slow connections or poor mobile service, the rule of thumb is the less DOM elements the better.
Read: Angular State Management with NgRx
Data Format
The MatTree expects an array whereby each element represents a node object. The type of object you can use is not constrained in any way, so long as you tell it what type of object to expect as well as how to fetch child nodes. Hence, either a class or interface will do. In our app, we’ll use an interface called VehicleNode. Here it is below, along with the full data array:
interface VehicleNode {
  name: string;
  id?: number;
  selected?: boolean;
  indeterminate?: boolean;
  children?: VehicleNode[];
  parent?: VehicleNode;
}

const TREE_DATA: VehicleNode[] = [
  {
    name: "Infiniti",
    children: [
      {
        name: "G50",
        children: [
          { name: "Pure AWD", id: 1 },
          { name: "Luxe", id: 2 }
        ]
      },
      {
        name: "QX50",
        children: [
          { name: "Pure AWD", id: 3 },
          { name: "Luxe", id: 4 }
        ]
      }
    ]
  },
  {
    name: "BMW",
    children: [
      {
        name: "2 Series",
        children: [
          { name: "Coupé", id: 5 },
          { name: "Gran Coupé", id: 6 }
        ]
      },
      {
        name: "3 Series",
        children: [
          { name: "Sedan", id: 7 },
          { name: "PHEV", id: 8 }
        ]
      }
    ]
  }
];
Initializing the Tree
There are two very important objects that you’ll need to initialize in order to have a functioning tree: these are the NestedTreeControl and MatTreeNestedDataSource.
The TreeControl controls the expand/collapse state of tree nodes, allowing users to expand and collapse tree nodes in a recursive manner. To do that, you need to pass a function to the getChildren() method via the NestedTreeControl’s constructor. Your function function may return an observable of children for a given node, or simply an array of children objects.
The MatTreeNestedDataSource manages the tree’s underlying data – a.k.a., the object array. Again, it needs to know what type of objects it’s working with, so you should instantiate it with a generic stating the object type before assigning your array to its data property:
Here’s what all of this looks like in our case:
export class TreeNestedOverviewExample {
treeControl =
new NestedTreeControl<VehicleNode>
There’s a demo with the basic nested MatTree on stackblitz.
Going Forward with Mat-Tree and Angular
At this point, our app is only displaying the nested nodes in a read-only capacity. In the next article we will add the checkboxes so that our app can track user selections.


