When creating a web page, you can create layers using the HTML div tag. A layer can be a block of HTML that you can be manipulated independently from other blocks of HTML on a page. For example, you could create a background layer of an image and then place text on top of it in one or more layers. You could then use JavaScript to manipulate the layers. With these layers you can manipulate the content of each of the layers you create in any manner you want.
To create layers, you use the HTML div tag as mentioned. The div tab by itself doesn’t do anything to the content it contains. By itself, all it does is group a chunk of HTML and allow you to then manipulate that content through other attributes. For example, you could create separate groups of code within div tags as shown in Listing 1.
Listing 1: Adding div tags to a listing
<html>
<head></head>
<body>
<p>This is my web page with an image and some text!</p>

<p>ONE</p>
<p>TWO</p>

<img src="div_pic.jpg" />

<p>End of the page!</p>
</body>
</html>
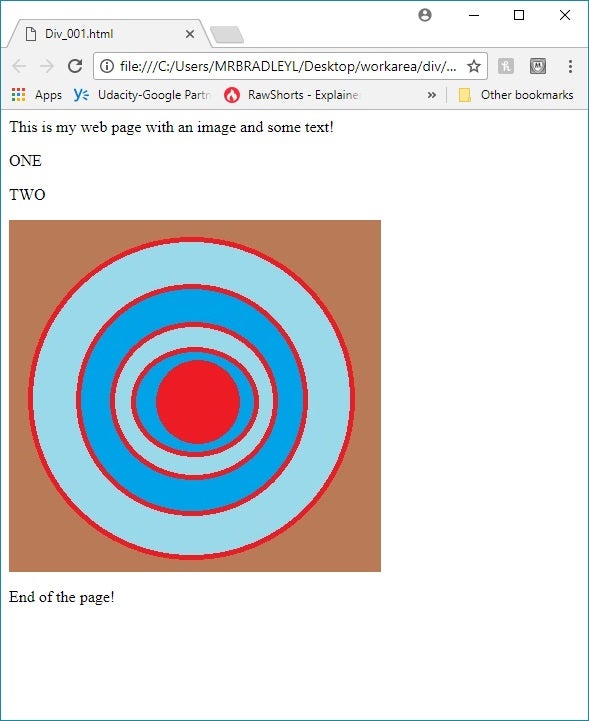
If you display the code in listing 1 in your browser, you’ll see that the div tags don’t have any impact on how the HTML is displayed on the page. As shown in figure 1, the page renders the code as if the divs were not there.
Figure 1: Rendering a basic div tag.
While the div tag can be used for any type of grouping, you should not use it when there are other tags that would be better. For example, some of the HTML tags such as <article>, <address>, or <details>.
Styling Your Layers
While the div tag can be used to separate the code as shown in listing 1, the real power of layers is when you add attributes to the div tags and then manipulate each div block independently with CSS and JavaScript. In listing 2 you’ll see that each div tag has been given a style attribute which manipulates the content.
Listing 2: Adding style to your div tags
<html>
<head>
   <style type="text/css">
       .DivStyle
         {
             background-color: lightblue;
             width: 500px;
         }
   </style>
</head>
<body>

<div class="DivStyle" >

<p>This is my web page with an image and some text!</p>

<div style="font-size:50px; background-color: yellow; " >
<p>ONE</p>
</div>

<div style="font-size:50px; background-color: orange; " > <p>TWO</p></div>

<div>
<img src="div_pic.jpg" />
</div>

<p>End of the page!</p>
</div>
</body>
</html>
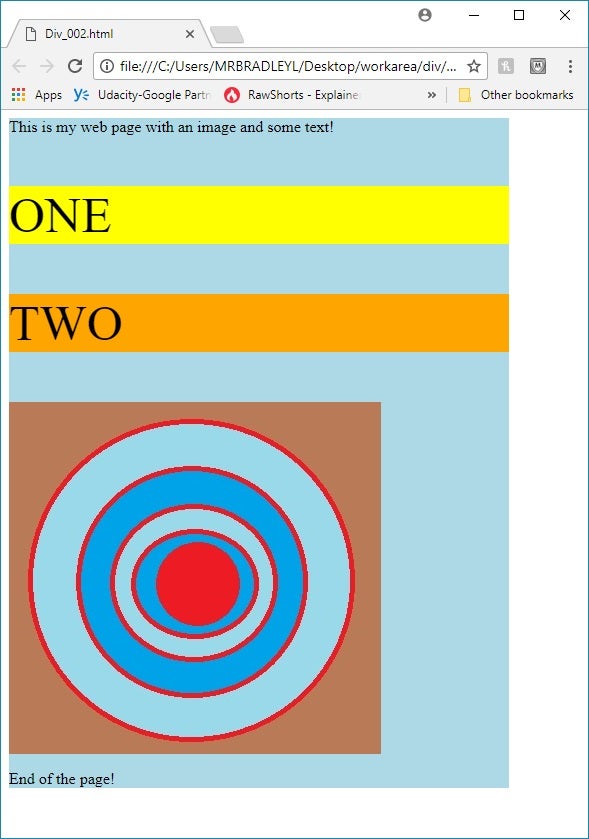
You can see in figure 2 that the output from Listing 2 has blocks that are styled differently through attributes on the div tag. While the styles are applied directly to attributes, you could also apply a class or ID to each div tag and use CSS to apply the look and feel.
Figure 2: Styled HTML via the div tag
Layering with div Tags
While the listing 2 presented different blocks being manipulated with formatting, the idea of layers implies moving things around on the page as well as putting such blocks on top of each other. This can be done using the position attribute. For positioning, you can set things to an absolute position or a relative position. We’ll cover absolute positioning to take control of your layers!
Using Absolute Positioning
Absolute positioning allows you to state specifically where you want the block of HTML in your div tag to appear. This positioning is based upon a coordinate system, where 0,0 is the upper left corner of the parent element that contains your div tag.
When positioning elements, you can set the top and the left positions using the top and left attributes. You can also control the width and height of the area the block will use with the width and height attributes! If you don’t specify the width and height, then the div tag will default like any other HTML tag to using the space needed.
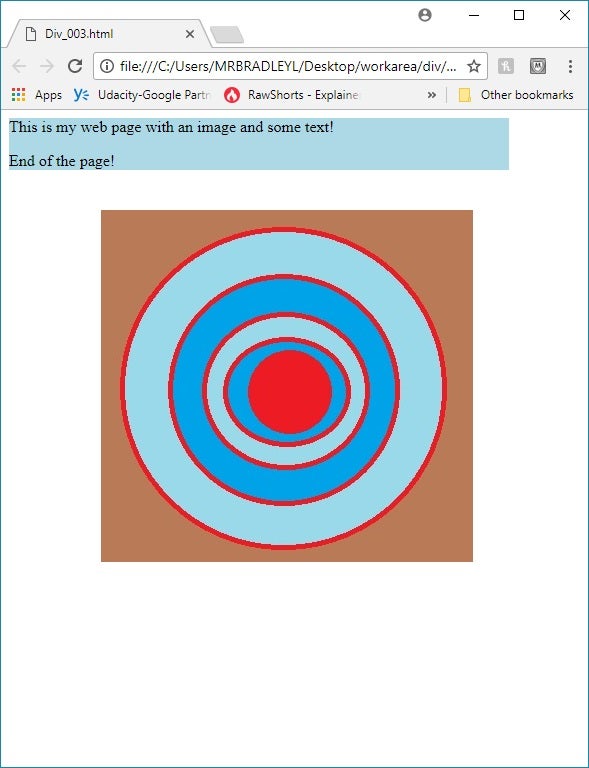
In Listing 3, you can see the previous listing has been modified so that many of the div tags have absolute positioning. You can see the results in Figure 3.
Listing 3: Using absolute positioning in a div
<html>
<head>
   <style type="text/css">
       .DivStyle
         {
             background-color: lightblue;
             width: 500px;
         }
   </style>
</head>
<body>

<div class="DivStyle">

<p>This is my web page with an image and some text!</p>

<div style="font-size:50px; background-color: yellow;
            position: absolute; top: 100; left: 100;" >
<p>ONE</p>
</div>

<div style="font-size:50px; background-color: orange;
            position: absolute; top: 100; left: 100;" >
<p>TWO</p></div>

<div style="position:absolute; top: 100; left: 100;" >
<img src="div_pic.jpg" />
</div>

<p>End of the page!</p>
</div>
</body></html>
Figure 3: The div blocks are positioned absolutely, but…
You might think that there is a problem with the rendering because the “ONE” and “TWO” text can no longer be seen. The text for those two div tags were displayed; however, they were rendered before the image, which ended up on top of them. You can fix this by controlling the order of the layers.
Setting the Layers
As you saw in listing 3, blocks can be set on top of each other. If you put an image on top of text, you’ll likely not be able to see that text. If you put text on top of an image, then you will likely see both. You can control which block is on top (or higher in a stack) using the z-index property. Setting the z-index to a higher number will move a block towards the top of the stack. By default, the current element is given a z-index of 0.
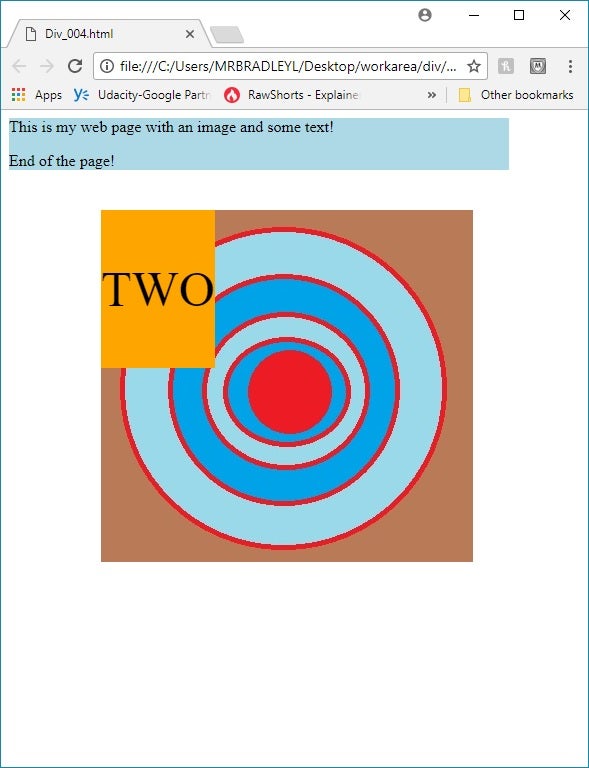
In Listing 3, the text and image were displayed without a z-index being specified. In Listing 4, a z-index has been added in order to control the display.
Listing 4: Setting the z-index
<html>
<head>
   <style type="text/css">
       .DivStyle
         {
             background-color: lightblue;
             width: 500px;
         }
   </style>
</head>
<body>

<div class="DivStyle">

<p>This is my web page with an image and some text!</p>

<div style="font-size:50px; background-color: yellow;
            position:absolute; top: 100; left: 100;
            z-index: 2" >
<p>ONE</p>
</div>

<div style="font-size:50px; background-color: orange;
            position:absolute; top: 100; left: 100;
            z-index: 2" >
<p>TWO</p></div>

<div style="position:absolute; top: 100; left: 100;
            z-index: 0" >
<img src="div_pic.jpg" />
</div>

<p>End of the page!</p>
</div>
</body>
</html>
Figure 4: Using the z-index
You can see in this listing that the order of the image was set to zero. Zero is the default order. If two elements have the same z-index, then they will be rendered in the order they would normally be rendered on the page. You can also have a negative z-index. That can be used to render an element below the current item.
Nested div Layers
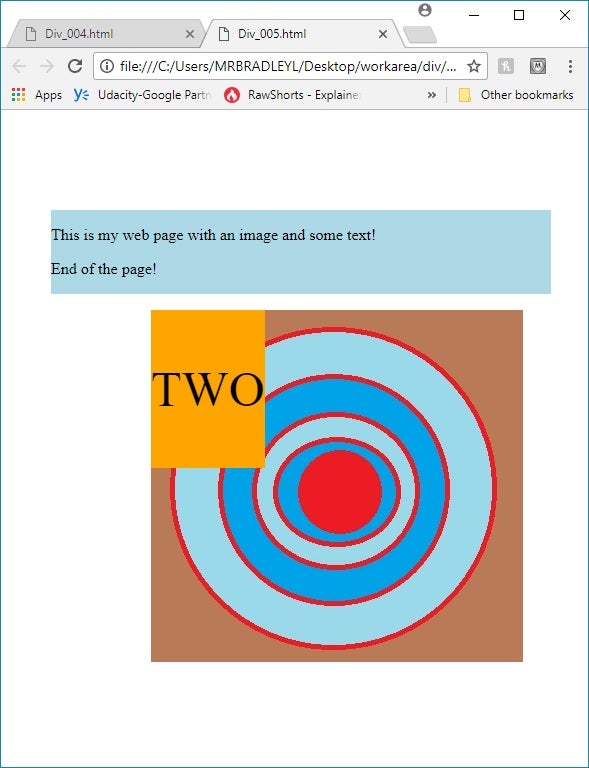
You should note that if a div is nested within another element, then the absolute positioning will be based on the parent element’s position and not the page. The div elements in Listing 4 are all within the div that is style “DivStyle” near the top. As such, the positioning is relative to where that div is displayed. In listing 5, the absolute positioning of the DivStyle is moved to 10, 100. When you run Listing 5, you’ll see that not only does the main div move down to that location, but all the embedded div positions move relative to the change as well.
Listing 5: Absolute positioning within an element
<html>
<head>
   <style type="text/css">
       .DivStyle
         {
             background-color: lightblue;
             width: 500px;
             position: absolute; top: 100; left:50
         }
   </style>
</head>
<body>

<div class="DivStyle">

<p>This is my web page with an image and some text!</p>

<div style="font-size:50px; background-color: yellow;
            position:absolute; top: 100; left: 100;
            z-index: 2" >
<p>ONE</p>
</div>

<div style="font-size:50px; background-color: orange;
            position:absolute; top: 100; left: 100;
            z-index: 2" >
<p>TWO</p></div>

<div style="position:absolute; top: 100; left: 100;
            z-index: 0" >
<img src="div_pic.jpg" />
</div>

<p>End of the page!</p>
</div>
</body>
</html>
Figure 5: Nested absolute positioning
Cleaning it up
You might have noticed a few things are still not right with the listing. For example, the “ONE” text is still not seen. This is because it’s relative position is the same as the div for the “TWO” text. You can adjust the positioning to show both text items.
You might have also noticed that the “End of Page” text only appeared at the end of the page with the first two listings. When items are rendered in absolute positions, they are shifted out of the normal flow the page uses for rendering. In the case of this listing, the “ONE” text, “TWO” text, and image are all placed in absolute positions. This shifts them out of the normal order, which in turn moves the “End of the page” text as the second line.
Summary
This article scratches the surface in showing you how you can use absolute positioning to create layers with blocks of HTML code. You also saw how to control which content is in the higher layers. You can download the listings and images from this article from here, and then play around with the positions and order!


