

In my last article, “Create a Joomla! Template From Scratch,” I provided a rough outline and somewhat incomplete code on how to create a Joomla! template. I had to do that on purpose for this is going to be a long and iterative process. I hope you stick around for the complete ride. If you followed along at home, you might have noticed in the last article that at one point your test article was appearing when you previewed the template, but with the final lines of code that I provided, your test article might have vanished. The reason for that is because this part of code was missing:
<jdoc:include type="component" />
Here’s a quick recap of where we are: we have created an templateDetails.xml file, an index.php file, and a css file. These files are saved in the templates folder. You’ve already gone into the backend of Joomla! and set your unique template as the default. If you want to jump ahead to where we are now, set up your files as such…
templateDetails.xml:
<?xml version="1.0" encoding="utf-8"?>
<!DOCTYPE install PUBLIC "-//Joomla!! 1.5//DTD template 1.0//EN"
"http://dev.joomla.org/xml/1.5/template-install.dtd">
<install version="1.5" type="template">
      <name>your_template_name</name>
      <creationDate>15-3-2011</creationDate>
       <author>your_name</author>
       <authorEmail>myemailaddress</authorEmail>
       <authorUrl>http://localhost/joomla/</authorUrl>
       <copyright>2011</copyright>
       <license>GNU/GPL</license>
       <version>1.0.0</version>
       <description>Template</description>
       <files>
               <filename>index.php</filename>
               <filename>templateDetails.xml</filename>
               <filename>css/template.css</filename>
        </files>

       <positions>
                 <position>top</position>
                   <position>left</position>
                   <position>right</position>
                   <position>bottom</position>
                   <position>banner</position>
                   <position>syndicate</position>
                   <position>footer</position>
                   <position>user1</position>
                   <position>user2</position>
                   <position>user3</position>
                   <position>user4</position>
       </positions>
</install>
index.php:
<!DOCTYPE html PUBLIC "-//W3C//DTD XHTML 1.0 Transitional//EN" "http://www.w3.org/TR/xhtml1/DTD/xhtml1-transitional.dtd">
<html  xml_lang="<?php echo $this->language; ?>" lang="<?php echo $this->language; ?>" >
<head>
<jdoc:include type="head" />
<link rel="stylesheet" href="<?php echo $this->baseurl ?>/templates/fscgroup/css/template.css" type="text/css" />
</head>
<body>
<jdoc:include type="component" />
<div id="container">
<div id="header"><jdoc:include type="modules" name="top" />The FSC Group</div>
<div id="sidebar_left" class="float">
<jdoc:include type="modules" name="left" />
</div>
<div id="sidebar_right"class="float"><jdoc:include type="modules" name="right" />Right sidebar</div>
</div>
</div>
</body>
</html>
And finally the template.css:
* {
	padding: 0;
	margin:0;
	}
ul {
	list-style:none;
	}
.float {
	float: left;
	}
.clear {
	clear: both;
	}
#container {
	width:1000px;
	margin: auto;
	}
#header {
	background-color:#999999;
	height: 150px;
	}
#content {
	width: 660px;
	text-align: center;

	}
#sidebar_left {
	text-align: center;
	background-color:#CCCCCC;
	width: 150px;
	}
#sidebar_right {
	background-color:#CCCCCC;
	width: 90px;
	}
If you put all of that together, you should now have something that resembles this when you click Preview:
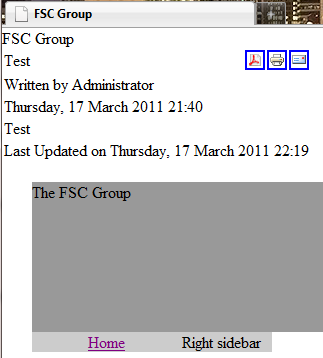
In the screenshot, the text in the top left corner is an article. It’s time to make some changes. First, let’s put the component include inside the content <div> tags:
<div id="content" class="float">
<jdoc:include type="component" />
Next, let’s update the #sidebar_right module so that it actually appears on the right:
#sidebar_right {
	background-color:#CCCCCC;
	width: 90px;
	float: right;
	}
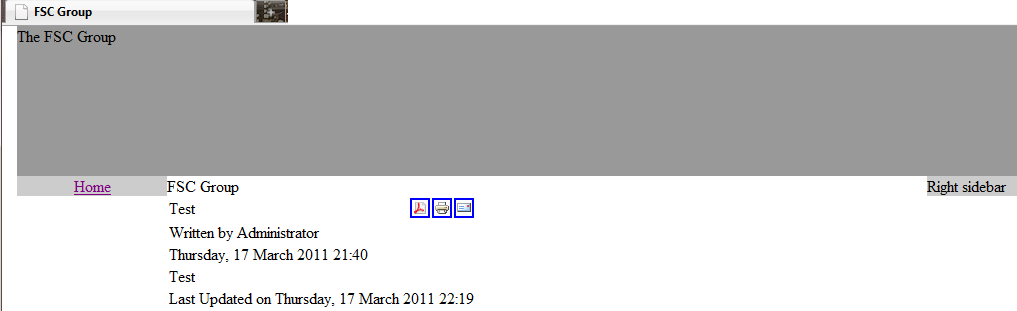
Don’t forget to save your files as you make changes or they won’t go into effect. For now, all you should have open is your index.php file and your template.css file and a browser window with the Preview open. Each time you make an update to a file, simply save it and then refresh your browser window to see the changes. At this point, your template should be taking better shape:
Now, let’s test that right sidebar to see if it actually works. Go into the backend of Joomla! and create a new module. For the sake of testing, I created a Most Read module and assigned it to the right position. I made sure it was enabled and then previewed the site:
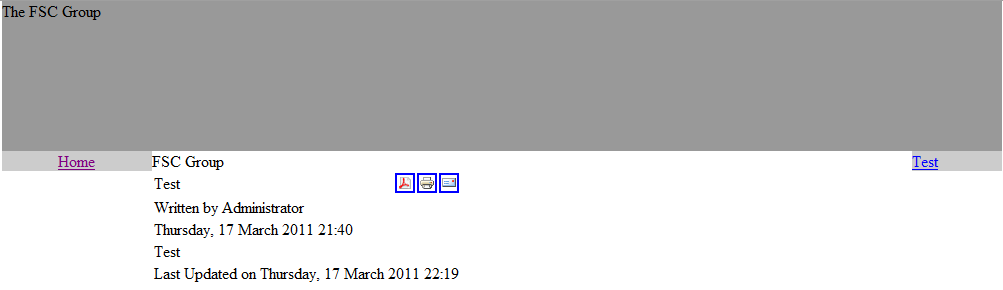
You’ll see now that Test replaced Right sidebar. That happened because I created the new module, but I also went back to my php file and removed the text ‘right sidebar’ from the following:
<div id="sidebar_right"class="float"><jdoc:include type="modules" name="right" />Right sidebar</div>
The template is slowly taking shape in terms of understanding how all the different parts work. Hopefully, we crossed over a pretty big hurdle in coming to terms with how the different files work.
At this point, at least for me, the next step is to put pen to paper and start actually designing how I want the page to look like in terms of functionality and aesthetics. Times New Roman and gray boxes won’t make the final cut. Stay tuned!
