


Introduction to Wishbox
This morning as I was digging through the usual gluttony of press release emails that I receive, I found one that caught my eye. It was from JotForm. I have used their products in the past and have been happy with the free tools that they provide. So, I gave the email my customary scan. If a press release email doesn’t keep my attention for more than a couple of sentences, it is immediately dismissed to the trash can. But this one kept my attention. The email was introducing Wishbox.
The product name itself didn’t mean anything to me, but the first few lines did, “When Google+ released earlier this year, it received over 1 million feedback messages in the first month. They used one of those feedback buttons on the side of the page. What was interesting about their feedback tool was that it had the ability to include a screenshot of the current page within the feedback message. This was pretty neat, since it allowed users to explain their problems more clearly.”
I immediately knew what they were describing, as I had used that Google+ feedback button myself and had used the screenshot capability. I thought it was all pretty slick. JotForm’s email continued with, “We thought this was something that could be useful to all web sites. Getting feedback from users is hard. Getting feedback that clearly explains a problem or suggestion is even harder.” I couldn’t agree any more than I do. It was if this email was directed solely to me!
The Wishbox JavaScript Code
Then JotForm provided the closing arguments as to why I should install Wishbox on my own site, “Getting people to send a screenshot with their feedback is a good idea. But, we thought why stop there? Why not let users annotate these screenshots with text and draw arrows on it? Let them have some fun, and show you the problem, instead of trying to describe it.” BOOM. I clicked through the email and to the JotForm site. After a few more clicks on the JotForm site and I instantly had code that I could paste into my HTML. Or, as the case may be, my index.php file, because I use the Joomla! CMS. Here’s what the code looks like:
I replaced my specific formId with X’s, but otherwise, that’s all the code. I simply pasted that code into my php file directly before the closing body tag. The results were instant and rather impressive. Here’s how the tab appears on my site, in the bottom right corner of the screen:

The default orange color is bright enough and contrasts enough with the black background to really stand out. However, if you don’t like the orange color, or even the text for that matter, making updates is simply a matter of updating the code to fit your liking. I wouldn’t mess with the formID, the base, the type, or the instant, but the background, fontColor, buttonSide, buttonAlign and the width and height should all be fair game to configure to your taste.
So, how well does it work? Here are some screenshots of Wishbox in action (which is kind of an odd name, perhaps they mean for the tool to be a Wishbox for the visitor?). When a visitor clicks the Feedback button, a big grey box appears with a Loading symbol. After the screenshot is loaded, they will see this:
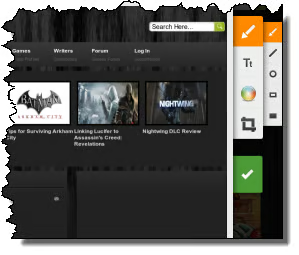
On the right side of the screenshot, the visitor will be presented with a set of tools. They can draw arrows, lines, circles and so forth. They can also insert text, change the color of the text or objects and they can crop the screenshot. When they are done marking up the screenshot, they can click the green button with the white check mark. The visitor then sees the feedback form:
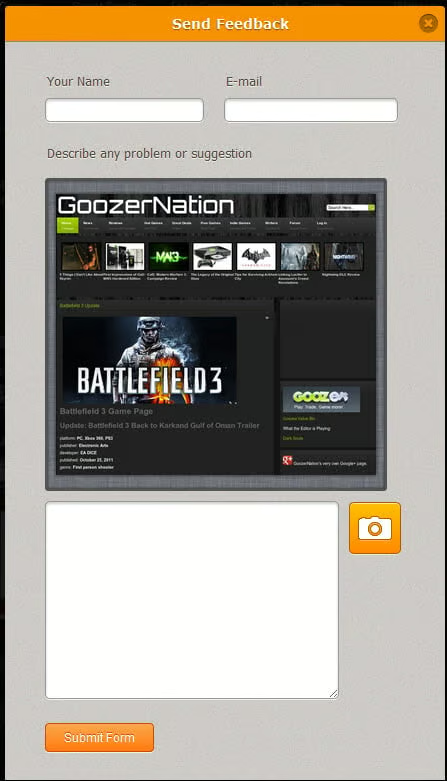
This is where the visitor is asked to enter their name and email address. They see the marked up screenshot that they had just created as well as a text box to add any additional notes. Finally, the visitor has the opportunity to click the camera icon to start over with a fresh screenshot. Finally, the visitor clicks the Submit Form button and off it goes to the administrator of the site.
JotForm allows you to receive up to 100 free feedback forms from visitors. This is a very handy tool with plenty of features and I do recommend it as a free solution to receiving feedback from your visitors.
