Cross-browser (or multi-browser) testing, through which you compare a website’s look and performance among different browser versions and platforms, is an important and often frustrating task. Moreover, such testing helps you to determine whether your website code — HTML, CSS, Javascript, JQuery, AJAX, etc. — is backwards compatible. This article introduces a few screenshot sampling tools to aid in your analysis. To review live browser testing applications, read “Tools for Cross-browser Compatibility: Live Testing”.
It should be enough to write standards-compliant, validating code (as set forth by the World Wide Web Consortium (W3C)) and have it render the same in all browsers. But, alas, browser makers choose to release their software without supporting all ‘features’ of HTML or CSS versions, or they simply interpret the standards differently. Others create proprietary code that works only with their browser; so, it is important for a Web developer to be certain that it degrades gracefully, when used.
Browser compatibility is not as bad as it was back in the day. Anyone remember those early Netscape days? Having to design a dumbed-down version of your site to support it? Well, those days are fairly well behind for desktop browsers, but differences in how well each browser supports standards still remain. And, support for portable devices (smart phones, e-pads, etc.) adds a whole new level of complexity.
Clients often do not appreciate how time-consuming/costly multi-browser testing is. Moreover, especially for smaller Web businesses, configuring in-house computer systems with the many different operating systems, browser versions, and screen resolutions is overwhelming. Consider that there are hundreds of combinations! This is where the browser testing applications and services save the day. Some offer sampling by screenshot (only), while others offer remote server access for live testing. Let’s look at two screenshot-only tools: Adobe® BrowserLab and Browser Shots.
Adobe® BrowserLab
For quick screenshot captures of the most popular browsers, Adobe® BrowserLab is my go-to test bed. Adobe® put their software UI team on this one, as is evident from the great user interface.
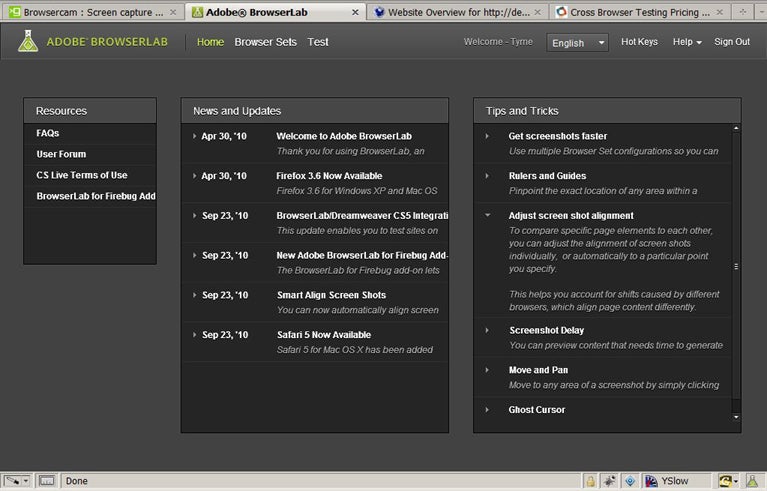
The cleanly designed application is free of detracting ads, and the home page features tips for use and browser-related news. Note the link to download the Firefox (/Firebug) add-on.
Selecting Browser(s)
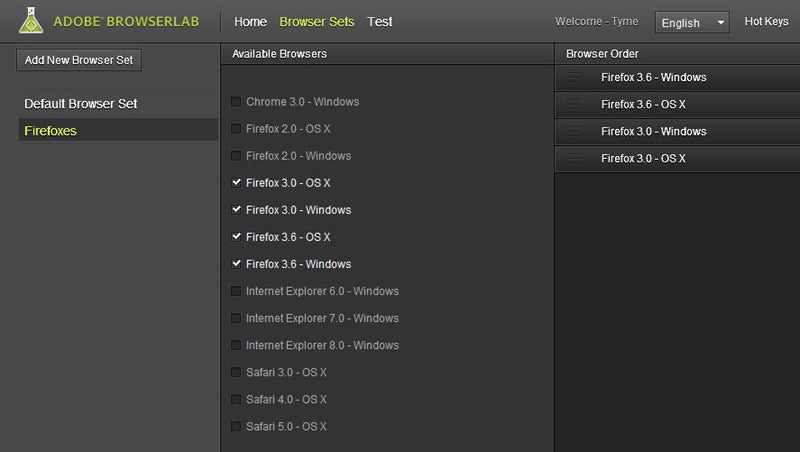
The “Browser Sets” feature displays a list of all supported browsers and lets you set default browsers or custom browser sets. This is handy if you have different requirements for different sites. Ideally, you will refer to your site analytics to determine the browsers that are used by your website’s demographic. If your site promotes the latest in technology of any kind, your visitors probably use the most recent browsers, so “Top Ones” might be a custom set. On the other hand, if you have a good percentage of visitors who use Internet Explorer 6, you’ll want an appropriate browser set with IE6 included…name it “JustKillMeNow” for quick reference.
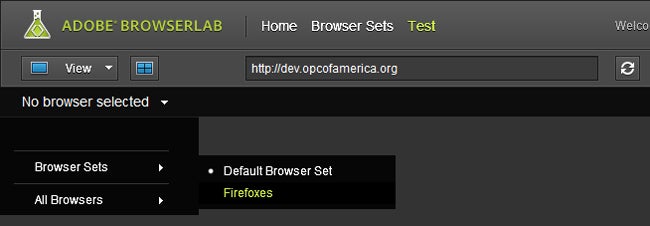
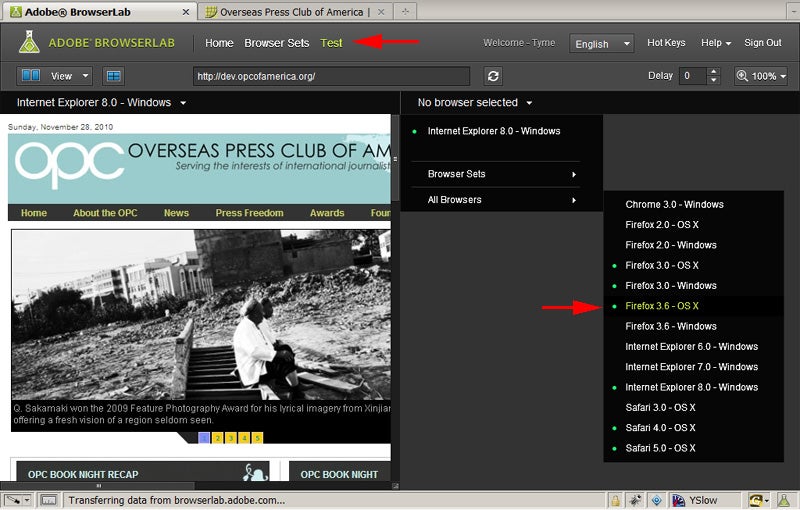
To start viewing the browser screenshots, enter a full URL (including the “http://”), select a browser or browser set, then click the “Test” link. In addition to loading multiple browser views at once by browser set (which preloads all views), you can load a view individually by simply selecting the desired browser from the “All Browsers” drop-down menu option. This is a bit faster, as additional browsers are not preloaded.
Browser Screenshot Views
The Adobe® BrowserLab gives you three viewing options: 1-up View, 2-up View (side-by-side), or Onion Skin View.
1-up View
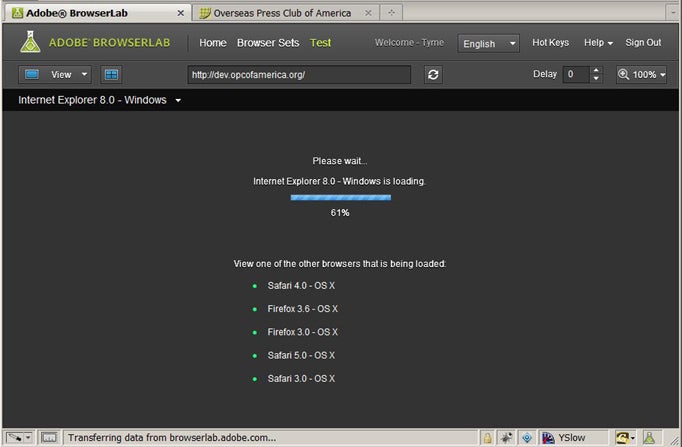
As expected, this view will display the target Web page in full view. A progress bar indicates the current browser being loaded and its status, and other browsers that have been preloaded by your browser set are listed below that. Simply use the browsers drop-down menu to select which loaded browser you want to view.
2-up View
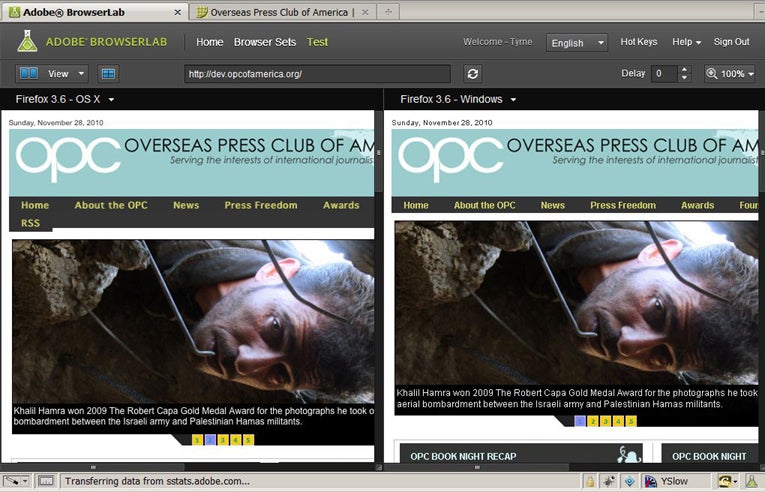
The side-by-side view is one of most useful (and one not offered by other browser testing applications), especially when comparing a Mac and a PC render of the same browser type. In the text example below, you can see how the same page displays differently in the Mac version of Firefox and the PC version. Mac fonts tend to be slightly shorter but bolder than comparable PC fonts, so what seems to fit perfectly on a PC doesn’t on the Mac view.
You can easily select a new browser to view for one of your side-by-side windows. Simply click the browsers drop-down menu of that frame to select. Notice that all active links are yellow, and all currently loaded browsers are indicated with a green bullet. Any browsers in the process of loading will bear a rotation icon. (Nice UI!)
Onion Skin View
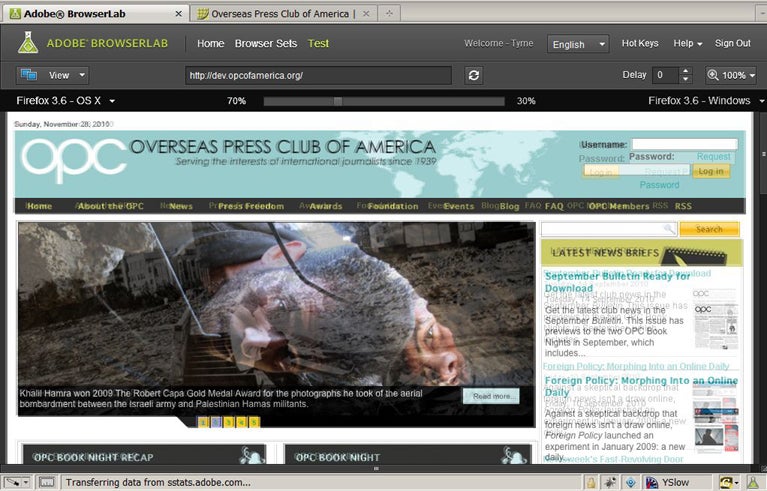
The “Onion Skin View” is pretty darn slick, and another one unique to the Adobe® browser tester. This view overlays one browser capture over the other, giving you a chance to see precise differences — particularly with respect to spacing. A slider lets you change the opacity of each to make one or the other more prominent. Did I mention the nice UI of this tester? Oh, right.
(The above screenshot is of the same two browsers tested in side-by-side mode, as depicted by the previous example.)


