WordPress (WP) has evolved into an extremely popular content management system. As a result, it is being used for building all kinds of websites. Many of these include file upload fields in registration and data import forms. In this tutorial, we’ll be getting a feel for working with upload fields by adding a file upload form to a WP page that is processed by a custom plugin on the server.
The Upload Form
It all begins with a form that contains a file input field. There are lots of plugins for uploading files, but I find that these let me down on the processing side because I tend to be working on very specific tasks such as database imports/exports. For that reason, I like to have control over each part of the solution. In this case, we’re just going to build a form within the WordPress Page editor. Here is the Text:
<h1>Excel Upload Form</h1>
<p>Choose an Excel file to upload.</p>
<form id="upload_form" action="/wp-content/plugins/phpExcel/main.php" enctype="multipart/form-data" method="post" target="messages">
  <p><input name="upload" id="upload" type="file" accept="application/vnd.openxmlformats-officedocument.spreadsheetml.sheet, application/vnd.ms-excel" /></p>
  <p><input id="btnSubmit" type="submit" value="Upload Selected Spreadsheet" /></p>
  <iframe name="messages" id="messages"></iframe>
  <p><input id="reset_upload_form" type="reset" value="Reset form" /></p>
</form>
There are a few things worth noting:
- The form will submit the form to a custom plugin.
- The results of the form submit will be displayed within an iframe. That prevents navigating away from the page and allows us to display the results of the upload process.
- The file input is set to accept excel files by default. Unfortunately, the user is free to change the file type and select anything they wish. Therefore, we’ll have to do some validation to enforce our file type.
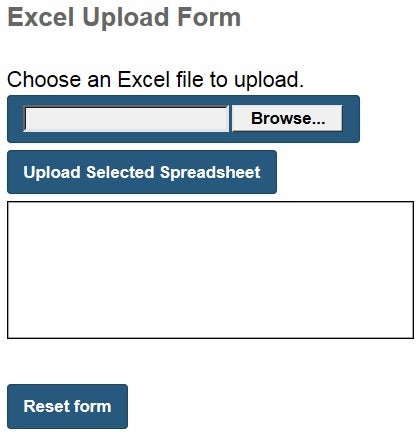
Here is the page in the browser:
Figure 1. Upload Form
It’s been styled to match my theme, so yours may look a bit different.
Form Validation
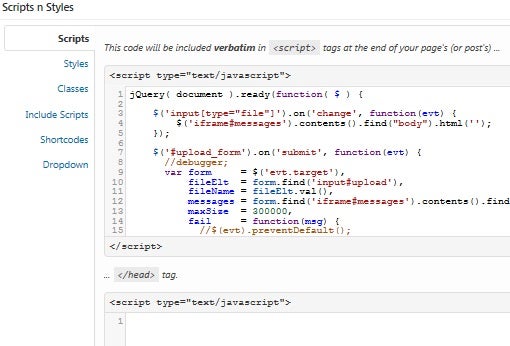
I am using jQuery across my site so I have it included in the page headers. For the local script, I use a plugin called Scripts n Styles. It allows Admin users to add custom CSS and JavaScript directly into individual Posts, Pages or any other registered custom post types. It does this via a global editor and a Meta_box in the WP post editor:
Figure 2. Scripts and Styles Editor
The form’s onsubmit event contains a few validation checks, including that:
- A file was selected.
- The extension is .xls or .xlsx (Excel).
- The file size does not exceed 300MB.
jQuery(document).ready(function( $ ) {
  $('#upload_form').on('submit', function(evt) {
    var form     = $('evt.target'),
        fileElt  = form.find('input#upload'),
        fileName = fileElt.val(),
        messages = form.find('iframe#messages').contents().find("body"),
        maxSize  = 300000,
        fail     = function(msg) {
           messages.append( $('<P>').css('color', 'red').text(msg) );
           fileElt.focus();
        };

    if (fileName.length == 0) {
       fail('Please select a file.');
    }
    else if (!/\.(xls|xlsx)$/.test(fileName)) {
       fail('Only Excel files are permitted.');
    }
    else {
      var file = fileElt.get(0).files[0];
      if (file.size > maxSize) {
        fail('The file is too large. The maximum size is ' + maxSize + ' bytes.');
      }
      else {
        return true;
      }
    }
    return false;
  });
});
The Server-side Code
Much like the upload form itself, the file processing code can reside in any number of places, depending on how you want to handle the file. I chose to put it in a custom plugin. While that might sound like a daunting proposition, it’s really quite easy to do.
- Create a file named like your plugin, with a .php extension. I called my plugin “phpExcel”, so I named my file “phpExcel.php”. In it, enter the some plugin info such as the following:
<?php
   /*
   Plugin Name: phpExcel
   Plugin URI: http://www.gravellewebdesign.com
   Description: a plugin to upload Excel spreadsheets
   Version: 1.0
   Author: Rob Gravelle
   Author URI: http://www.robgravelle.com
   License: GPL2
   */

?>
Of all this information, only the plugin’s name is required. But if you intend to distribute your plugin, you should add as much data as possible.
- Create whatever directories and files your plugin needs. In our case, one PHP file named “main.php” will do.
- Zip all of your plugin files in an archive named after your plugin (doesn’t have to match exactly).
- Navigate to the Installed Plugins page in WordPress Admin, and click the Upload Plugin button. That will bring up the plugin upload form:
Figure 3. Upload Form - Browse to your zip archive and click the Install Now button. WordPress will now download and install the plugin for you. After this, you will see the success message with a link to activate the plugin or return to plugin installer.
That’s all there is to it!
Here‘s an article with more info on creating your own plugins.
Now it’s time to look at the main.php script code. I included comments to clarify certain points of interest:
<?php
//provides access to WP environment
require_once($_SERVER['DOCUMENT_ROOT'] . '/wp-load.php');

  /* import
  you get the following information for each file:
  $_FILES['field_name']['name']
  $_FILES['field_name']['size']
  $_FILES['field_name']['type']
  $_FILES['field_name']['tmp_name']
 */

if($_FILES['upload']['name']) {
  if(!$_FILES['upload']['error']) {
    //validate the file
    $new_file_name = strtolower($_FILES['upload']['tmp_name']);
    //can't be larger than 300 KB
    if($_FILES['upload']['size'] > (300000)) {
      //wp_die generates a visually appealing message element
      wp_die('Your file size is to large.');
    }
    else {
      //the file has passed the test
      //These files need to be included as dependencies when on the front end.
      require_once( ABSPATH . 'wp-admin/includes/image.php' );
      require_once( ABSPATH . 'wp-admin/includes/file.php' );
      require_once( ABSPATH . 'wp-admin/includes/media.php' );

      // Let WordPress handle the upload.
      // Remember, 'upload' is the name of our file input in our form above.
      $file_id = media_handle_upload( 'upload', 0 );

      if ( is_wp_error( $file_id ) ) {
         wp_die('Error loading file!');
      } else {
        wp_die('Your menu was successfully imported.');
      }
    }
  }
  else {
    //set that to be the returned message
    wp_die('Error: '.$_FILES['upload']['error']);
  }
}
?>
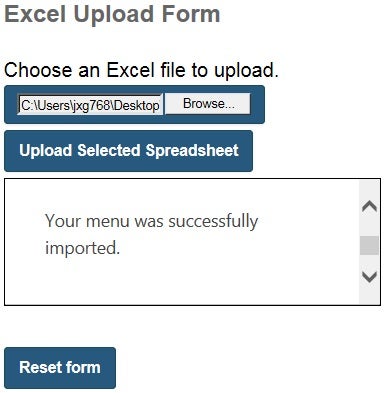
If all goes well, you should see the success message:
Figure 4. Upload Form with Success Message
Conclusion
In this tutorial, we created a page with a file upload form along with a custom plugin to process the uploaded file. In future installments, we’ll implement more stringent security, as well as include our form within meta_boxes and post lists.


