

by David Catuhe
Starter and full solution can be found here.
Summary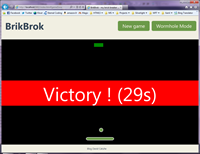
1. Introduction
5. Conclusion
Introduction
The goal of this tutorial is discovering graphics development using SVG and Canvas (which are two majors technologies of HTML5).
To do so, we will write together a brick breaker game (à la Arkanoïd or Blockout). It will be composed of an animated background (using Canvas) and will use SVG for bricks, pad and ball.
You can try the final version here: http://www.catuhe.com/ms/en/index.htm
Prerequisites
· Internet Explorer 9/10 or other hardware-accelerated HTML5 modern browser
· Visual Studio 2010 SP1
· Web Standards Update : http://visualstudiogallery.msdn.microsoft.com/a15c3ce9-f58f-42b7-8668-53f6cdc2cd83
Setting up the background
The background is only an alibi to use a canvas. It will allow us to draw pixels in a given area. So we will use it to draw a space wormhole (yes, I love Stargate!). Users will have choice to display it or not using the mode button:
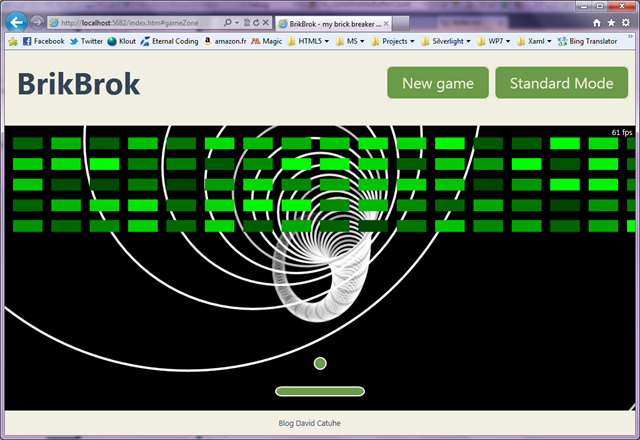
You can note that we will add a performance counter in the right top corner (just to see the power of accelerated graphics )
Setting up HTML5 page
Starting from the index.htm file, we will add our canvas as child of the div “gameZone”:
1. <canvas id=”backgroundCanvas”>
2. Your browser doesn’t support HTML5. Please install Internet Explorer 9 :
3. <br />
4. <a href=”http://windows.microsoft.com/en-US/internet-explorer/products/ie/home?ocid=ie9_bow_Bing&WT.srch=1&mtag=SearBing”>
5. http://windows.microsoft.com/en-US/internet-explorer/products/ie/home?ocid=ie9_bow_Bing&WT.srch=1&mtag=SearBing</a>
6. </canvas>
Adding JavaScript code
The background is handled by background.js file (what a surprise!). So we have to register it inside index.htm. So just before the body closing tag, we will add the following code:
1. <script type=”text/javascript” src=”background.js”></script>
Setting up constants
First of all, we need constants to drive the rendering:
1. var circlesCount = 100; // Circles count used by the wormhole
2. var offsetX = 70; // Wormhole center offset (X)
3. var offsetY = 40; // Wormhole center offset (Y)
4. var maxDepth = 1.5; // Maximal distance for a circle
5. var circleDiameter = 10.0; // Circle diameter
6. var depthSpeed = 0.001; // Circle speed
7. var angleSpeed = 0.05; // Circle angular rotation speed
You can of course modify these constants if you want different effects on your wormhole.
Getting elements
We also need to keep reference to main elements of the html page:
1. var canvas = document.getElementById(“backgroundCanvas”);
2. var context = canvas.getContext(“2d”);
3. var stats = document.getElementById(“stats”);
How to display a circle?
The wormhole is only a sequence of circles with different positions and sizes. So to draw it, we will use a circle function which is build around a depth, an angle and an intensity (the base color).
1. function Circle(initialDepth, initialAngle, intensity) {
2. }
The angle and the intensity are private but the depth is public to allow the wormhole to change it.
1. function Circle(initialDepth, initialAngle, intensity) {
2.
3. var angle = initialAngle;
4. this.depth = initialDepth;
5. var color = intensity;
6. }
We also need a public draw function to draw the circle and update depth, angle. So we need to define where to display the circle. To do so, two variables (x and y) are defined:
1. var x = offsetX * Math.cos(angle);
2. var y = offsetY * Math.sin(angle);
As x and y are in space coordinates, we need to project them into the screen:
1. function perspective(fov, aspectRatio, x, y) {
2. var yScale = Math.pow(Math.tan(fov / 2.0), -1);
3. var xScale = yScale / aspectRatio;
4.
5. var M11 = xScale;
6. var M22 = yScale;
7.
8. var outx = x * M11 + canvas.width / 2.0;
9. var outy = y * M22 + canvas.height / 2.0;
10.
11.return { x: outx, y: outy };
12.}
So final position of the circle is computed by the following code:
1. var x = offsetX * Math.cos(angle);
2. var y = offsetY * Math.sin(angle);
3.
4. var project = perspective(0.9, canvas.width / canvas.height, x, y);
5. var diameter = circleDiameter / this.depth;
6.
7. var ploX = project.x – diameter / 2.0;
8. var ploY = project.y – diameter / 2.0;
And using this position, we can simply draw our circle:
1. context.beginPath();
2. context.arc(ploX, ploY, diameter, 0, 2 * Math.PI, false);
3. context.closePath();
4.
5. var opacity = 1.0 – this.depth / maxDepth;
6. context.strokeStyle = “rgba(” + color + “,” + color + “,” + color + “,” + opacity + “)”;
7. context.lineWidth = 4;
8.
9. context.stroke();
You can note that the circle is more opaque when it is closer.
So finally:
1. function Circle(initialDepth, initialAngle, intensity) {
2. var angle = initialAngle;
3. this.depth = initialDepth;
4. var color = intensity;
5.
6. this.draw = function () {
7. var x = offsetX * Math.cos(angle);
8. var y = offsetY * Math.sin(angle);
9.
10.var project = perspective(0.9, canvas.width / canvas.height, x, y);
11.var diameter = circleDiameter / this.depth;
12.
13.var ploX = project.x – diameter / 2.0;
14.var ploY = project.y – diameter / 2.0;
15.
16.context.beginPath();
17.context.arc(ploX, ploY, diameter, 0, 2 * Math.PI, false);
18.context.closePath();
19.
20.var opacity = 1.0 – this.depth / maxDepth;
21.context.strokeStyle = “rgba(” + color + “,” + color + “,” + color + “,” + opacity + “)”;
22.context.lineWidth = 4;
23.
24.context.stroke();
25.
26.this.depth -= depthSpeed;
27.angle += angleSpeed;
28.
29.if (this.depth < 0) {
30.this.depth = maxDepth + this.depth;
31.}
32.};
33.};
This article was reprinted with permission from Microsoft Corporation. This site does business with Microsoft Corporation.
