


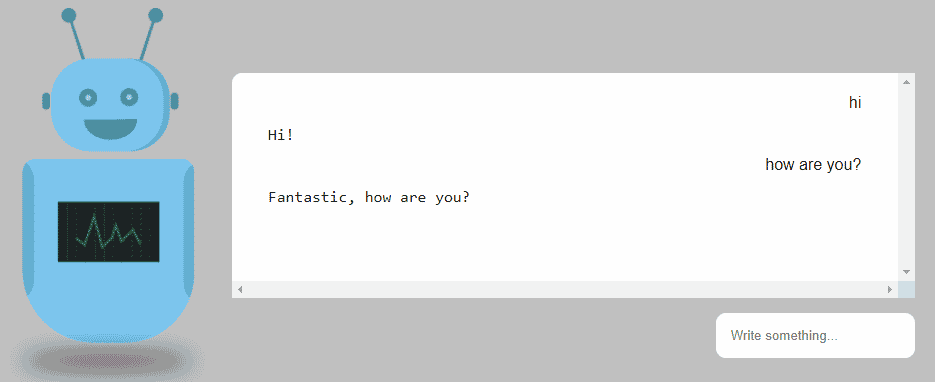
In this web development tutorial, we will see how to create a basic chatbot using HTML, CSS, and vanilla JavaScript. This exercise is focused on JS fundamentals rather than any kind of Artificial Intelligence (AI). To make the process simpler and easier to learn, I am not using any third-party libraries. I will be building the chatbot from scratch by focusing on the basics of the JavaScript programming language.
This exercise is aimed to help JavaScript programmers learn how a chatbot works and how web devs can build a basic chatbot using JavaScript.
Create a Chatbot in JavaScript
First, start by creating an HTML file. Let’s create a file name index.html, containing the following code:
<!DOCTYPE html>

<html>

   …

<div id="main">

    <div><input id="input" type="text" placeholder="Write something..." autocomplete="off"  autofocus="true"/></div>

</div>

   …

</html>
Here, we have created a div with id ‘main’ and inside it we have an input field in which the user can type text and communicate with the bot. This is the basic HTML set-up. We will be adding more functionalities along the way.
Next, we also need to add some layout styling to our webpage. So let us create a CSS file named style.css. Use the following stylesheet code:
#main {
    position: fixed;
    top: 40%;
    right: 200px;

    …

.messages {
	display: flex;
	flex-direction: column;
	overflow: scroll;
	height: 90%;
	width: 100%;
	background-color: white;
	padding: 15px;
	margin: 15px;
	border-radius: 10px;
}

   …

}
Creating the .js File
Now, create a .js file and then set up some basic functionality into it with the following JavaScript code:
document.addEventListener("DOMContentLoaded", () => {
  document.querySelector("#input").addEventListener("keydown", function(e) {
    if (e.code === "Enter") {
        console.log("You pressed the enter button!")
    }
  });
});
Note that adding the DOMContentLoaded listener here is ensuring that the JavaScript will load only when the HTML has finished rendering. It’s good coding practice, by the way.
Some users find it a tedious task to click the send button, again and again, to send messages over a chat app. So we want to implement an instant messaging feature into this app that will enable the user to send the message just by pressing the enter key after they finish typing the message.
And that could be done in the following ways:
    const inputField = document.getElementById("input")
    inputField.addEventListener("keydown", function(e) {
        if (e.code === "Enter") {
            let input = inputField.value;
            inputField.value = "";
            output(input);
    }
  });
By adding the e.code == ‘Enter’, we are telling the event listener that we only care about the enter key. We have replaced the console log with some statements which are performing these actions:
Assignment of the input field value to the local variable.
We also want to clear the form input field after submission, so we set the input field’s value to the empty string.
Passing the input value to our next function ‘output’
JavaScript Functions for Chatbots
In the next step, we will create some JavaScript functions that will make a bot.
First, we want to take control over the text the user types in the input form field. Whatever the user types in the input field, we want to make it a little more standard using regular expressions as done in the following code snippet:
function output()
{
        let text = input.toLowerCase().replace(/[^\w\s\d]/gi, "");
        …
}
The above regular expression will remove everything other than words, digits, and spaces. We also want to remove all rogue characters and everything that could make the matches difficult. So it can be done in the following ways:
function output()
{
      let text = input.toLowerCase().replace(/[^\w\s\d]/gi, "");
        …

     text = text
    .replace(/ a /g, " ")
    .replace(/whats/g, "what is")
    .replace(/please /g, "")
    .replace(/ please/g, "");
}
For example if the user type is ‘what’s going on’ or ‘whats going on’ or ‘what is going on’ – instead of accounting these differences separately, we would treat them the same.
Now that we have an idea of how the user input will look, let’s create the set of possible bot responses and user texts.
Programming Bot Responses in JavaScript
Our next task is to work on the bot responses based on the triggers (user text). So I am going to create arrays of arrays that include utterances and the answers. For simplicity, I am going to keep them brief.
const utterances = [
  ["how are you", "how is life", "how are things"],        //0
  ["hi", "hey", "hello", "good morning", "good afternoon"],      //1
  ["what are you doing", "what is going on", "what is up"],      //2
  ["how old are you"],					//3
  ["who are you", "are you human", "are you bot", "are you human or bot"],   //4

   …

;

// Possible responses corresponding to triggers

const answers = [
   [
    "Fine... how are you?",
    "Pretty well, how are you?",
    "Fantastic, how are you?"
  ],                                                                                  	//0
  [
    "Hello!", "Hi!", "Hey!", "Hi there!", "Howdy"
  ],						//1
  [
    "Nothing much",
    "About to go to sleep",
    "Can you guess?",
    "I don't know actually"
  ],						//2
  ["I am infinite"],					//3
  ["I am just a bot", "I am a bot. What are you?"],	//4

  …

];

// For any other user input

const alternatives = [
  "Go on...",
  "Try again",
];
If you notice the indexes of each array and how they are lined up, you will see that the user text that matches an option at utterances[0] will respond with an option from answers[0], and so on. The alternatives array is, of course, for those input values that do not match in the first array. This explains how a basic chatbot works under the hood.
Chatbot Triggers and Responses
Now we can get familiar with how the triggers and responses look. The next step is to create a function that will compare these arrays:
function compare(utterancesArray, answersArray, string) {
  let item;
  for (let x = 0; x < utterancesArray.length; x++) {
    for (let y = 0; y < utterancesArray[x].length; y++) {
      if (utterancesArray[x][y] === string) {
        items = answersArray[x];
        item = items[Math.floor(Math.random() * items.length)];
        }
      }
   }
  return item;
}
Now we call this function from the original function ‘output()’ in the following way:
function output(input) {
  let product;
  let text = input.toLowerCase().replace(/[^\w\s\d]/gi, "");
  text = text
    .replace(/ a /g, " ")
    .replace(/whats/g, "what is")
    .replace(/please /g, "")
    .replace(/ please/g, "");

  if (compare(utterances, answers, text)) {
    product = compare(utterances, answers, text);
  }
  else {
    product = alternatives[Math.floor(Math.random() * alternatives.length)];
  }

  //update  DOM
  addChatEntry (input, product);
}
After comparing arrays, our ‘output’ function finally calls the addChatEntry() function to make the conversation render on the webpage.
Updating the DOM
The last thing remaining now is to update the DOM. So we must create a function addChatEntry():
function addChatEntry(input, product) {
  const messagesContainer = document.getElementById("messages");

  let userDiv = document.createElement("div");
  userDiv.id = "user";
  userDiv.className = "user response";
  userDiv.innerHTML = `${input}`;
  messagesContainer.appendChild(userDiv);

  let botDiv = document.createElement("div");
  let botText = document.createElement("span");
  botDiv.id = "bot";
  botDiv.className = "bot response";
  botText.innerText = "Typing...";
  botDiv.appendChild(botText);
  messagesContainer.appendChild(botDiv);

                                  …

  setTimeout(() => {
    botText.innerText = `${product}`;
  }, 2000); }
This function creates a thread of messages for both the bot and user fields, on the same page.
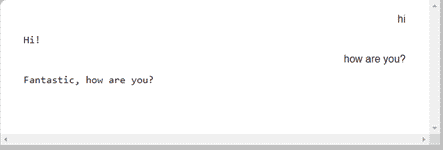
In the setTimeout function, we set the time delay by two seconds to make the impression that the bot thinks for a few seconds and then replies when someone talks to it.
Chatbot Programming Tutorial
Here, we have created a basic chatbot using Javascript. Our primary focus of this tutorial was to understand Javascript logic behind the creation of a chatbot.
Building a real-time chatbot may be a complicated task but it is worth it. Nowadays, there are lots of software development companies and chatbot platforms that are building and integrating chatbots into different business applications. You can also use pre-written code for building chatbots. They are helpful for optimizing client communication and reaching out to the target audience.
You can access all of the source code of this app on my Codepen.
If you need arrays of utterances and answers, they are in this other Codepen.
