As noted in a previous article, the specification for transitions isn’t stable and that the syntax and behavior is subject to change. Having said that, with CSS3 Transitions you can animate CSS properties and HTML elements. Some applications of this are: animated rollovers, fades, changing color from white to black, and more.
A simple example of how to use transitions can be found on the site Understanding CSS3 Transitions. Here, they give you several examples of CSS3 transitions.
On the W3C CSS Transitions page, here’s a table of all the animatable properties. While you can code transitions by hand, that would be time intensive. To make the process of using CSS3 Transitions easier, I’m going to use Adobe Dreamweaver CS6 and go through a basic tutorial on how transitions work, using the CSS Transitions Panel.
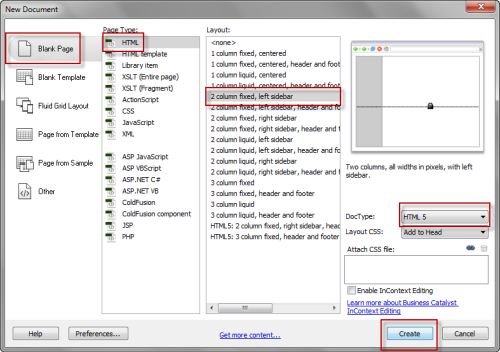
To begin, launch Dreamweaver CS6 and click on File: New.
Next, click on File: Save As. If you have the Dreamweaver assets file installed, navigate there and save the file with the name: Transitions.
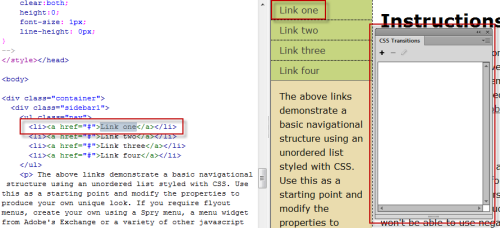
Now it’s time to begin building the transtion. In the Design view, click on Link One. Next, go to Window: CSS Transitions to open the panel. Note that when you do, the panel is blank, because there’s nothing it.
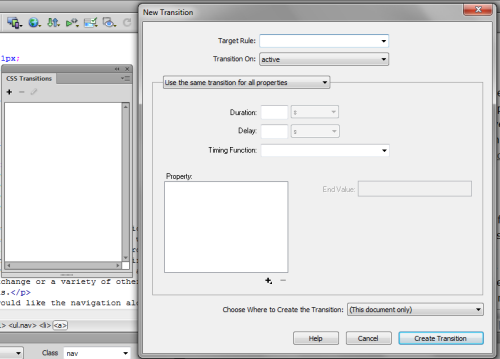
In the Transitions panel, click on the plus sign (+) at the top left. This opens the New Transition dialog box. Note that there are several drop down lists and parameter boxes that you can fill in manually. At the moment, we’re going to create the following:
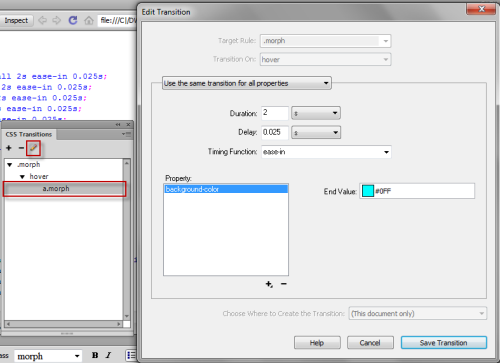
• Target Rule: .morph (note that this rule isn’t listed in the option of the drop down list).
• Transition On: Hover
• Use the Same Transition for All Properties
• Duration: 2 seconds
• Delay: .025 second
• Timing Function: Ease-in
• Property: Click on the plus sign (+) and choose background-color
• End Value: #0FF
• Choose Where to Create the Transition: This Document Only.
• Click on Create Transition.
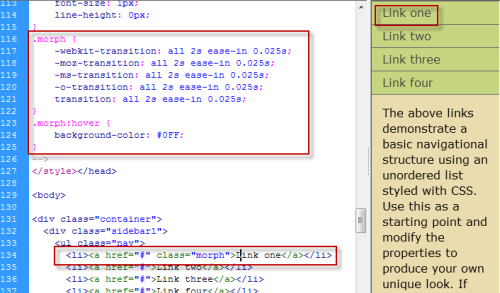
Now, let’s look at the results in the Code view. As you can see, a new class, .morph was created. Note also that because you clicked on Link One before you created the CSS transition, the class was also added to the selected element.
To see what this transition looks like in action, click on Live View. Note what happens when you hover your mouse over Link One in the Design view and what happens when you move the mouse pointer away.
Now what happens if you want to edit the transition and test out some new settings? First off, click on the live view button do disable it. Next, go back to the CSS Transitions panel. Highlight a.morph, then click on the pencil icon above. This opens the Edit Transition dialog box. You can make your adjustments and when you’re finished, click on the Save Transition button.
This gives you a brief overview of what you can do with CSS3 Transitions. More information can be found in the resources section at the bottom of this article.
CSS3 Gradients
In this section we’ll have a look at CSS3 Gradients. One place where you can learn about the subject is at the Mozilla Developer Network: Using CSS Gradients, which covers the two types of gradients: the linear-gradient function, the radial-gradient and gives you a number of examples of how gradients are used.
Here’s a free tool, the Ultimate CSS Gradient Generator. Note that on this page, you can only use this with FireFox and Chrome. In other locations online, I’ve been reading that people are having issues with IE and that it’s not supported.
Dreamweaver CS5.5 offers support CSS3 Gradients. We’ll have a look at transparency in a file that comes with Dreamweaver 5.5. In this layout you’ll notice that all the columns have an opaque white header. To make changes to gradients you’ll have to make use of the CSS Styles, panel.
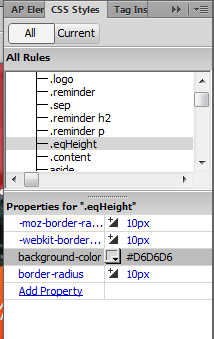
To do so, go to Window: CSS Styles. Once the pane is open, scroll down the list until you find .eqHeight. Note the white swatch, which I want to make transparent. but right now the code reads: #FFFFFF. I’m unable to use that for transparency so I have to change it.
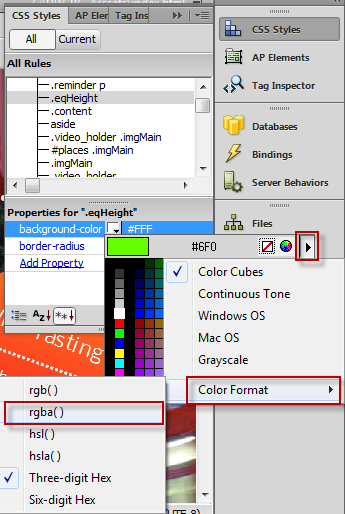
To do so, some steps need to be taken, first. Click on the white color swatch. This brings up the color palette. Next, click on the triangle at the top right. This brings up a popup menu. Scroll the bottom and click on Color Format. In the next menu that pops up, click on rgba(). The “a” designation refers to “alpha” or transparency.
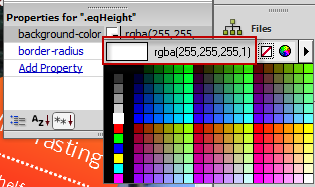
When you do that, you’l see a color picker and and you move it around the swatches, you’l see that the color display has changed. If you want white , click on the white swatch to select it. Now, in the properties, you’ll see that the background-color is displayed as: rgba(255,255,255,1). The first three numbers give you the color white and the last number, the alpha, controls the transparency of the image.
To change the opacity, I’ll type in a figure of .5. Note how the white columns have suddenly become transparent.
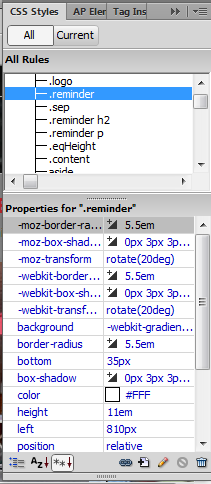
Now we’re going to take a look at the orange wine tasting button and do some manipulations with it. First off, we need to turn off Live View, then look for the CSS rule. In this case it’s .reminder, which we’ll find in the CSS Styles panel.
Here’s .reminder selected and all the properties that go along with it. As you can see, it’s quite an extensive list. In this list, I want to change the transparency and the color of the wine tasting button.
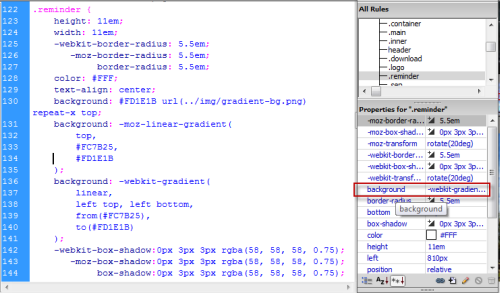
In the properties list, the transparency is governed by the .background property. For more control, I right click on it and open the code view.
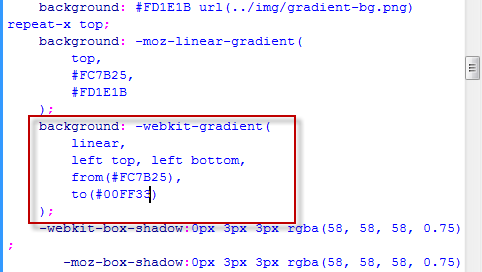
In the CSS, I’ve isolated .background: -webkit-gradient( As you look at the code underneath it, you’ll see two color settings that govern the gradient. As a simple change, I’ll change the first grouping to “00FF33.” and turn on Live View.
Note what happens to the circle. This gives you a quick overview of what you can do with gradients in Dreamweaver. As you can imagine, one can go a lot further and we will in upcoming articles.
References
Understanding CSS3 Transitions
Creating CSS3 Transitions in Dreamweaver CS6


