
WordPress is one of the most popular CMS’s (Content Management Systems) available on the Internet today. It offers a wide range of functionality and it’s easy to use, even if you’re a newbie, but some beginners feel uncomfortable when they need to install WordPress for the first time. Fortunately, there are options and one of them is to install WordPress automatically, assuming your ISP (Internet Service Provider) allows for it.
In this article we’ll look at two ways of installing WordPress. The first is using cPanel and creating an automatic installation. The second way is by doing so manually, using FTP (File Transfer Protocol). Before we begin, the first thing to look at is hosting. According the WordPress.org site, they recommend three hosting companies, Bluehost, Dreamhost and Laughing Squid. The one that was recommended to me (and that I use) is Hostgator.
In terms of installing WordPress, I recommend working with a service that use cPanel, because it’s the easiest to install and maintain. In the past I used GoDaddy, but I found their system cumbersome due to the proprietary interface. Things have changed now and they’re offering cPanel which is a plus.
Automatic Installation with cPanel
In this section we’re going to install WordPress using cPanel.
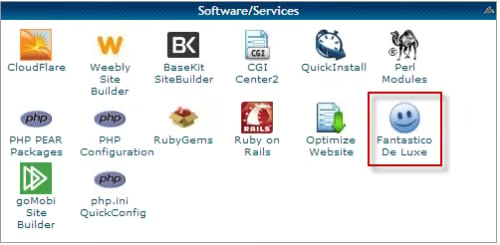
The first step is to log in and scroll down the page until you see an option for installing WordPress. In this case, it’s Fantastico De Luxe. Click on the Fantastico De Luxe icon.
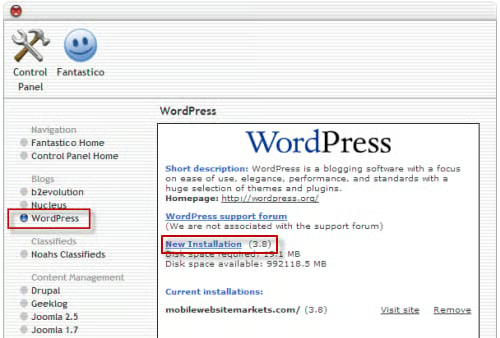
On the Fantastico page, choose WordPress under the Blogs section and click on the New Installation link.
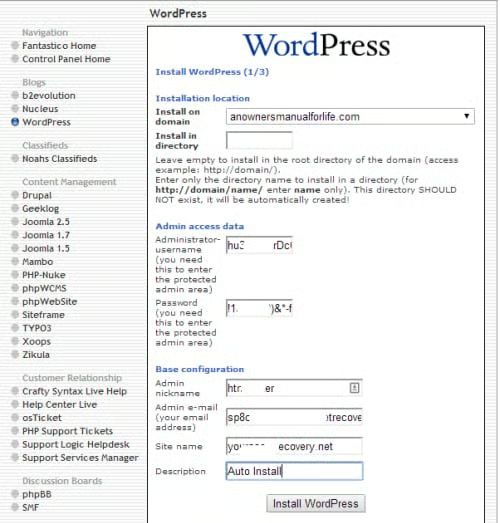
The installation panel appears. At the top you need to select which domain to install under. After that you’ll see the heading: Install in Directory. I recommend leaving this blank. WordPress will be installed into the root directory if you do this. If you want to create a directory, such as: blog, it should not exist, but once you enter it, it will be automatically created.
Next, you need to create the administrator name. This should not be “admin.” That’s too easy for hackers to guess. I recommend 16 letters. It should be alphanumeric and look something like this: Hrt0cfF931gGm6xzViO . Next you need to crate the password. It can contain special characters and could look something like this: !1o^31aP)&*cf9^#ch. After that, you’ll need to add an administrator nickname, a site description and you’re ready install WordPress.
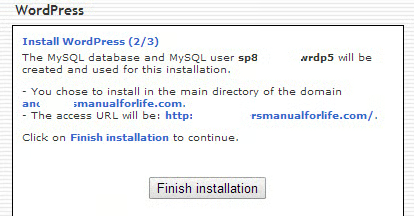
After that, the following screen appears. Click on the Finish Installation button.
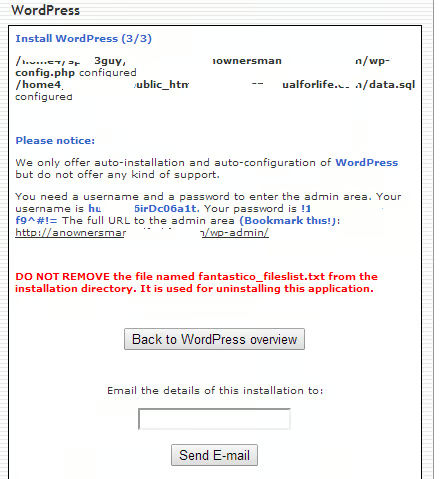
This gives you information about the finished installation and everything you need to access your WordPress site. Note that you can send a message with details of the installation. I recommend sending one to your email account as a backup of what’s been done here.
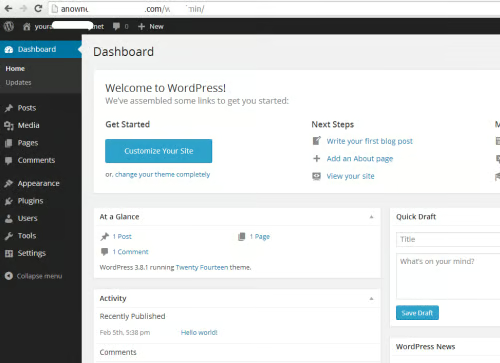
The last step is where you successfully log into WordPress. And that’s it.
Install WordPress Manually by FTP

In this section we’ll install WordPress manually, using FTP (File Transfer Protocol). Before we begin, there are few steps to put into place, which are:
- To have access to your web server by FTP. (I use WinSCP). You’ll need to configure the software so you can upload your WordPress files to your hosting account.
- A text editor (such as Notepad or an HTML editor). I use Adobe Dreamweaver.
- Your web browser of choice
- Make sure your ISP meets the minimum WordPress requirements. That’s no problem with Hostgator.
Next, visit WordPress.org and download the latest version of WordPress (which is a Zip file). Unzip the WordPress file to a directory on your hard drive (WordPress will create its own directory). You’ll need access to the files later on.
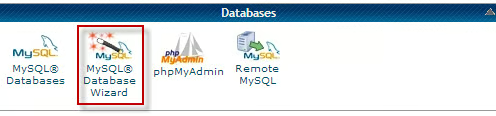
Go to cPanel, scroll to the Databases section and click on MySQL Database Wizard.
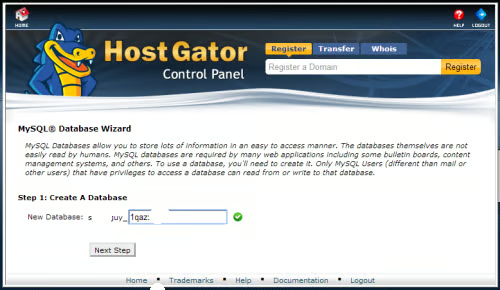
Enter a database name and click on Next Step.
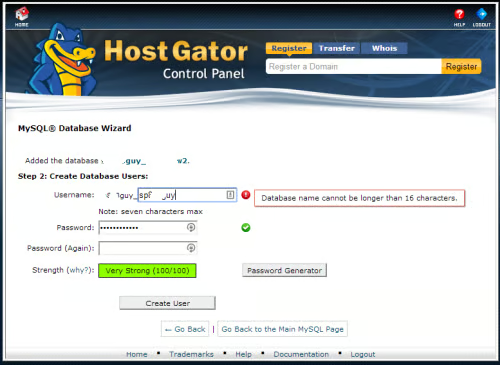
Enter a database user name and a password. It’s a good idea to use the Password Generator here. Make note of the database name, the user name (must be alpha numeric) and password. You’ll need all of these for the WordPress installation.
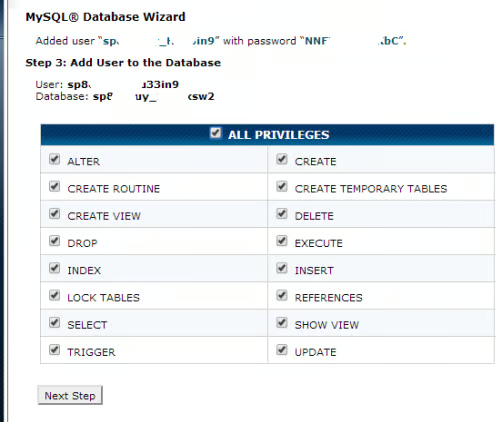
On the next page, set All Privileges and click Next Step. You’ll receive a final confirmation and your database will be complete.
The next step is to go to the directory where you unzipped all the WordPress files. Locate the file: wp-config-sample.php Rename it to wp-config.php. Open the file in Notepad or in an HTML editor and add in the database information.
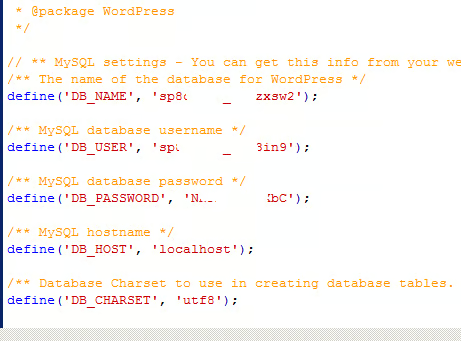
Enter the database information you gathered earlier. Make sure that there are no spaces when you do so or that will create an error with the installation.
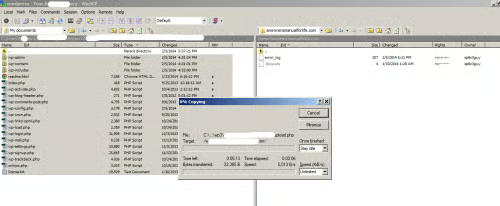
Upload the files to your server with your FTP program of choice. You can upload the files to the root directory of your domain or to a directory of your domain. An example is: http://yourdomain.com/blog.
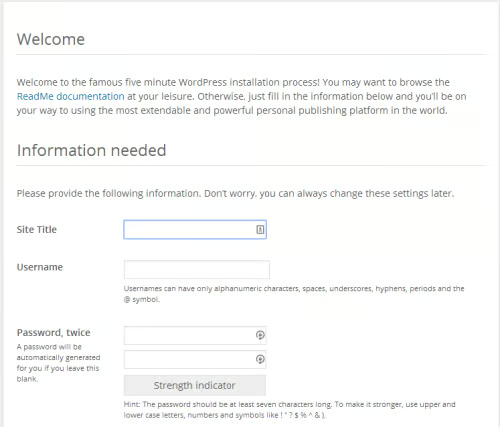
Once the files are installed, open your browser (I use Google Chrome) and type in your domain name. On the screen above, enter the title for the site, the username (I recommend 16 alphanumeric characters). Again, DO NOT enter admin. You don’t want to make it easy for hackers to crack your site. For the password, you can use alphanumeric and special characters. The strength indicator will help insure you choose a strong password. Again, 16 characters is good. Below this section, enter your email address and click on Install WordPress. Your login information will be emailed to you.
You’ll get a final confirmation message that WordPress has been installed and you can now log into your new site.
Note: If you run into difficulties you’ve probably made a mistake with the wp-config.php file. This is a common issue, simply check your settings and upload the file again.
That’s it!
Resources
Here’s the link to the WordPress 5 minute installation guide.
