A study done by Forbes shows that 30,000 websites get hacked on the daily basis. To secure your website and its data and content is very important but more than that, protecting your website’s user’s data must be a priority. Businesses that fail to take care of their website security often ends up losing their customer base, resulting in revenue loss.
Though protecting sites from hackers is mandatory, no particular solution can guarantee the complete protection. This statement holds true even more in the case of e-commerce sites. But that doesn’t mean we stop taking preventive measures that can help lowering down the hacking experiments on our websites.
How about securing your WordPress website by restricting the access to a site for users logged in by IP addresses? With this article explained setting up IP restrictions to a site’s login page.
What’s an IP address?
Try writing what’s my IP on Google and it will show you some numbers separated by full stops. These unique strings of number identify each computer using the Internet Protocol to communicate over a network.
Now, you know what address is. First, let’s get on to restricting IP address with static IP address. That’s another term to learn about.
1) Using Static & Dynamic IP Addresses!
What’s static IP address?
It’s an IP address that doesn’t change, which means you login to your WP website administration panel with a unique IP address. It helps you restricting other users to login. Continue reading if you are also one of those who login to their websites from different locations as we learn the perspective in which the IP addresses remain static.
How to use Static IP addresses to set IP restrictions?
First of all, we need to make some changes to the .htaccess configuration file and find out the IP address that you use while logging into your WordPress account.
1) Type in Google, ‘What’s my IP’.
2) Copy the IP address that Google results in shows and paste it into a .txt file as we need this file for coding but later.
3) Go to the root directory of your site and find out the .htaccess configuration file.
4) In case you don’t have one, create it yourself:
- Go to your control panel and click File Manager(located in Files section)
- Choose “choose hidden files”(if you don’t find the option, click on ‘reset all interface settings
- Choose the folder you want to open and click on “Go” button.
- Click on the new file icon and create a new file.
- Name it as .htaccess and now you have the file with you.
5) Login to your cPanel and look for the .htaccess configuration file.
6) Open a text editor and add coding to the file.
Now, follow these two steps to set IP restrictions using static IP addresses to your website’s login page.
Step 1.) Open the WP website’s file through Control panel text editor and paste the below code to the top of .htaccess configuration file.
RewriteEngine on
RewriteCond %{REQUEST_URI} ^(.*)?wp-admin$
RewriteCond %{REMOTE_ADDR} !^12.345.678.90
RewriteCond %{REMOTE_ADDR} !^IP Address InsertTwo$
RewriteCond %{REMOTE_ADDR} !^IP Address InsertThree$
RewriteRule ^(.*)$ – [R=403,L]
Step 2.) Once copied the code into your file, save it. You have successfully setup the IP address restrictions.
Now, let’s know how to set up IP restrictions using dynamic IP address.
What’s a dynamic IP address?
A dynamic IP address is a temporary Internet Protocol address assigned to a computer when it’s connected to the network. It is an automatically configured IP address accredited by a DHCP server.
It may happen that you need to grant access to multiple users for whatever reason to login to your WordPress website’s dashboard.
How to use Dynamic IP addresses to set IP restrictions?
Open your website’s cPanel and fetch .htaccess file and add the following code on the top and save it.
RewriteEngine on
RewriteCond %{REQUEST_METHOD} POST
RewriteCond %{HTTP_REFERER} !^http://(.*)?your-site’s-name.com [NC]
RewriteCond %{REQUEST_URI} ^(.*)?wp-login.php(.*)$ [OR]
RewriteCond %{REQUEST_URI} ^(.*)?wp-admin$
RewriteRule ^(.*)$ – [F]
You might need to grant permission to WP login page to few trusted people. You can do that by editing the code.
Use of these Codes!
Both the codes will inhibit the spammers or hackers who are using bots to enter into your WordPress website and will allow only those users that are actually navigating to the web pages similar to yours i.e. internally, they’ll have entry to the WP site’s wp-admin page or login page. They will receive a ‘404 error’ message everytime they try the bots to enter your website.
2) Using Plugins
There are various WordPress Plugins that you can use to restrict IP addresses on your websites such as:
- WP-Ban
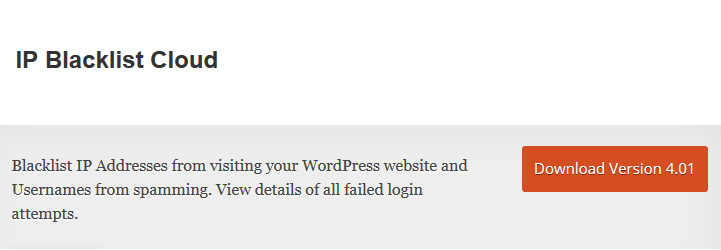
- IP Blacklist Cloud
IP Blacklist Cloud plugin will give you access to know the number of failed logins on your admin dashboard. You can figure out the multiple tries and accordingly, you can put those IP addresses in the block lost to secure your website.
3) Some other ways to secure your WordPress websites from harmful attacks
- By Restricting access to Other Directories
We know that WordPress is very popular, and there are plenty of people who knows the structure of a WordPress website and aware of its shortcomings. They know where to look for the plugins and functionality you have added to your site. You can restrict them doing all this by just preventing directory browsing.
- # directory browsing
- Options All -Indexes
- Restricting Access to Site’s Content
The WordPress-content folder accommodates themes, plugins and images that you install in your WordPRess website which makes all of them important to prevent from hackers. Just follow these five steps to restrict access to the wp-content:
Order deny,allow
Deny from all
<Files ~ “.(xml|css|jpe?g|png|gif|js)$”>
Allow from all
</Files>
- By Protecting Wp-config file
It is a file in your directory that has information of your website and database, and that is something you want to secure from the hands of any hacker. Add the below code to prevent access to the wp-config. php file:
<Files wp-config.php>
order allow,deny
deny from all
</Files>
As mentioned earlier, no guaranteed solution can protect your website from the attacks of bad users. Setting IP restrictions to the login page and including plugins at least minimises the risk of attacks on a WordPress site. Did your site ever face any security attack? If yes, what did you do to protect your WordPress site? Please, let us know by posting your comments below as your input could be helpful for us and millions of other users who are also leveraging the WordPress platform.
About The Author: Kiera Hayes is a passionate Blogger and Web Developer. She enjoys reading and writing articles whenever she gets time from her work.


