Create a Django Python Project with PyDev
The World Wide Web has helped propel certain programming languages to the forefront while relegating others to the brink of obscurity. Guido van Rossum’s Python language is a perfect example of a language that has thrived in the realm of web development. Eventually Python gave rise to an open-source web framework called Django. Named after guitarist Django Reinhardt, Django was created in order to encourage “rapid development and clean, pragmatic design“. In today’s tutorial, we’ll configure our development environment and create a new Django Python project in Eclipse using the PyDev IDE plugin.
Ready, Set, Hold on a Second.
Although Python can be coded in a text editor and executed via the command prompt, there are a lot of tools at our disposal to make the whole process a little more unified. They just require a bit more work up-front. Let’s take a few minutes and setup the various pieces of the development environment.
Python
Once you’ve written Python code, you’ll need to run it through the interpreter in order to execute your program. Python is available for most operating systems, including Windows, Linux/UNIX, Mac OS X, and others. If you are using Windows like me I would recommend that you use the executable installer. It guides you through the installation process and even appends Python to the Path environment variable.
Django
The latest Django release comes packaged as a compressed .tar.gz file. Once downloaded, uncompress the file and extract the contents to a directory of your choosing. The location does not really matter as long as you have read and write privileges to it. I was able to perform both steps using Winzip in Windows.
Once you’ve extracted all of the Django modules, using a command prompt, navigate to the directory containing the modules.
Installing Python Modules
The Django docs recommend using pip installer program. Starting with Python 3.4, it’s included by default with the Python binary installers.
Run the following command from the root of the Django modules:
pip install django
I used the alternate approach using python:
python setup.py install
Eclipse
PyDev requires Java 8 and Eclipse 4.5 onwards. Download the Eclipse IDE for Java Developers. It comes with a Java 8 compiler. There is an installer for Windows platforms. For other OSes, just unpack the archive to a directory and voila! Run the eclipse.exe file to launch.
Configuring the Eclipse Environment
Almost done! At this point, Eclipse is really a Java IDE. To tailor it for Python and Django, we need to perform a few configuration steps.
Installing the PyDev Plugin
- Fire up eclipse and close the Welcome screen if necessary.
- Select Help > Install New Software… from the main menu.
On the Install dialog:
- Click the Add button and enter “PyDev” in the Name field and “http://pydev.org/updates” for the Location. Click OK to add the PyDev repository.
- In the Software list, select the PyDev checkbox and click Finish.
Visit the PyDev site for detailed installation instructions.
Configuring the Python Interpreter
The last thing we need to do is add the paths to the Python interpreter and associated libraries.
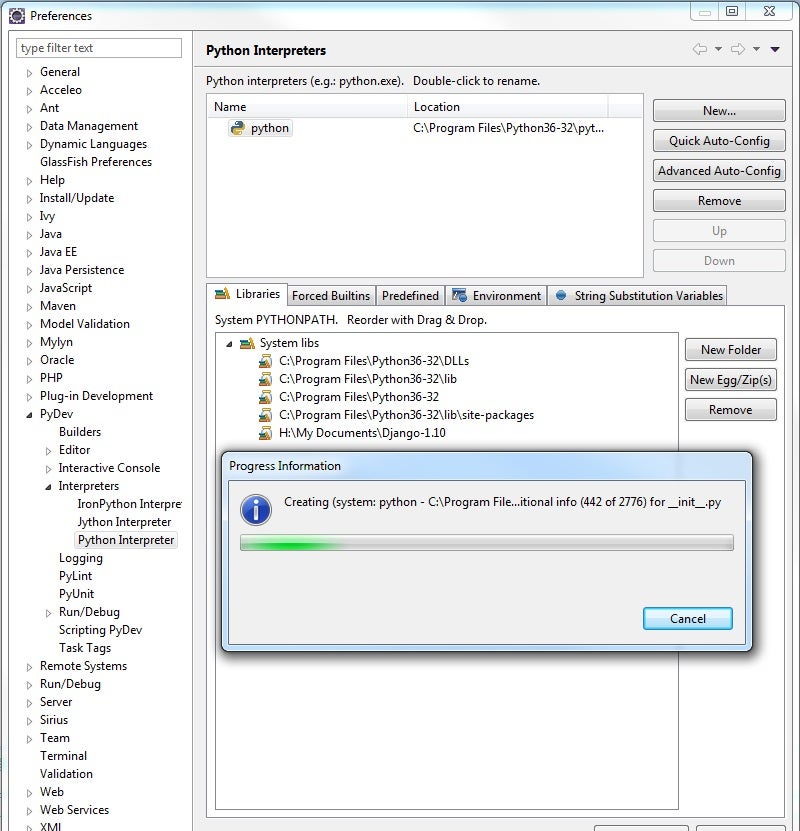
- Launch the Preferences dialog via Window > Preferences… from the main menu.
- In the left-hand pane, navigate to PyDev > Interpreters > Python Interpreter.
- I found that clicking the Quick Auto-Config button was all I needed to do to load up the Python Interpreter and libraries.
Otherwise, you’ll need to define a new one and browse to the location of the python executable.
- Before leaving this screen, you’ll need to add the Django libraries as well. Just click on New Folder and browse to the directory to which you extracted the Django modules earlier.
- Now you can click OK to close the Preferences dialog.
Creating the Project
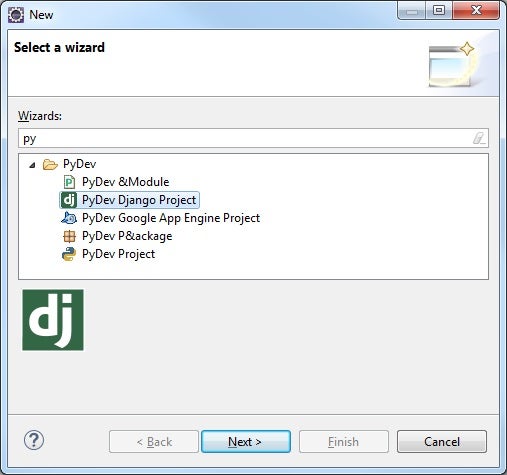
Remember when we installed the PyDev plugin? Some of the components that it added included wizards for Python development. If you select New > Other… from the main menu and type “py” in the filter, you’ll get a list of PyDev wizards, including one for PyDev Django Projects.
Select it and click Next>.
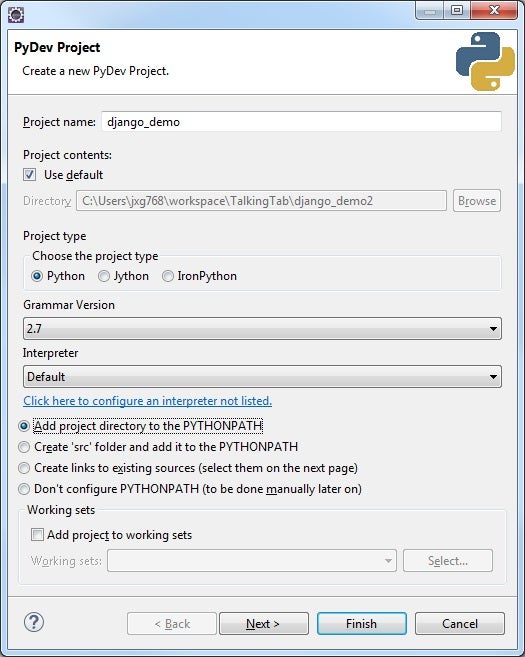
On the next screen, enter the Project Name in the first textbox. The Grammar version and Interpreter can be left as 2.7 and Default.
There are a number of radio buttons for configuring the path. Generally, if your existing project’s Python source files are in “workspaceName/projectName/”, you would select “Add project to the PYTHONPATH”. Otherwise, if your existing project’s Python source files are in “workspaceName/projectName/src/”, you would select “Create ‘src’ folder and add it to the PYTHONPATH”.
The next screen is for selecting referenced projects, so you can simply click on Finish. That will create a new project with the following structure:
Here is a brief description of each file:
- __init__.py: An empty file that tells Python that this directory should be considered a Python package.
- settings.py: Settings/configuration for this Django project, including those for apps, databases, time zone, and others.
- urls.py: The url declarations for this Django project. Defines the urls of our website such as “http://localhost/MyDjangoApp“. In order to reference /MyDjangoApp in our project we have to mention this in urls.py.
- wsgi.py: An entry-point for WSGI-compatible web servers to serve our project. This file handles our requests/responses to/from the django development server.
Conclusion
Now that we’ve got a new project in place, in the next instalment, we’ll code, debug, and run a simple application.


