
Unlike regular web pages, which tend to have extensions such as .htm, .html, .jsp, or .php, ember employs routes to map URLs to one or more route handlers. Handlers are necessary because routes are responsible for displaying templates, loading data, and setting up application state. By extension, you can’t just link to a route using regular HTML hyperlinks. Instead, ember uses the {{link-to}} component for navigating from one route to another. The Working with Data Models and Routes in EmberJS tutorial described how to setup several routes for the “sakila-video” application. Today, we’ll add a navigation bar to our app.
Keeping up with EmberJS
Since I first created the “sakila-video” application using ember 2.18.0, a few short weeks ago, ember has released version 3.0. Therefore I have updated my ember installation using the latest version. You may want to do the same. You can check which version you are running by entering ember -v at the command line. To install ember using npm, enter the following at the Node.js command prompt:
npm install -g ember-cli@3.0Using the {{link-to}} Component
In ember, components are enclosed within double curly braces ({{}}). Ember comes with several built-in components. You are able to extend these and create your own as well. The {{link-to}} component generates HTML hyperlinks between your routes.
For instance, to create a link to our about page from the rentals page, we would include the following in the rentals.hbs file:
{{#link-to "about"}}About{{/link-to}}Notice that the text between the “tags” is the link text, while the “about” in quotes denotes the route to link to. It should match the name of the target route exactly.
Creating Routes to Link To
Although we created a rentals and about page in the last tutorial, let’s create a contact page to give our app a total of three pages. Type the following command from the Node.js command prompt to generate the contact route:
ember g route contactNow let’s dress up our about and contact pages so that they contain more than a title.
Here’s the new about.hbs code:
<div class="jumbo">
<h2>About</h2>
<p>We rent videos for people who would rather go out to rent movies than stream!</p>
<p><strong>Join the revolution!</strong></p>
</div>
And here’s code for the new contact.hbs file:
<div class="jumbo">
<h2>Contact</h2>
<h3>Address</h3>
<p>129 Reynolds St.<br/>
Los Angeles, CA <br/>
90125</p>

<h3>Phone</h3>
<p>555-123-9999</p>
</div>
Including a Navigation Bar on Every Page
For our app, we want to display the links on every page, so it would make sense to create a navigation bar. Type the following command from the Node.js prompt:
ember generate component navigation-barThat will add a navigation-bar.js file under app/components/ as well as navigation-bar.hbs template file under app/templates/components.
Here’s some content for the navigation-bar.hbs template file that links to the rentals home page, as well as the contact and about pages:
<ul>
<li>{{#link-to "rentals"}}Home{{/link-to}}</li>
<li>{{#link-to "contact"}}Contact{{/link-to}}</li>
<li>{{#link-to "about"}}About{{/link-to}}</li>
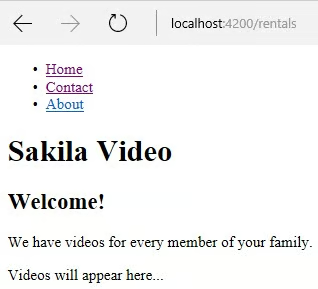
</ul>To include our navigation-bar component in a page, we simply have to add the {{navigation-bar}} text to the template page. Since we want the navigation bar to appear at the top of every page, we’ll put it in the application.hbs file located in the app/templates directory. Here’s the updated contents:
{{navigation-bar}}
<h1>Sakila Video</h1>

{{outlet}}
Let’s take a moment to admire our work. Run ember server (or ember serve, or even ember s for short) on the command line to start the Ember development server and then navigate to http://localhost:4200 to see our new nav bar in action! It should look like this:
Including CSS in Our App
Sure, the links work and the navigation bar appears at the top of every page, but it isn’t much to look at. What it needs is some CSS. Generic styles for nav bars are easy to find. Once you’ve found some, just put them in the app.css file, located in the app/styles directory. You don’t need to restart the server; it refreshes automatically. That’s why I always have two Node.js consoles open at all times!
ul {
  list-style-type: none;
  margin: 0;
  padding: 0;
  overflow: hidden;
  background-color: #333;
}

li {
  float: left;
}

li a {
  display: block;
  color: white;
  text-align: center;
  padding: 14px 16px;
  text-decoration: none;
}

li a:hover {
  background-color: #111;
}

.active {
  background-color: #4CAF50;
}Save the file and check the app in the browser. The navigation bar should look dramatically different! Here is the About page showing how the active link is highlighted:

Here is a .zip archive containing the directories and files that we worked with today.
Conclusion
In this tutorial we learned how to setup links between our EmberJS app pages using a custom component. In the next instalment we’ll add some videos to the rentals page. Although we alluded to models in the Working with Data Models and Routes in EmberJS article, we’ll get into the nitty-gritty next time.
