Connect to a Database from your Java Enterprise Applications
In the Persistence in Java EE Applications tutorial, we were introduced to the Java Persistence API (JPA), which is a persistence interface that leaves the implementation to the individual providers. One such provider is ObjectDB. It’s a great storage option for starting out with Java EE projects because it’s a pure Java Object Database. If you want to learn more about PJA, take a look at the previous tutorial to get your project setup in Eclipse. In today’s follow-up, we’re going to create a JUnit test for making sure that the database is working properly.
The PersistenceTests Class
To perform our connectivity tests, we’ll be using Eclipse’s built-in JUnit facilities. It allows you to perform tests on your classes using pojos (Plain Ole’ Java Objects) by inserting annotations. Our class, named PersistenceTests.java, will reside within its own source folder so as to not be mixed in with the classes that it tests.
Creating the Class
- Right-click your project folder in the Project Explorer and select New > Source Folder from the popup menu:
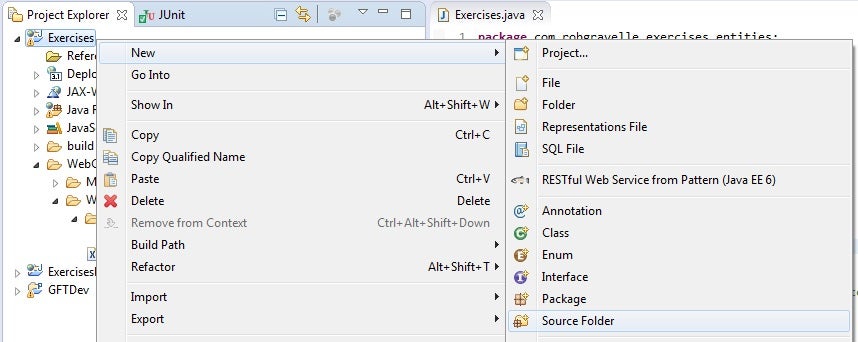
- On the New Source Folder Dialog, enter a Folder Name of “tests” and click Finnish to close the dialog and create the tests source folder.
- Expand the “Java Resources” folder and right-click the newly-created tests folder and select New > Package from the popup menu:
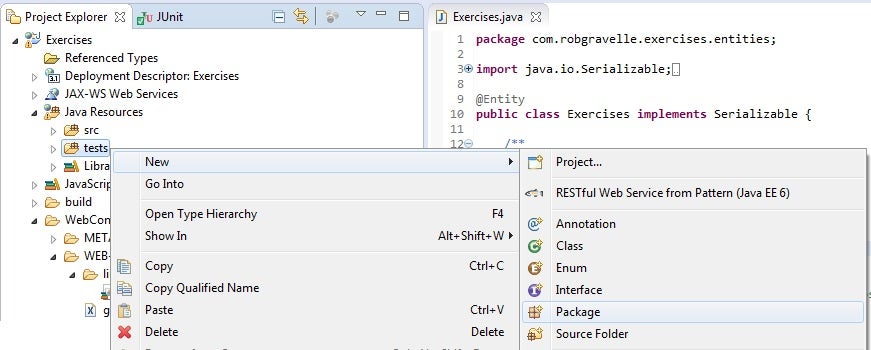
- On the New Java Package dialog, name your package “com.robgravelle.exercises” so that it mimics the layout of the main package structure.
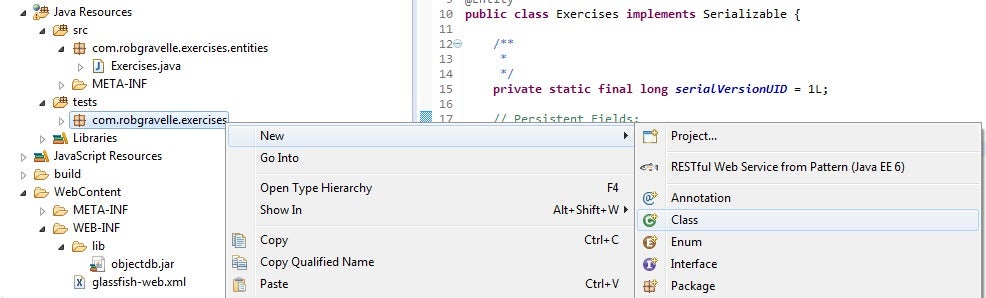
- Now we’re ready to create the test class. Right-click the new package and select New > Class from the popup menu. As mentioned above, no special class is required to run tests. A regular one will work just fine!
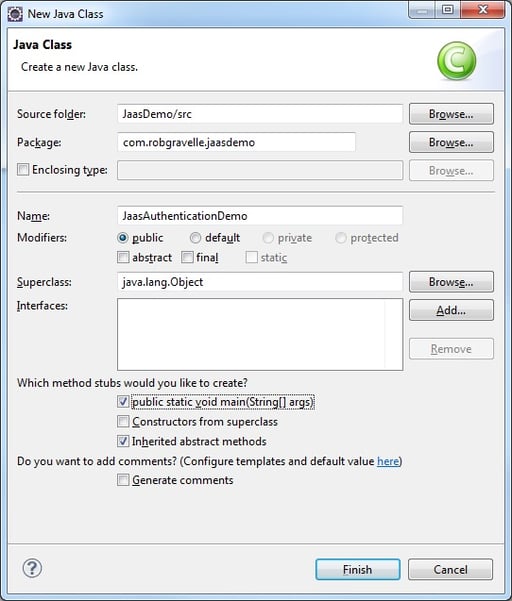
- On the New Java Class dialog, enter “PersistenceTests” in the Name field and click finish to close the dialog and create the class. Thanks to annotations, you don’t even need to extend a particular class.
- Click Finnish to close the dialog and create the new class.
Coding the Class
We’ve now got a basic working class, ready to be turned into a test class.
package com.robgravelle.exercises;

public class PersistenceTests {

        public PersistenceTests() {
                // TODO Auto-generated constructor stub
        }

}
Let’s begin by declaring some objects that we’ll need to configure the database; these are the EntityManagerFactory and the EntityManager:
public class PersistenceTests {
private static EntityManagerFactory mEmf;
private static EntityManager mEntityManager;
The main role of an EntityManagerFactory instance is to create EntityManager instances. An EntityManagerFactory is constructed for a specific database, and provides an efficient way to construct one or more EntityManager instances for that database. The instantiation of the EntityManagerFactory itself is only done once and can serve the entire application.
The @BeforeClass Method
Placing the @BeforeClass annotation immediately preceding a method designates it as the initialization method for the entire class. As such, it executes only one time, before any tests are run.
The createEntityManagerFactory() method can accept either a name of a persistence unit (as supplied via the persistence.xml file) or a database url (or path) directly. The database path is our best bet for conducting simple tests because it bypasses the need for a persistence unit. ObjectDB considers any string that starts with “objectdb:” or ends with “.odb” or “.objectdb” to be a database url/path rather than a persistence unit name. The database path may be absolute relative. You don’t need to include the “objectdb:” protocol prefix if the database file name extension is “.odb” or “.objectdb” but it doesn’t hurt if you do as in the code below:
@BeforeClass
public static void initTestFixture() throws Exception {
mEmf = Persistence.createEntityManagerFactory("objectdb:$objectdb/db/exercises_test.odb;drop");
Map<String, String> properties = new HashMap<String, String>();
properties.put("javax.persistence.jdbc.user", "admin");
properties.put("javax.persistence.jdbc.password", "admin");
mEntityManager = mEmf.createEntityManager(properties);
}
The “$objectdb” variable in the path above refers to the root of the objectdb installation directory. Appending the drop command after the semi-colon deletes any existing database content from previous tests.
User credentials can either be included in the connection string as in “objectdb://localhost/myDbFile.odb;user=admin;password=admin” or via the createEntityManager() method’s properties argument. It accepts a Map of properties where each key is a specially formatted string..
A Simple Persistence Test
Our test will save our Exercises Entity class to the database and then retrieve it immediately. We will then confirm that the retrieved class is not null using the JUnit assertNotNull() method.
Saving an entity is a three-step process. First, we obtain a reference to the resource-level EntityTransaction object. The EntityTransaction instance may then be utilized to begin and commit transactions. The next step is to call the EntityManager’s persist() method, passing in the object. Finally, we invoke the EntityTransaction object’s commit() method to complete the transaction. Assuming that all went well, we should then be able to retrieve the saved object using the EntityManager’s find() method. It accepts a variety of arguments; the one we are using passes the Entity class and the primary key. Since there is only one object in the database, the key should be 1. We can then pass the retrieved object to assertNotNull() to verify whether or not we obtained a non-null object.
        @Test
        public void testPersistence() {
                Exercises exercise = null;
                try {
                        mEntityManager.getTransaction().begin();

                        exercise = new Exercises("Bench Press", "chest", "front delts, triceps, lats", "barbell", "compound", "pushing");
                        mEntityManager.persist(exercise);

                        mEntityManager.getTransaction().commit();

                        exercise = mEntityManager.find(Exercises.class, 1);
                } catch (Exception e) {
                        fail();
                }

                assertNotNull(exercise);
        }
Cleaning Up
After running our test(s), we should close the Entity Manager and factory. That can be done in the method preceeded by the @AfterClass annotation. That method will be called after all of the tests in the class have been run, sort of like the finally block after a try/catch.
@AfterClass
public static void closeTestFixture() {
   mEntityManager.close();
   mEmf.close();
}
Running the Test(s)
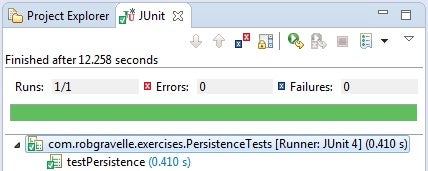
To run your test class, right-click anywhere in the source code and select Run As > JUnit Test from the popup menu. If all goes well, you should see a green bar in the JUnit view:
Conclusion
Now that we know how to save and retrieve Entity classes from the database, we can create the persistence.xml file and use it to set our real database properties. That will be the topic of the next instalment.