In my previous article, Web-based VR Made Simple with A-Frame, you learned how to use A-Frame to create a few simple objects that would be displayed within the browser as a virtual reality scene. Using a VR device such as a phone or Oculus, you would be able to load the created scenes and look around. In this article, you are going to see how easy it is to move the shapes you’ve created into a more “full world” environment. In fact, by using A-Frame, you can create an enticing virtual scene with just a few more lines of HTML.
Preexisting Environments in A-Frame
The quickest way to go from what appears like a few shapes in VR to more of a virtual world is to tap into existing environments. By including another file in your web page, you can add preexisting environments, such as a forest. Listing 1 is pulled from the previous article and displays a snowman. This listing has been modified, however, to put the snowman into a forest.
Listing 1: Using a preexisting A-Frame environment
<html>
  <head>
    <script src="https://aframe.io/releases/1.0.2/aframe.min.js"></script>
    <script src="https://unpkg.com/aframe-environment-component@1.1.0/dist/aframe-environment-component.min.js"></script>
  </head>
  <body>
    <a-scene environment="preset: forest; dressingAmount: 500" >

      <a-box position="-1 0.5 -3" rotation="0 45 0" color="#FFFF00" shadow></a-box>
      <a-sphere position="1 1.25 -5" radius="1.25" color="#FFFFFF" shadow></a-sphere>
      <a-sphere position="1 3.00 -5" radius="1.00" color="#FFFFFF" shadow></a-sphere>
      <a-sphere position="1 4.50 -5" radius=".75" color="#FFFFFF" shadow></a-sphere>
      <a-sphere position="1 3.00 -4.01" radius=".05" color="#000000" shadow></a-sphere>
      <a-sphere position="1 3.20 -4.04" radius=".05" color="#000000" shadow></a-sphere>
      <a-sphere position="1 2.80 -4.05" radius=".05" color="#000000" shadow></a-sphere>
      <a-sphere position="1.05 4.30 -4.05" radius=".06" color="#000000" shadow></a-sphere>
      <a-sphere position=".80 4.30 -4.05" radius=".06" color="#000000" shadow></a-sphere>
      <a-cylinder position="1 4.75 -5" radius="0.5" height="1.5" color="#000000" shadow></a-cylinder>
      <a-cylinder position="1 4.75 -5" radius="1.0" height=".01" color="#000000" shadow></a-cylinder>
    </a-scene>
  </body>
</html>
Three changes were made to this listing from what was presented in the first article. First, a new script was included in the page header:
<script src="https://unpkg.com/aframe-environment-component@1.1.0/dist/aframe-environment-component.min.js"></script>
This header includes the scripting needed to support the environments.
The second change was in the a-scene tag. The background color was dropped since it was no longer needed, and it was replaced with an environment attribute. This attribute included information to use a preset environment of forest and to use a dressingAmount of 500. In short, it builds a forest with 500 trees of various sizes as can be seen in the following figure:
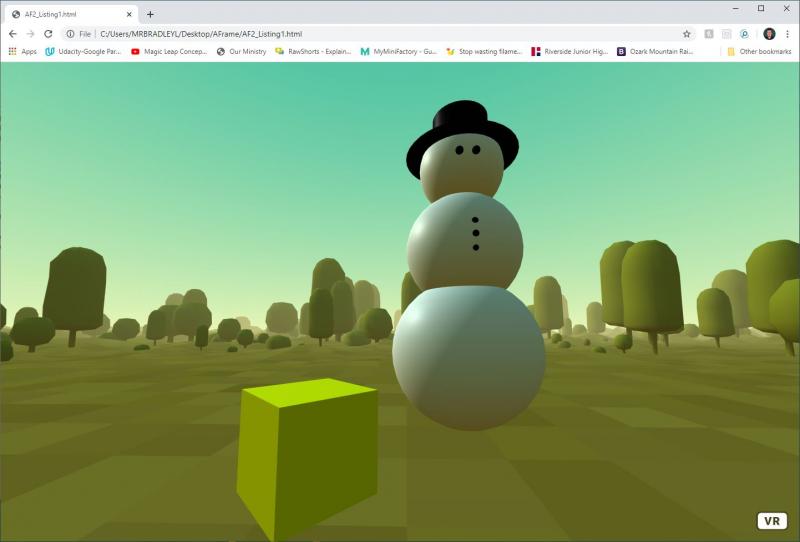
This is a virtual world, so if you use a VR headset or scroll around it with your mouse, you’ll see that there are trees all around the snowman and box. In fact, there are 500 of them!
The third change that was made was the removal of the plane object. Because the forest preset provides a ground, there was no need for the plane to remain in the scene.
Other Preset Environment
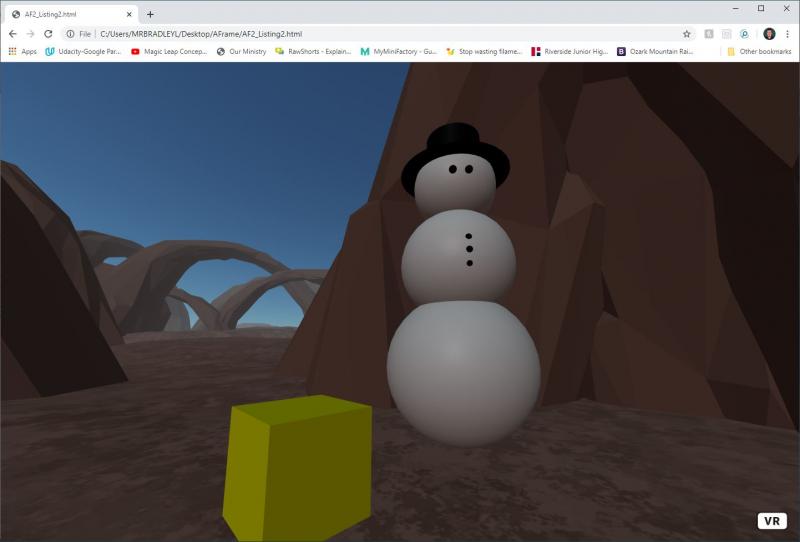
For the forest you’ve created, you can adjust the dressingAmount to add or remove the number of trees. You can also change the value for preset to change the world you are in. Both of these changes can be illustrated by changing the initial a-scene line in listing 1 to the following:
<a-scene environment="preset: arches; dressingAmount: 50 " >
When you display the page with these changes, you will see that the forest has been change to arches, and instead of 500 arches, the number has been dropped to a more reasonable 50. With two simple changes, your snowman and box are now in a world of arches instead of a forest!
Of course, the big question you are likely asking is, what presets are available? The following is a list of some of the values that can be used for preset:
- none
- default (which is none)
- arches
- checkerboard
- dream
- egypt
- forest
- goaland
- goldmine
- japan
- osiris
- poison
- starry
- threetowers
- tron
- volcano
- yavapai
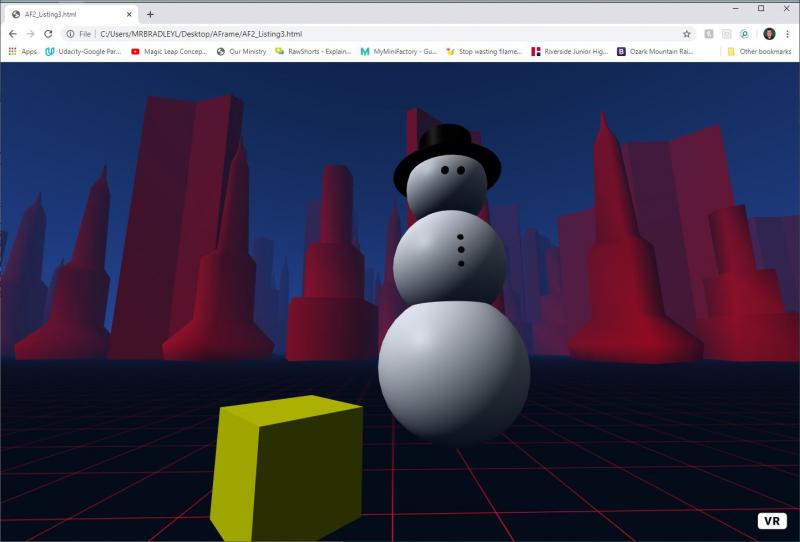
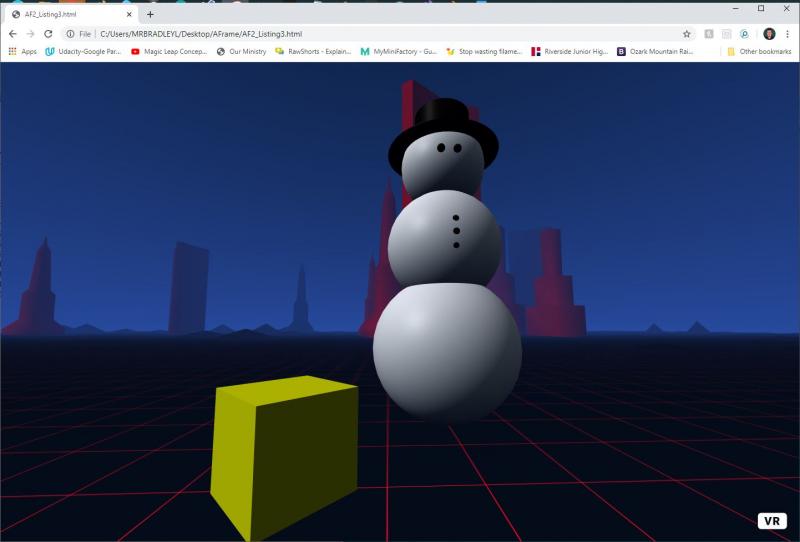
If you choose to use the preset environments, then as mentioned, the dressingAmount value is the main additional attribute you’ll want to set. If you find performance of your VR world is slow, then the dressingAmount is also the attribute to adjust to a lower value first. You’ll also want to find a number of preset elements that gives you the feel you want for your world. The following images show the tron preset world with 500 versus 50 dressings:
A Few Other Environment Attributes
There are a number of other attributes beyond the preset and the dressingAmount that you can set for the preexisting environments. A few of the key value you can set include:
- dressingColor: This is the base color used to create the dressing objects.
- groundColor: This is the six-digit hex code for the main color of the ground
- groundColor2: This is a hex value for the secondary color of the ground if the ground has texture. If the ground doesn’t have a texture, then this color is ignored.
- dressing: This is the type of additional objects being used in the scene for decoration. For example, in the forest, trees are being used as the dressing. The values for this are none, cubes, pyramids, cylinders, towers, mushrooms, trees, apparatus, and torii. If you load the forest and include a dressing value of pyramids, then you will have a world of pyramids instead of trees. Changing the scene environment line in Listing 1 to the following results in such a chance as shown in the image that follows as well.
<a-scene environment="preset: forest; dressingAmount: 500; dressing: pyramids" >

Where to Go from Here
You could create all the features in the preset environments on your own. In general, however, the included scripting file will likely operate more efficiently to create these worlds than the code and texture loading that most people would create.
As you’ve seen, using A-Frame, with about a dozen lines of code, you can create an entity and put it into a variety of virtual worlds. The listing presented in this article can be run on most modern desktop browsers as well as on VR equipment. If you pull up the web page on your VR browser, you’ll not only see what you’ve built, but you will also be able to take a 360-degree look.
Of course, a static world is just the beginning. The next steps are to place additional elements within your virtual world and then be able to move amongst them! Of course, A-Frame allows you to control the camera, so that can be done as well! Stay tuned for that in a future article on A-Frame!


