Introduction
In many situations, it is required to present the user to choose from a range of valid values. For example, the user has to choose a rating from 1 to 5, or a percentage, or a value from a possible range of valid inputs. To make things easy for users, HTML5 specification supports range as a first class type on the input element.
Historically, to mimic a range/slider on a web pages, web developers had to use javascript or custom plugin. However, with HTML5, there is now direct support for range like input.
The HTML5 spec says
The HTML5 spec describes range as a type attribute on the input element whose value is “range” and represents an imprecise control for settling the element’s value to a string representing a number.
Source: http://dev.w3.org/html5/markup/input.range.html
The following attributes are permitted on an input element which has the “range” type.
All global attributes:
- Name (which is a string)
- Disabled – valid values are “disabled”, “” or empty
- Form – which take an value of the id attribute on the form
- Autocomplete – valid values are “on” or “off”
- Autofocus – valid values are “autofocus”, “” or empty
- List – value of id attribute on a datalist element.
- Min – a floating point number
- Max – a floating point number
- Step – valid value is any” or a positive floating number
An input element with “range” type can be a child of any phrasing element.
Hands On
Range types can be declared as simple as under:
<input id=”myRange” type=”range”>
A simple HTML5 web page which illustrates range type is listed below
<!DOCTYPE html>
<html>
<body>
<header>
<h1>Range demo</h1>
<p>Demo showing range type on input element</p>
</header>
<footer>
<h1></h1>
<p>HTML Goodies</p>
</footer>
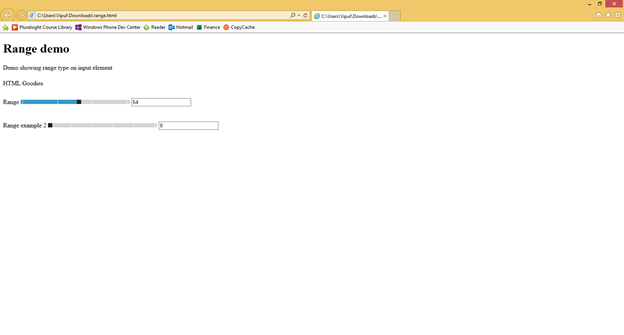
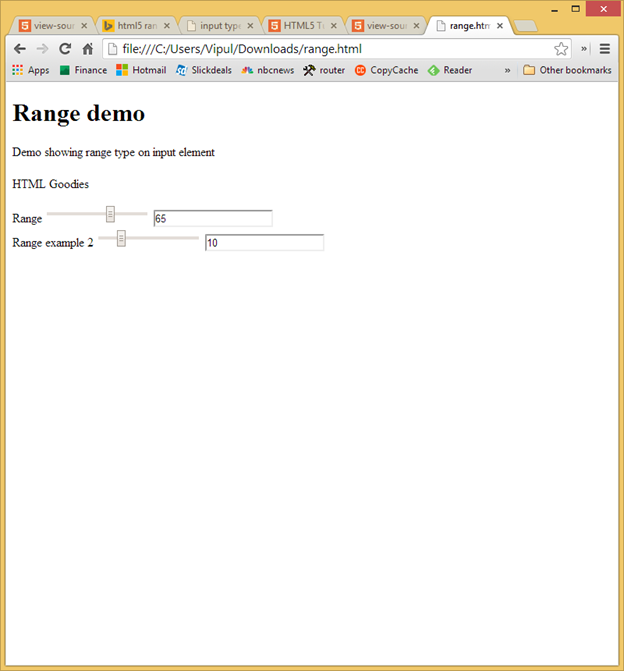
Range
<input id=”example1” type=”range” min=”1” max=”100” step=”1” onchange=”textbox1.value = example1.value” />
<input id=”textbox1” type=”text” />
<br>
Range example 2
<input id=”example2” type=”range” min=”0” max=”50” step=”10” onchange=”textbox2.value = example2.value” />
<input id=”textbox2” type=”text” />
</body>
</html>
When the page is rendered in a modern browser which supports HTML5, you can see the range input type in action.
For the first slider, you can step 1 and see the corresponding value of the slider printed on the adjoining textbox.
For the second slider, you can only step in 10s.
The page is rendered as below on Internet Explorer 11.
On Google Chrome, it is rendered as below.
Input elements with range type only support numbers to be part of the range.
Summary
In this article, we learned how to use the range type on input elements in web pages to mimic the slider experience. I hope you have found this information useful.
About the author
Vipul Patel is a Program Manager currently working at Amazon Corporation. He has formerly worked at Microsoft in the Lync team and in the .NET team (in the Base Class libraries and the Debugging and Profiling team). He can be reached at vipul.patel@hotmail.com


