Sometimes reading an entire file into memory isn’t the most efficient way to go. As you can well imagine, reading several very large files into memory is a time consuming and expensive proposition. Before going down that road ask yourself if maybe you could just read part of the file. Thanks to the JavaScript FileReader API’s slice() method, it is possible to break large files down into chunks on the client-side, before uploading data to the server and taking up precious network bandwidth.
You might look at today’s lesson as two-in-one because, not only are we going to learn how to use the slice() function, but we’re going to put it to good use to determine an image type by looking at the first four bytes of the file, using a process called the “magic number” technique.
Real Life Application
This isn’t some pie-in-the-sky example made up to learn a concept. I used the “magic number” technique myself just a short time ago, only in Java. The issue there was that there were no extensions to go by because all files were saved using a specific naming convention. This limitation aside, the file extension is not a reliable way to determine the image type because it’s easily changed. Suppose that the only image type supported by the system was JPEG. Some end-user would inevitably try and upload a file with a different image format by renaming the file extension. This kind of trickery is called gaming, and it happens all the time!
A Slice() for Every Browser
The slice() method is a member of the File object that is returned as part of the file input element’s File collection. Slice() accepts a start parameter for the value for the first byte, and a length parameter, which denotes the end point of the slice as byte offsets from start. The function returns a new Blob object between the ranges of bytes specified.
Unfortunately, you can’t just call the slice() function directly because different browsers have implemented it differently. In Firefox, it was replaced by mozSlice(), and Google Chrome substituted webkitSlice() in its place. Both these functions share one important difference in the second input parameter: whereas in the slice() function, it’s the length of block that should be loaded, in the mozSlice() and webkitSlice() functions, it’s the end position of block – ergo: length + start position. We could write a lot of code to decide which function to call and calculate the end position every time we call slice(), or, we can create our own slice() function by overriding the File’s prototype property like so:
  if (!File.prototype.slice) {
      var newSlice = File.prototype.mozSlice || File.prototype.webkitSlice;
      if ( newSlice ) {
          File.prototype.slice = (function() {
              return function(startingByte, length) {
                  return newSlice.call( this, startingByte, length + startingByte );
              };
          })();
      } else {
          throw "File.slice() not supported."
      }
  }
Now calling to File.slice() will work the same across different browsers.
Calling Our Slice() Method
Ideally, you would add an event listener to the file input element’s onchange() event, but for the purposes of this tutorial, we’ll just include the onchange attribute to the control’s tag as to avoid the differences in event handling models across browsers. We can thus pass the first selected file in the files array using the code “this.files[0]”. Calling the slice() method with a start of zero and a length of four returns a blob which contains the first four bytes of the file. We can then pass that to one of the three binary read methods, readAsBinaryString(), readAsDataURL(), or readAsArrayBuffer():
<input type="file" />
<script type="text/javascript"></script>
We need to use the readAsArrayBuffer() function because file signatures are numeric and, as we’ll soon learn why, an array is the best object to hold raw binary data.
What’s the Magic Number?
File read methods are asynchronous in nature, just like Ajax calls. Therefore, we have to put the processing code in the FileReader’s onload() event, which fires once the file has been loaded into memory. The data is held in the result property. As I said above, the readAsArrayBuffer() method is the most well suited for our purposes. The reason is that we can use the new JavaScript Typed Arrays to create a buffer whose contents start at a particular offset. This effectively makes it possible to set up views of different data types to read the contents of a buffer based on the types of data at specific offsets into the buffer. In our case, we want to create an 32-bit integer using the Int32Array() function. The first element can be compared to standard image file signatures to determine the type. A classification string is assigned to our own file property called verified_type:
    reader.onload = function(e) {
      var buffer = reader.result;
      var int32View = new Int32Array(buffer);
      switch(int32View[0]) {
          case 1196314761:
              file.verified_type = "image/png";
              break;
          case 944130375:
              file.verified_type = "image/gif";
              break;
          case 544099650:
              file.verified_type = "image/bmp";
              break;
          case -520103681:
              file.verified_type = "image/jpg";
              break;
          default:
 							file.verified_type = "unknown";
              break;
      }
		};
Seeing is Believing
Just to be sure that the code works as expected, we should add some code to display the verified_type. You don’t want to mix the UI code with the processing logic, so that code should be housed in a different function. However, you can’t just call it after the getFileTypeFromFirst4Bytes() function because it’s asynchronous. What we need is a callback function:
<input type="file" />
<script type="text/javascript"></script>
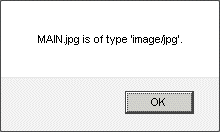
In the above code, the showFileType() function is passed to the getFileTypeFromFirst4Bytes() method to be called at the end of the FileReader.onload() event. Here is a sample result:

Conclusion
In addition to the code used above, you could also use the HTML5 DataView object and getUint32() method to convert the Array buffer into a Hex value. Although this would make the code more like that of similar C and Java “magic number” code, there isn’t enough browser support yet to make them worthwhile for the time being.


