


Let’s say you scoured the internet looking for that perfect Joomla! template and you found one that fits 99% of your needs. However, there could be one lacking element to the template that you wish you could fix. For example, let’s say the template you chose doesn’t have a Left position. Instead, the template has a very wide main column and a slimmer right column, but no left column. This article will show you how to add that Left position into your Joomla! template so that you can fill the left column with modules.
But first, let’s look at how you can create new positions on the fly. Joomla! contains a very nice feature that allows you to create new positions for a module by simply typing the new name into the Positions box. This works extremely well if you want to insert a module into an article. For example, let’s say you created a poll and you want it to appear in the article instead of in the right or left column.
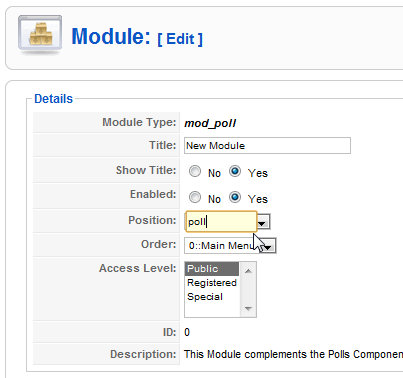
To get started, create a new module and in the Position box, type in “poll” or something relevant to the module. Make sure the module is Enabled (I don’t know how many times I’ve forgotten to do that…). Also make sure that the module will appear in all menus. Don’t worry about the new module showing up on every page. Since you created a new position, that position has not been assigned to show up on any pages, it will only show up in the article you embed it in.
Now, create a new article and at the end of the article type in: {loadposition poll}
Replace “poll” with whatever you named your position. Make sure the article is set to publish and then Preview your site. The new article should contain the newly created module. If you assign more than one module to the “poll” position, then all modules assigned to the “poll” position will appear anytime you use {loadposition poll}. You can assign the order the modules appear in from the Module Manager.
Now let’s get back to creating a new position within the template. You’ll want to do this if you want modules to appear in a position that your template does not currently have, and you do not want modules to appear in articles. This is the case of the Fiction template from Joomshaper. This is how my personal site appeared before I added in the left column:
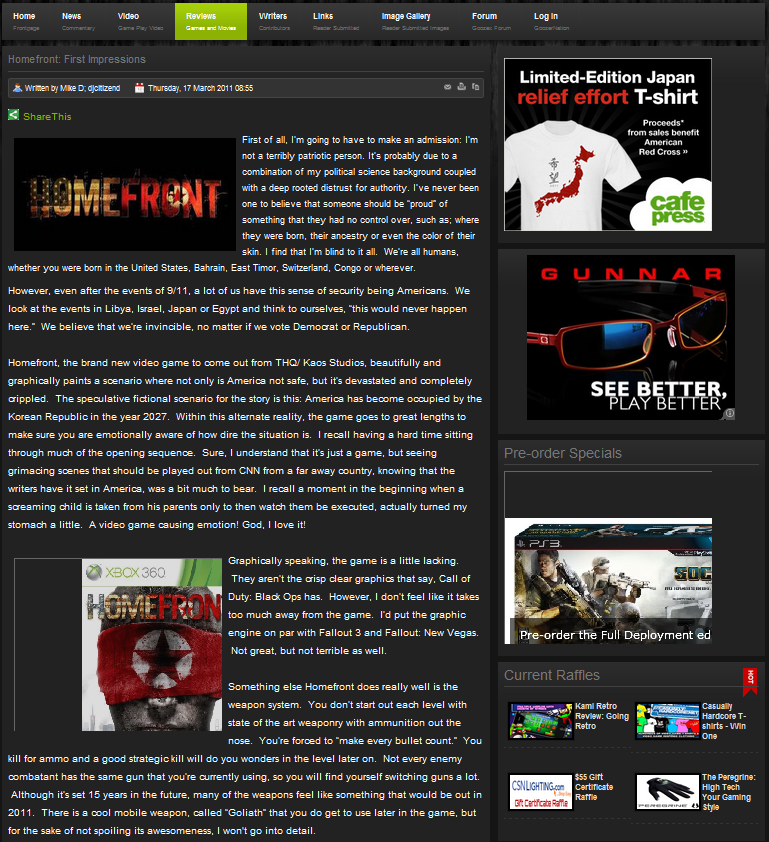
You will notice that I have all of my ads and additional links to site content all jammed up in the right column. The problem is, I want to put in additional modules there, but the Contributors to the site tend to write short blog posts. Therefore, I wind up with a very long right column, which extends much further down the page than the article. To fix this, I want my site-content modules such as Current Raffles, Most Popular, Facebook, etc. to appear in the left column, have the article in the middle, and all of the ads and affiliates in the right column. That should help even out the page and allow more space for more modules.
My first step was to transfer all of the template folders and files to my localhost to do the testing. There’s no way I was going to test something like this on my live site. With the Fiction template files in the Template folder of my localhost, I went into Joomla! and assigned it as the default template. When I previewed my localhost, I saw this:

This is basically the Fiction template with only one test article for content. So far, so good. Now let’s add in that left position to which we can add modules. If all goes well, the next screenshot will show the Most Read Content in the left column. If you haven’t read my first two articles on creating a Joomla! template from scratch, now might be a good time to review those articles. That way, you’ll be current for the following information. The first article is called, “Crash Course: Create a Joomla Template From Scratch” and the second is called, “Crash Course: Refining Your Joomla! Template“. If we learned our lessons well from those two articles, adding a new position should be easy…
Let’s start by opening the templateDetails.xml file. The first thing that I noticed is that the <position>left</position> was not present. So, I added <position>left</position> to the list of existing positions within the <positions> tags. I then saved and closed that file.
Next, I opened the index.php file and searched for the include for the right module. Basically, I want the same characteristics of the right module and recreate them for the left module. This is what I found:
<?php if ($this->countModules ( 'right' )) : ?>
		<div id="right">
			<jdoc:include type="modules" name="right" style="sp_rounded" />
		</div>
<?php endif; ?>
I copied and pasted that and changed “right” to “left.” I also moved the left include to appear before the article component. The order the <divs> appear in does affect the order of the content on the site. Here’s the code for the main content of the site:
<div class="main-bg">
		<?php if ($this->countModules ( 'left' )) : ?>
		<div id="left">
			<jdoc:include type="modules" name="left" style="sp_rounded" />
		</div>
		<?php endif; ?>
		<div id="container<?php echo $contentwidth; ?>">
			<jdoc:include type="message" />
			<jdoc:include type="component" />
			<div class="clr"></div>
		</div>
		<?php if ($this->countModules ( 'right' )) : ?>
		<div id="right">
			<jdoc:include type="modules" name="right" style="sp_rounded" />
		</div>
		<?php endif; ?>
		<div class="clr"></div>
	</div>
I saved and closed the file.
Then I opened the template.css file and searched for #right to find how the right column is defined in the css. This is what I found:
#right{float:right; width:35%; overflow:hidden;margin-left:1%;}
I copied and pasted that and changed “right” to “left”. Now that I know the right column consists of 35% width, and my new left column also consists of 35%, I needed to change the #container from 64% to 30%. You might notice that 64 + 35 = 99. You might be wondering where that other 1% went. If you look closely at the #right definition, you’ll see a margin-left of 1%. With the addition of the #left definition, that also added a margin of 1%, which should be changed to a right margin. Therefore, I changed #left to 33%. Now I have 33 + 30 + 35 = 98, and the two margins add up to a round 100%. Here’s the code:
#right{float:right; width:35%; overflow:hidden;margin-left:1%;}
#left{float:left; width:33%; overflow:hidden;margin-right:1%;}
#container80{width:30%; float:left;overflow:hidden;}
I didn’t quite like the way the middle column was so skinny, so I fidgeted the numbers around so that the left column was 25 and the container was 38. Here’s the result:
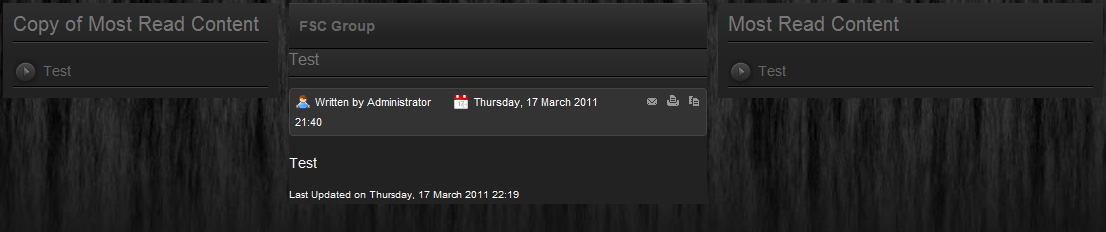
I now have a left-column position that I can fill with modules. Next, I copied the three updated files to my live site via ftp. I then updated my content modules that were in the right position to the left position and voila — it all worked as planned. To see the updated site with all three columns, you can visit GoozerNation.
