


When building a web site, there are many things that go into the layout. In my case, I use Adobe Dreamweaver, so I’m able to take advantage of some of the software tools, such as the pre-formatted cascading style sheet (CSS) layouts. When it comes to creating menus, that’s a different story and I find that building those can be quite time intensive. Looking for a solution, I found CSS Tab Designer 2.
The name says it all. This program is for creating menu designs that you can cut and paste into your web design. Best of all, it’s free and you can get it here.
Using CSS Tab Designer 2 To Create a Menu
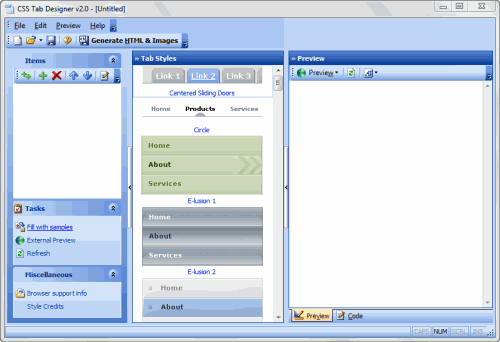
When you launch the program, this is what you’ll see.
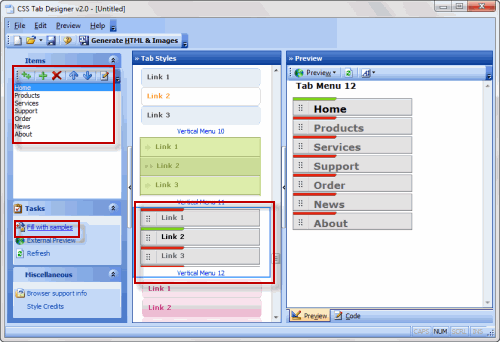
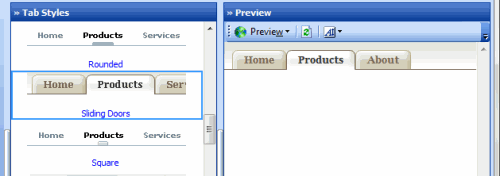
Using the program is pretty straightforward. Under Tab Styles you’ll see several menu layouts. Some are in a horizontal format. Others are in a vertical format. To see what any given menu will look like, click on one in the Tab Styles pane, then click on the Fill with Samples link. The menu will appear on the right in the Preview window and in the far left, under Items, you’ll see a list of the menu tabs, all of which can be edited.

To see an external preview of the menu, go to Preview and in the drop down list, choose which browser you want to use.
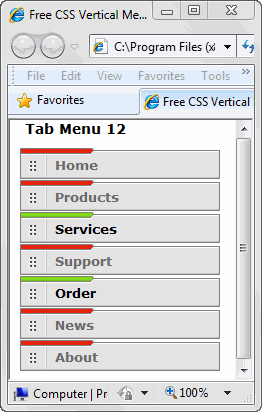
The preview will be displayed in that browser. Directly below the Items name are several control icons. From left to right, these allow you to:
Add multiple items
Add one item
Delete item
Move up
Move down
Edit Selected Item
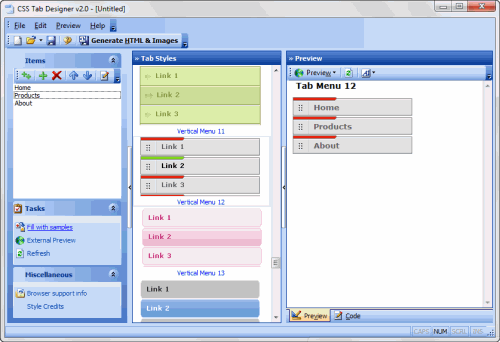
For the sake of simplicity, I’m going to remove a few items from the Items list by highlighting the item, then clicking on the Delete icon. As you add or delete items, the results are instantly reflected in the Preview pane.
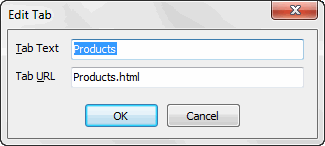
Now, we’re going to look at the Edit tool. Simply highlight an item in the list, then click on the Edit button. This brings up the Edit Tab dialog box and you can quickly change the name of the item and the Tab URL.
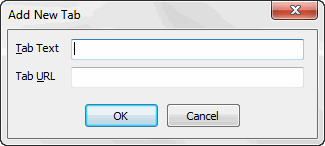
To add a new item to the list, click on Add Item button. In the dialog box that appears, enter the name of the item and the Tab URL. If you’re not satisfied with the item position. highlight it, then click on the Move Up or Move Down icons to change the position.

To control the font size, use the Preview pane. At the top right is a button that allows you to quickly change the font size. If you want more control over the text, you’ll have to edit the CSS. This will give you more control over the size of the font, the font itself and more.
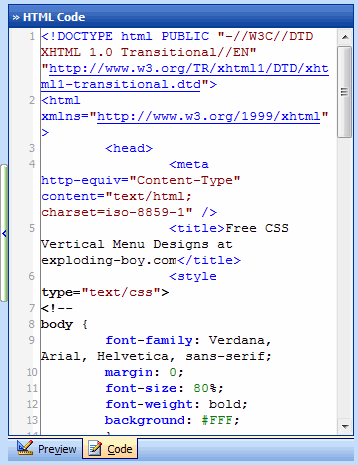
In the Preview pane you’ll notice two tabs at the bottom of the pane. One is for a preview of the layout, the other is for the code. When I click on the code tab, you’ll see the HTML code, which also includes the CSS. When you’re satisfied with your layout and you want to export it, click on the Generate HTML & Images button or go to File: Generate HTML & Images (F8) and save the file. An option is to use Ctrl+C to copy the information to the clipboard for use in a layout.
Dreamweaver Integration: Adding Your Menu To a Page Layout
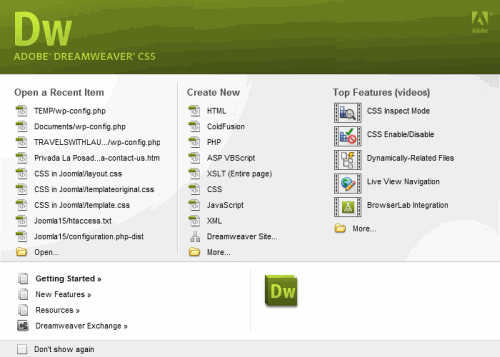
In this next section, I chose to use Dreamweaver CS5 for my layout. When you start up Dreamweaver, you’re presented with this starting page. Click on the More button at the bottom of the Create New column.
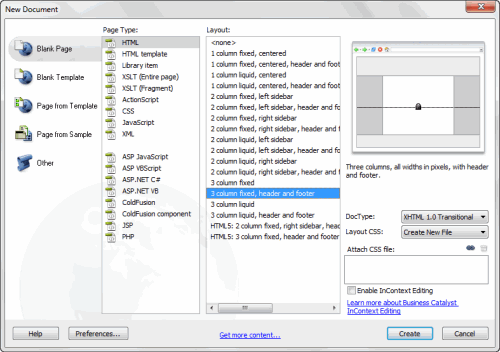
This brings up the New Document dialog box. Under the Layout heading, you’ll see various layout options. In this case, what I wanted was the three column fixed, header and footer layout. You can see a preview on the top right. Once you’re satisfied with your choice, click on the Create button.
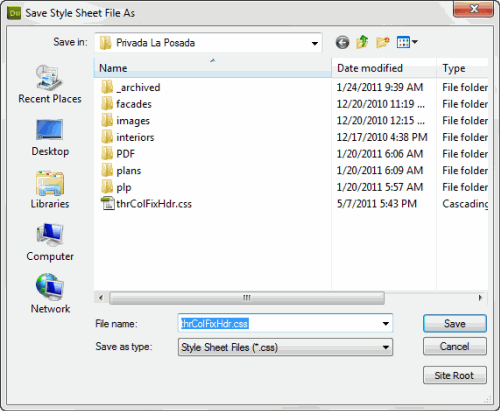
Immediately after that, a Save Style Sheet As dialog box will appear with the file name already chosen. You can change that file name if you wish.
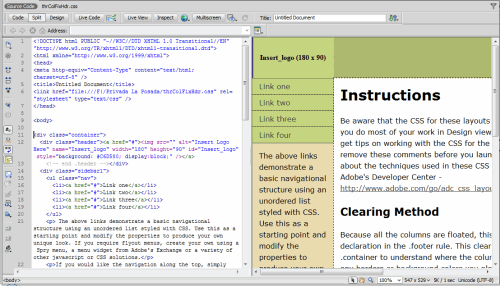
When you click on Save, the dialog box disappears and you’re taken to the Dreamweaver layout, where you’ll see both the Code view and the design, side-by-side.
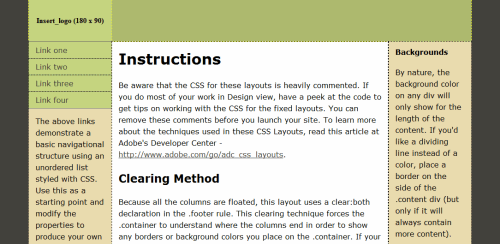
To see the Code or Design by itself, click on either button at the top left of the document. Here’s the design by itself, which is the foundation for what I want to build.
Now that I have this layout, I’m ready to copy over my information from the CSS Tab Designer program. A few months ago, I was asked to build a simple website for a real estate developer. My first step was to create the layout in Dreamweaver, using the template you see here. The second step was to use CSS Tab Designer to create the menu design.
Here’s the layout that I chose in CSS Tab Designer 2.
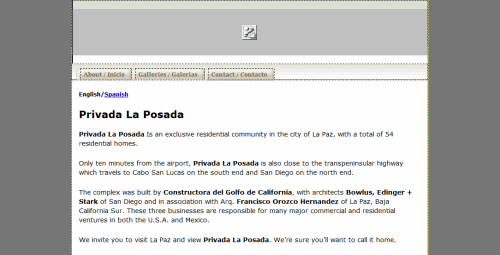
And here’s the web page layout in Dreamweaver. first off, I erased all the placeholder text. Next, I copied over the code in two sections, the CSS first, then the menu code and place it in the right section of my document. Next, I tested it with my website and I had to reconfigure the links to work with my site. Here’s what the layout looks like in Dreamweaver.
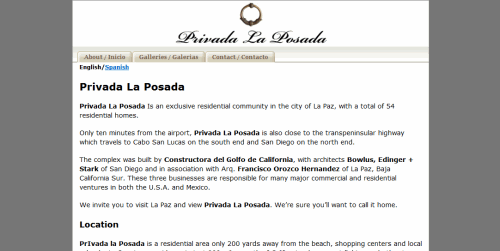
And here’s the final layout as view in Internet Explorer 8. As you can see, using CSS Tab Designer with your layouts is a fast and easy method of creating great results.
