
In this article we look at HTMLPad, an all-in-one HTML, CSS and JavaScript editor.
One thing about the installation is that the program asks about using Internet Explorer (IE) for viewing. That really surprised me. I have IE 9 on Windows 7 Home Premium and I find it to be incredibly unstable and is prone to freezing. Whenever possible, I avoid using it.
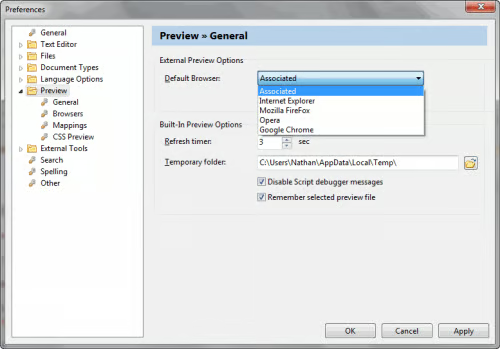
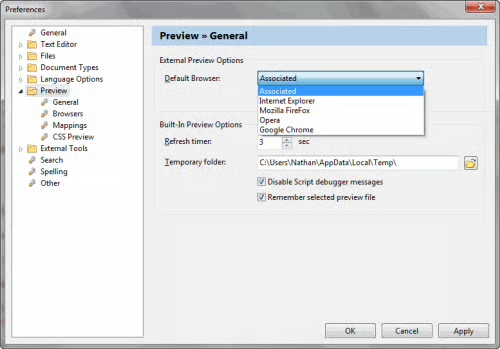
After you configure the program using the steps below, you can set the browser preview. To do so, go to: Options: Configure Browsers and in the Preferences dialog box, click on the Preview folder. As you can see in the screen shot above, your choices are: Associated, Internet Explorer, Firefox, Opera and Google Chrome.
Getting back to setting up the software, when you launch the program it takes you through several steps to configure the user interface.
Here’s the sequence:
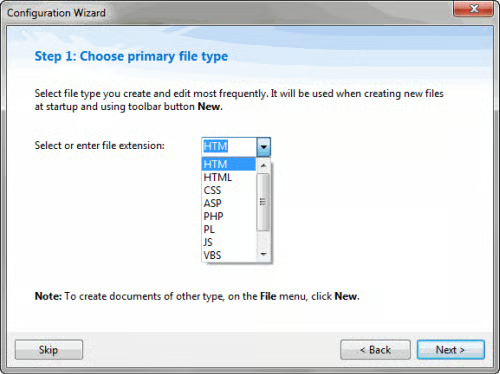
Set primary file type. This refers to the files you normally use. You can select one or all of the file types in the list above.
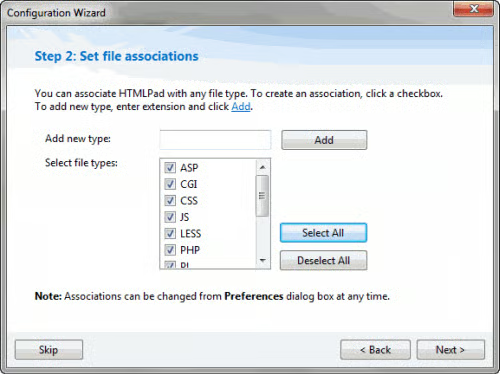
Next, you set the file associations and which one you want to use.
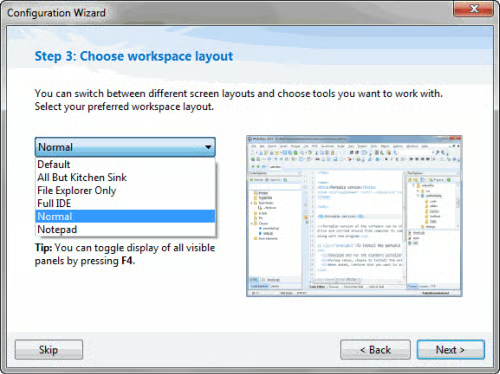
Here, you set the workspace layout. I chose the default “normal” option.
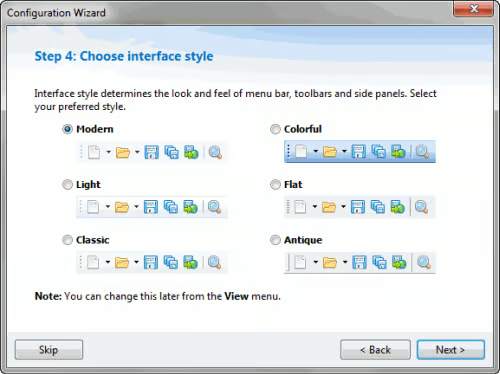
Now you choose the interface style. Again, I went with the default of “Modern.”
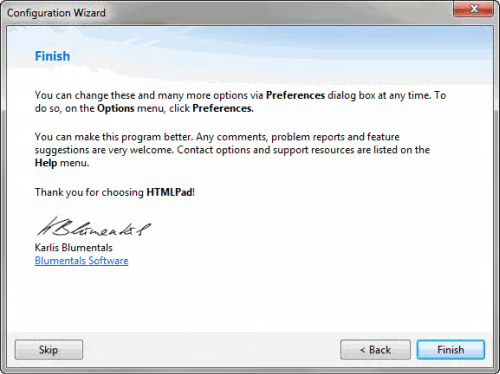
This is the last page letting you know that your setup is finished and if you want to make any changes to the layout, to Options: Preferences.
This is the finished interface, based on the selections above. Now we’re going to look at a few highlights of this program, which will make it easier create code.
One of the biggest problems with getting up to speed with coding is the learning curve. In HTMLPad, one of the ways this is addressed is through templates. When you open the file menu, you’ll see a few options. These are: New HTML Page Wizard, New Style Sheet Wizard and New from Template.
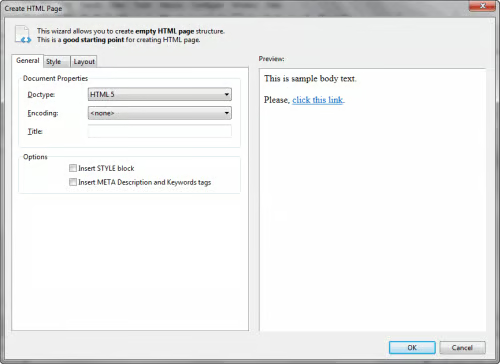
We’ll have a look at one of these options here. When you click on Create HTML page, the dialog box above, appears. And within it, you’ll notice three tabs on the top left, which are: General, Style and Layout. On the far right is a preview pane, so you can see the results of your changes.
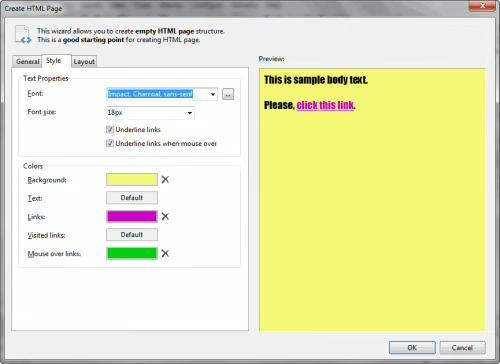
Here are some of the changes I’ve made to the template. I’ve set the DOCTYPE to HTML5, made a several changes under Style (as you can see in the screen shot above) and set the margins to 8.
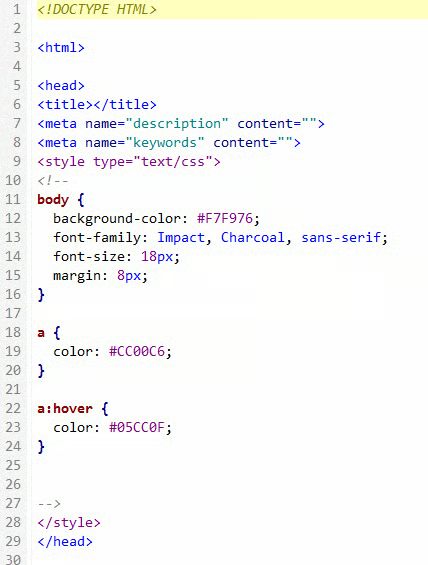
When I click on the OK button, here’s the resulting code.
Time Saving Aspects of Writing Code
One of the features that will save you time when writing code is the Auto Complete option. As you type code, the Auto Complete window will appear. You can also activate it using Ctrl+Space. Initially, it wouldn’t work in my document, but after fiddling with the settings under Tools: Preferences, it worked, but not that well. Sometimes it would kick in while typing and other times it wouldn’t work at all. The performance was unreliable, at best.
One thing I did like what when I’d type in tags such as <table>, <aside>, etc. As soon as I finished typing the first tag, the closing tag appeared, which was a time-saver.
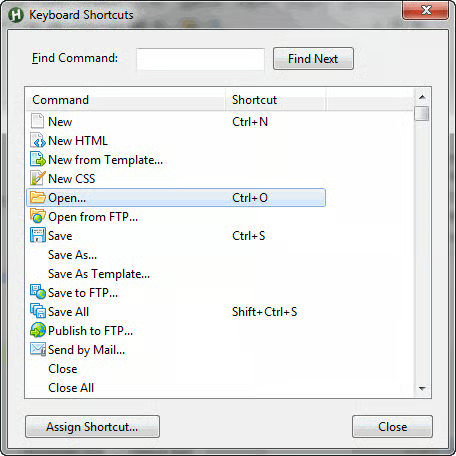
As with many programs, a way to speed up tasks is to use keyboard shortcuts and HTMLPad is no different. To set or change shortcuts, go to Options: Keyboard Shortcuts. In the Keyboard Shortcuts dialog box, click on a command and click Assign Shortcut, make the changes then click on OK and close the dialog box.
CSS Gradient Assistant
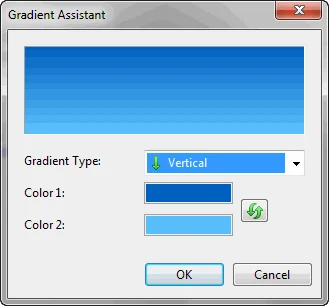
One of the new features when working with CSS is the Gradient Assistant, which you activate by going to CSS: Set Gradient Background. In the dialog box, you can set the direction of the gradient including vertical, horizontal and diagonal, you can flip the gradient so the display is from top to bottom or bottom to top and you have full control over the color using a color picker.
Text Shadow
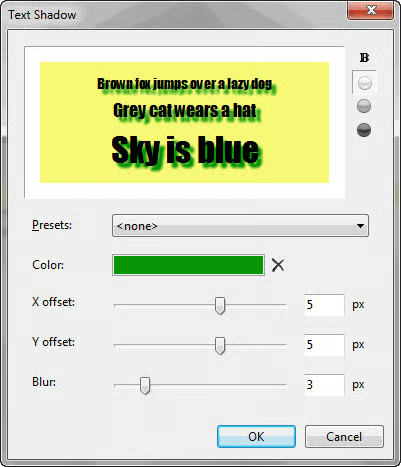
Another time-saving CSS feature is the Text Shadow dialog box. To activate it, go to CSS: Set Text Shadows. In the dialog box, you have a number of different options. At the top center is a preview window and at the far right are a number of buttons. One will allow you to bold the text and the others give you different text effects, such as white on a text shadow. The yellow background you see is from an earlier step where we set up the HTML document.
Directly below the preview window is a button where you can choose several shadow presets. Below that is a color button and this controls the color of the shadow. And below that are sliders governing the position of the shadow and the softness of the blur effect.
Validation
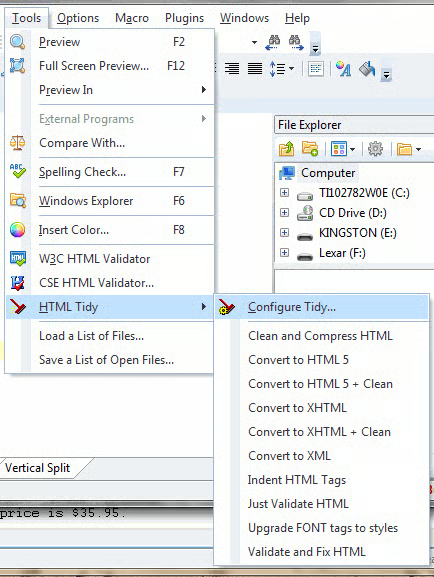
When it comes to validating your code, you’re presented with several options under the Tools menu. You’ll note the W3C HTML Validator and the CSE HTML Validator and directly below that HTML Tidy, which is used to validate and format HTML and XHTML documents. HTML Tidy can perform many tasks but each needs to be configured, first. To save time, you can use any of the pre-configured tasks.
Note: This software might not work properly with some PHP files. No mention is given in the manual as to what to look for, if this happens, though.
Conclusion
In this article we’ve only been able to touch upon a few of the highlights. I recommend that you visit the HTMLPad website for a full list of features and to demo the program. It comes with a 30 day evaluation period and when that expires, the price point of the software is only $35.95.
