


The Drupal Module “Nodes In Block” enables a user to…you guessed it, publish a node into a block on their site. The module offers handy on-the-fly customization, without needing to use Views or to install a more complex module like Panels. Moreover, the module makes it easy for content creators to manipulate content by bypassing the Drupal block administration — a concept that can intimidate users.
Best of all, this thoughtful and clever module is well supported; and the developer, Kristof De Jaeger, has pledged to have a Drupal 7 version available when Drupal 7 launches!
Now, that I’ve piqued your interest, let me give you some ideas about how you might use it and give you an overview of how to go about using it.
Remember, block flexibility on your site will depend on your theme, as the theme specifies the regions of your page layout. A typical 3-column theme (such as Drupal core themes) offers two sidebars and a middle content area. Wherever there is a region, you can place a block.
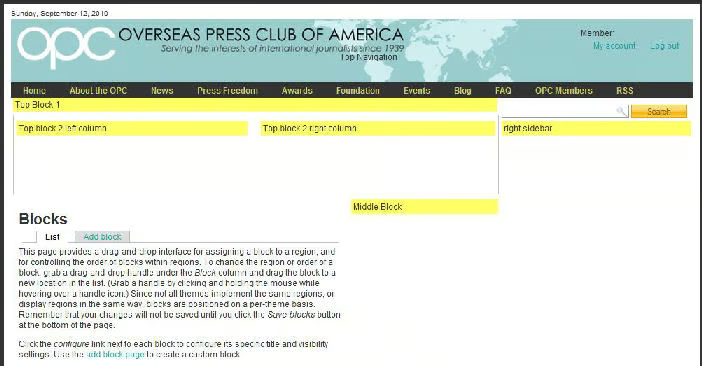
In the screenshot above, you see 3 top content-area regions. For the sake of the following use example, I’ll focus on the regions “Top block 2 left column” and “Top block 2 right column”. If you understand about blocks, which I hope at this point you do, you know that if nothing is published in a particular region, the region space is not reserved.
Case Example
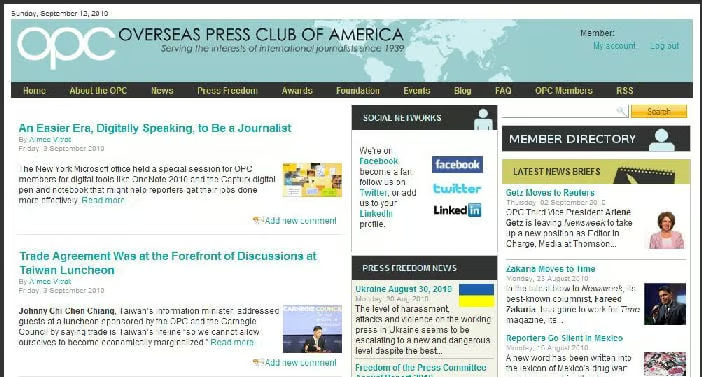
For this use case, here is a screenshot of the home page before Nodes In Block customization is used:
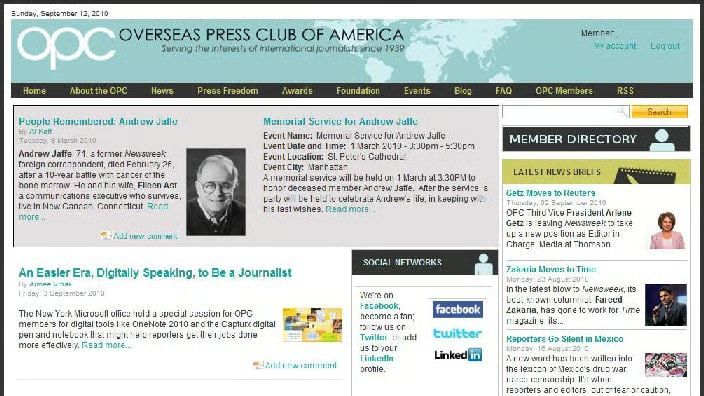
The example site has a regular page for obituaries; but on occasion, the publisher might wish to feature a death notice, such as for a prominent organization member. This is easily achieved by assigning the particular obituary story to one of the top blocks noted. There also has been an event created for a memorial service, so the publisher can place these two features side by side, as shown below.
How to Configure
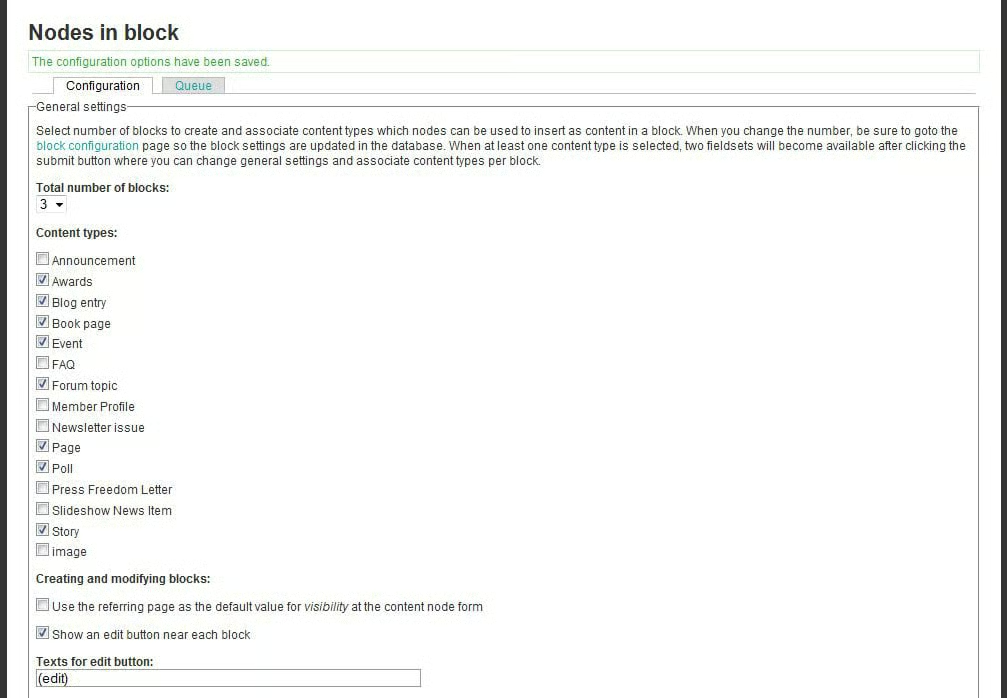
First, the site admin must configure the module. From the configuration option, you first specify how many blocks you wish to create. Then, select the content types that you want to be associated with these blocks.
After this information has been saved, your Nodes In Block blocks will be created for you to further configure. Give your blocks a friendly name — remember, this is what your content creators will see. Then, select the default setting for visibility — show on certain pages or exclude from certain pages. You have to anticipate your content creators’ use here.
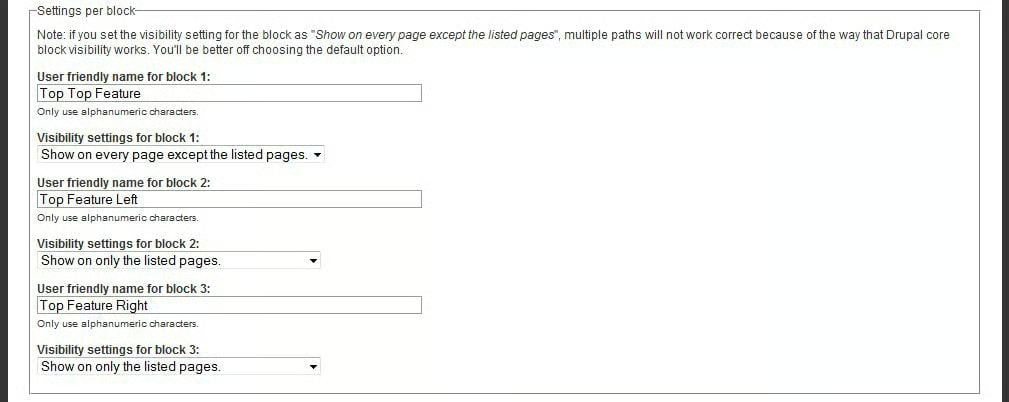
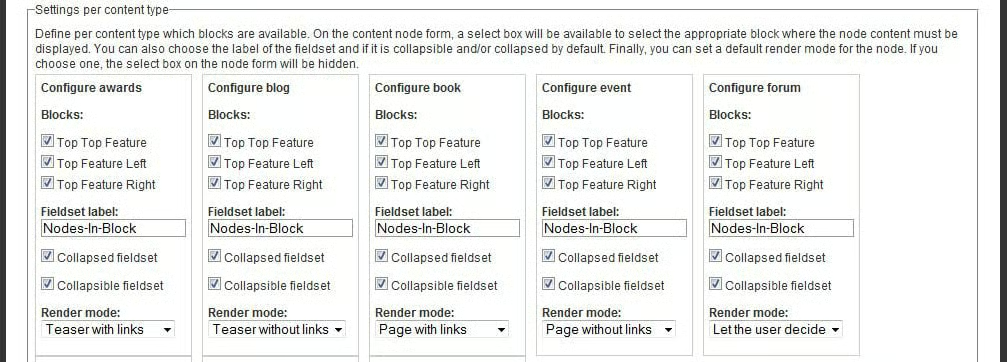
And, lastly, specify settings for the various blocks based on content type. Here, you can:
- Specify which blocks are available to each of your selected content types
- Specify a section name for the Nodes In Block configuration on the node edit form
- Choose whether that form section can be collapsed and/or the state to which it should default (collapse or expanded)
- Specify how this block, for this content type, should render: Teaser with link, Teaser without link, Page with link, Page without link, Let the user decide
What?! Are you kidding me with this flexibility?! Sweet.
The site admin will need to use the Block Administration to assign those new Nodes In Block blocks to a region of the page. And, the CSS can be modified if you’d like these blocks to have a different look. (Hey, there is even flexibility for manipulating the Nodes In Block through template files, for you theme monkeys.) Then, just leave the rest up to the content creators.
How Content Creator Deploys
Assigning a node to a Nodes In Block block is handled on the node edit form.
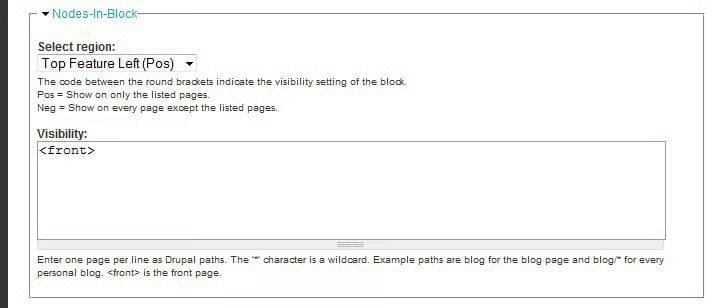
The content creator simply selects the target block, and then specifies which page(s) the node should appear in that block. If you had set the block for this content type to be excluded for certain pages, the user would be specifying the exclusions. (The visibility will likely require some user training by the site admin. The term “visibility” might not be clear, and the user must know how to obtain the page path.)
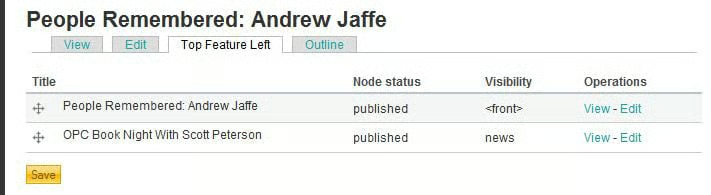
Once the content creator has enabled a block and saved the form, a new tab will appear on the form for that Nodes In Block placement (see below). This page will show all Nodes assigned for that particular Nodes In Block block, and the page on which each is set to display. If more than one block is set for a particular page, the user can adjust the order of the content items by moving them using the “handles” (cross symbol).
A site admin, or publisher (if permissions allow), can use the Queue tab under Nodes In Block administration to see the placements for all Nodes In Block blocks (see below). For convenience, the page even has links to create new content.

Other Uses
Nodes In Block can be used to place a node within a node, where you might want to display the entire page in the block, rather than only the teaser. In this case, it would be important for the theme to include an actual “content” area — some themes do not. Remember, for more advanced users, you can create a custom template to give you more flexibility with Nodes In Block placements. The module also adds an extra property to the node object, which you can use in a node template file to make theming even easier.
But, overall, Nodes In Block expands the functionality of a core block by letting the user impose other node features (such as social networking links, print or email icons, etc.) on the block content.
Summary
Nodes In Block is a sleeper module, in my opinion. It has great functionality and flexibility, and it can make content manipulation a bit easier for the content creators. And, I did mention that the module is well supported. It has few unresolved issues, and if you post feature or support requests, you can expect a very timely response. (Note: There also is a different module called “NodeBlocks”.)
