
Before we get started, it’s necessary to look at domain names and how to prepare them for use with GoMobi. When you build a mobile site, you have two domain name options: One is to use a subdomain, the other is to use a .MOBI domain.
Using a subdomain is one option and the best part is that it’s free. The down side is that in search, it might not be obvious to a user that this is a mobile domain.
In contrast, the major up side of using a .MOBI domain is that it’s clearly obvious to a user doing a search that this is a mobile site. The down side is that it costs about $6.99/year, depending on the registrar.
Before you can use either domain option with GoMobi you have to set it up first. Each domain will require similar and different steps to make them ready for use.
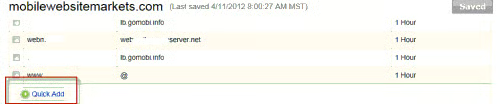
To set up a subdomain for mobile, you need to change the CNAME of the domain. I use GoDaddy for my hosting and domains. In the screen shot above, I’ve accessed the DNS Manager and I’m now in the CNAME section. To add a new entry, click on the Quick Add button.
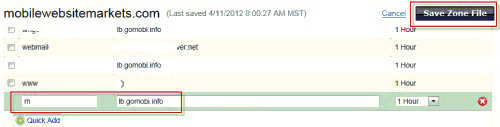
Set the Host to “m” and the Points to information to lb.gomobi.info.
This will create a subdomain which will look like this: m.yourdomain.com. This indicates that this is a mobile domain. To save your changes, click on the Save Zone File button. It will take about an hour to make the changes, then you can use the subdomain to build your mobile site.
Setting up the CNAME with a .MOBI domain is similar, except that this time, you’ll use the Host: www and make sure the Points to section is: lb.gomobi.info. After that there’s one more step. You need to set up domain forwarding. Let’s say your domain is: yourdomain.mobi. You need to go into the forwarding section of the domain and set the http:// to forward to www.yourdomain.mobi. This is in case someone types in www before the domain name in their browser.
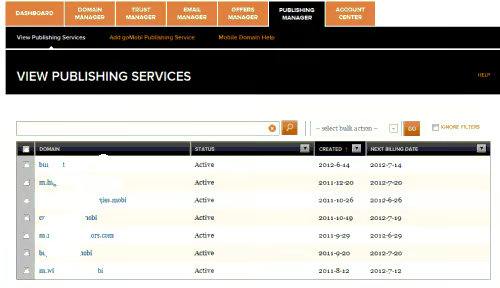
The next step is to open the Publishing Manager in OpenSRS. Note that what you see here will be different with every provider. As you can see, this a list of many of the sites built with GoMobi (names concealed for privacy reasons).

To get started, click on Add GobMobi Publishing Service in the menu bar above.
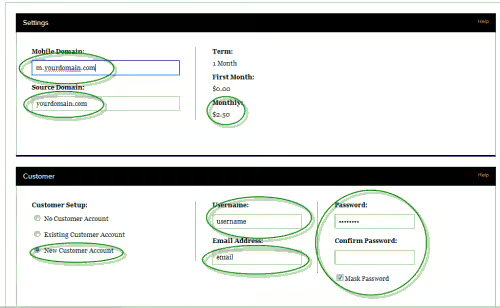
This brings up the Settings and Customer Information sections which must be filled out before going further. Here are the settings to use:
Mobile Domain: Use either m.yourdomain.com (if using a subdomain) or yourdomain.mobi (if using a mobile domain)
Source Domain: yourdomain.com (this references the .COM you’re using as a resource to build the mobile site. The mobile site will scrape some information from the desktop site, making it a bit easier to build the mobile site)
Terms: (these vary with each provider and are highlighted here for your reference)
Customer Setup: Choose New Customer Account, then set a username, email address for the customer and mask the password. Again, this information will change with every provider. When you complete filling out the forms, there’s a submit button (not visible in this screen shot).
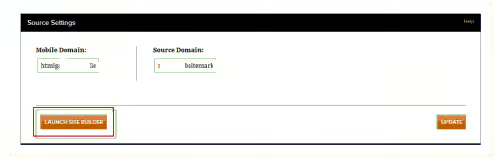
Once that’s pressed you’ll get a message that the account has been created and a new page will appear. Scrolling down the page, you’ll get to a section with the button: LAUNCH SITE BUILDER.
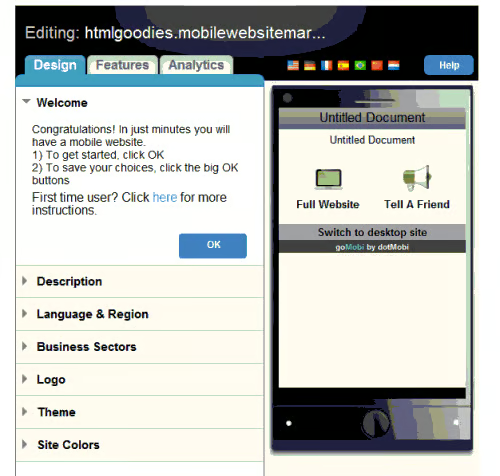
This brings up the default Site Builder page. On the left you’ll see three tabs: Design, Features and Analytics. On the design tab, you’ll see a number of sections with basic information that you’ll fill out in order to build a mobile site. Most of these are straightforward to use and will only take few minutes to complete.
The sections that are the most important are the logo, theme and site colors. In many cases the software will scrape the logo you use on your .COM site and use it for the mobile interface. While this is a fast solution, it’s not the best approach, because it will squash your logo to fit the mobile interface. A better idea is to use another program such as Adobe Photoshop or Illustrator to re-size your file for the mobile phone format. Generally, as size of 300×130 pixels works best (this will be discussed in greater depth in an upcoming article).

Next in line is the Theme and Site Colors section.
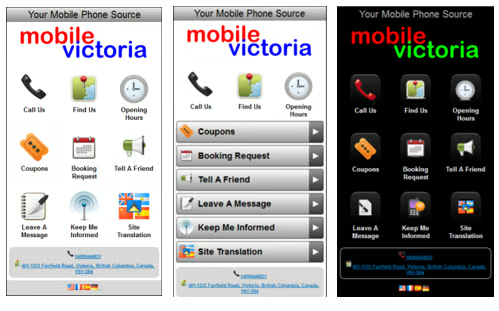
Here are some examples of some phone layouts using the different theme options and site colors.
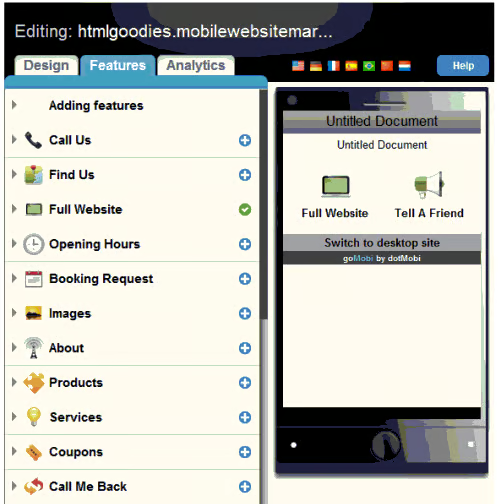
Once you’ve finished with all the settings under the Design Tab, click on the Features tab. This is the screen that will come up every time you build a mobile site.
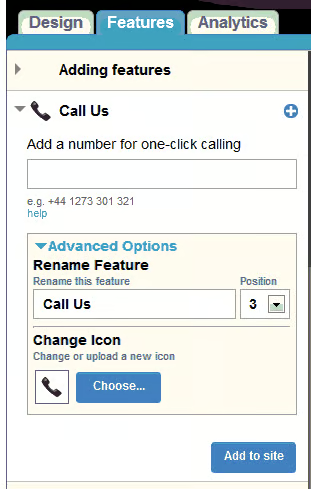
Many of these sections will be easy and fast to work with. An example is the Call Us fature. Here, the simple thing to do is to add the phone number and add it to the site, but what happens if you don’t like the default position or the icon. Note that the Advanced section is open. This allows you to change the icon, rename the feature and change the position.
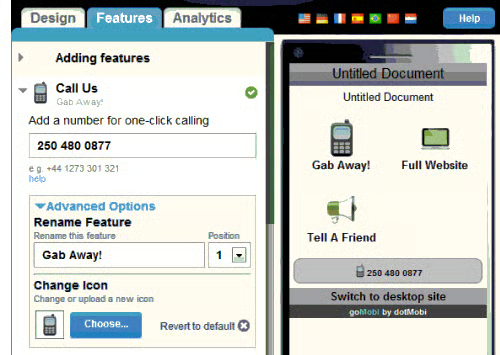
Here’s it’s been renamed, the icon has been changed and moved to position 1.
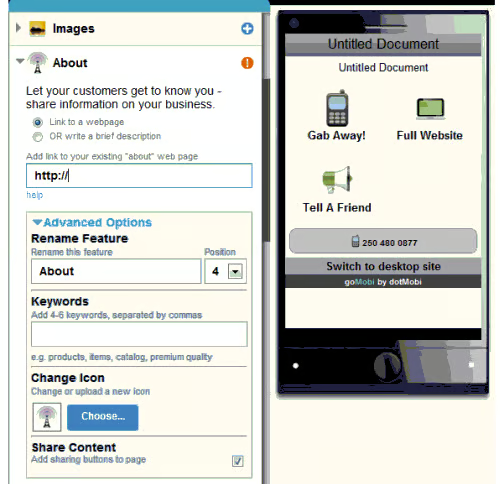
Other sections, like About Us, give you two different opton for adding content. The first is to link to a page on your desktop site and if that page is relatively uncluttered, it could work quite well.
The second choice is to choose “Or write a brief description.” This gives you a lot more control over the text and you can manipulate the fonts, colors, linking, etc. While you can build source code in this box, it’s rather cumbersome. It’s a better idea to use an HTML editing program such as Notetab Pro or Dreamweaver, which make it much easier to work with the code.
What you’ve seen so far are some of the basics of the GoMobi Site Builder, though there’s a lot more. In the next article we’re going to look at ways of going beyond the limitations of the GoMobi interface. In the last article in this series, we’ll look at tips and tweaks to help you get the best results from your GoMobi layouts.
