During the past ten years, we’ve seen a major shift in web development from the server-side to the client. In my opinion, we have the stellar improvements to HTML, JavaScript and CSS to thank for this trend. Moving the bulk of application code to the client has many benefits, but some drawbacks as well. One of these is an increase in files to sift through. To make working with numerous project files easier, a number of JavaScript Frameworks have stepped in.
One such framework is called Vue (pronounced view). It’s a progressive framework for building user interfaces. The “progressive” moniker alludes to the fact that, unlike other frameworks, Vue is designed to be incrementally adoptable, meaning that the core library works on the View layer of MVC exclusively, and is easy to integrate with other libraries or existing projects. On the other hand, Vue is also perfectly capable of powering sophisticated single-page applications when used in combination with modern tooling and development libraries.
There are several ways to work with Vue, depending on your goals. In this tutorial, we’ll examine the different ways to use Vue in your projects.
Some History
Vue is a relative newcomer to the JavaScript framework scene, having been launched publicly on GitHub in February 2014. It was created by a former Google developer, Evan You. Much like myself, he was a fan of JavaScript because it allowed for easy prototyping and coding. During his time as Google, he and his team employed the Angular framework to prototype their web apps. While Angular did speed things up to some extent, Evan found that project files needed to be structured a certain way. In an effort to further simplify the coding process and help developers move faster, Evan worked to build something that accomplished many of the same goals as other JavaScript frameworks, but that was even more lightweight. The end product was Vue.
At this time, the latest stable version is 2.5.16. Vue uses the latest and greatest ECMAScript 5 features that are supported in all ECMAScript 5 compliant browsers. Therefore, Vue is incompatible with Internet Explorer 8 and below, because it does not support ECMAScript 5.
Installation and Usage Options
Vue readily supports a wide range of projects, from single page apps to complex, large scale, ones. It does so by offering four different ways to incorporate the Vue scripts in your web apps. For example, you can benefit from the Vue runtime, by including the vue.js script in your web page. It is available in development and production versions. The former includes full warnings and debug mode, while the latter comes with warnings stripped, and tops out in a smaller 30.90KB size in min+gzip format.
Those same files are available from a Content Delivery Network (CDN) as well.
NPM is the recommended installation method when building large scale applications with Vue. It pairs nicely with module bundlers such as Webpack or Browserify. Vue also provides accompanying tools for authoring Single File Components.
Another way to work with Vue is through its official CLI. It’s specifically for quickly building ambitious Single Page Applications. It takes only a few minutes to get up and running and includes numerous features, such as hot-reload, lint-on-save, and production-ready project building.
Using vue-cli
The remainder of this article provides a walk-through for setting up a Vue project using the vue-cli tool.
Since npm is employed to install vue-cli, be sure to install it first.
Once you’ve got npm on your system, type the following at the command prompt:
npm install -g vue-cli
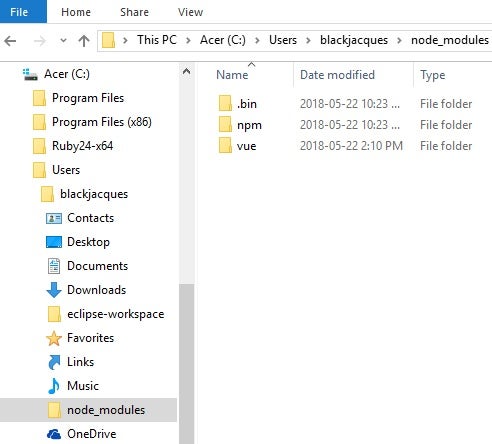
Npm can install packages in local or global mode. In local mode it installs the package in a node_modules folder in your parent working directory. This location is owned by the current user. Global packages are installed in “{prefix}/lib/node_modules/”, which is owned by root, where “{prefix}” is usually “/usr/” or “/usr/local” on Linux. On Windows, the user’s home directory is under “C:Users” .
You can see your npm configurations, you can type “npm config list” at the command prompt:
C:Usersblackjacques>npm config list
; cli configs
metrics-registry = "https://registry.npmjs.org/"
scope = ""
user-agent = "npm/5.6.0 node/v8.10.0 win32 x64"

; builtin config undefined
prefix = "C:UsersblackjacquesAppDataRoamingnpm"

; node bin location = I:Program Filesnodejsnode.exe
; cwd = C:Usersblackjacques
; HOME = C:Usersblackjacques
; "npm config ls -l" to show all defaults.
Next, initialize Vue to start a new project, and choose a project name. Type “vue init webpack vuejs-project” to use webpack. You’ll have to answer a number of questions:
C:Usersblackjacques>vue init webpack vuejs-project

'git' is not recognized as an internal or external command,
operable program or batch file.
? Project name y
? Project description y
? Author Rob Gravelle
? Vue build standalone
? Install vue-router? Yes
? Use ESLint to lint your code? Yes
? Pick an ESLint preset Standard
? Set up unit tests No
? Setup e2e tests with Nightwatch? No
? Should we run `npm install` for you after the project has been created? (recommended) npm

   vue-cli · Generated "vuejs-project".

# Installing project dependencies ...
# ========================

npm WARN notice [SECURITY] mime has 1 moderate vulnerability. Go here for more details: https://nodesecurity.io/advisories?search=mime&version=1.3.6 - Run `npm i npm@latest -g` to upgrade your npm version, and then `npm audit` to get more info.

> [email protected] postinstall C:Usersblackjacquesvuejs-projectnode_moduleswebpacknode_modulesuglifyjs-webpack-plugin
> node lib/post_install.js

npm notice created a lockfile as package-lock.json. You should commit this file.
npm WARN optional SKIPPING OPTIONAL DEPENDENCY: [email protected] (node_modulesfsevents):
npm WARN notsup SKIPPING OPTIONAL DEPENDENCY: Unsupported platform for [email protected]: wanted {"os":"darwin","arch":"any"} (current: {"os":"win32","arch":"x64"})

added 1225 packages in 785.069s

Running eslint -- fix to comply with chosen preset rules…
# ========================

> [email protected] lint C:Usersblackjacquesvuejs-project
> eslint -- ext .js,.vue src " -- fix"

# Project initialization finished!
# ========================

To get started:

  cd vuejs-project
  npm run dev

Documentation can be found at https://vuejs-templates.github.io/webpack
Next, cd into your project directory and issue the “npm install” command to install dependencies:
C:Usersblackjacques>cd vuejs-project

C:Usersblackjacquesvuejs-project>npm install
npm WARN optional SKIPPING OPTIONAL DEPENDENCY: [email protected] (node_modulesfsevents):
npm WARN notsup SKIPPING OPTIONAL DEPENDENCY: Unsupported platform for [email protected]: wanted {"os":"darwin","arch":"any"} (current: {"os":"win32","arch":"x64"})

up to date in 11.627s
And that’s it! We’re now ready to start the dev server and run the app:
C:Usersblackjacques>npm run dev
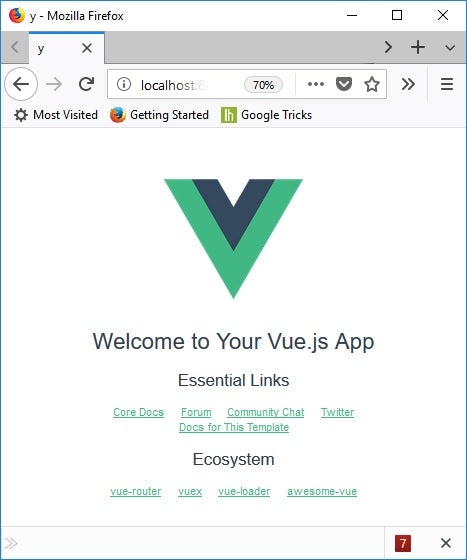
Launch your web browser and navigate to “http://localhost:8080” to see the default app page:
Conclusion
In today’s tutorial, we learned several ways to work with Vue and created a single page app using the Vue CLI tool. In the next installment, we’ll get to work on our web app.


