Everyone knows what a bookmark is. It’s just a link to a Web resource that usually begins with the “http:”, “file:”, or “ftp:” protocol. There is another special prefix that browsers recognize as well: “javascript:”. It tells the browser to execute everything that comes after as JavaScript code. Bookmarks that employ the “javascript:” prefix are known as bookmarklets. These “one-click” wonders add functionality to the browser, allowing us to modify the appearance of any web page, querying a search engine with search terms provided by previously selected text, or submitting the current page to a translation or blogging service.
While powerful, bookmarklets are not without limitations. One of the biggest in my view is that you can’t fully automate them. You always have to kick things off by clicking the bookmark link. Sounds like a minor annoyance, but there may be times that you’d like your script to run on the page load event. In fact, it was that very requirement that led me to a browser extension called Greasemonkey. It enables users to install scripts that make on-the-fly changes to web page content after or before the page is loaded in the browser. Since changes made to the web pages are executed every time the page is viewed, Greasemonkey scripts are effectively permanent for the user running the script.
Like Bookmarklets, Greasemonkey can be used for customizing page appearance, adding new functions to web pages (for example, embedding price comparisons within shopping sites), fixing rendering bugs, combining data from multiple web pages, and countless other purposes.
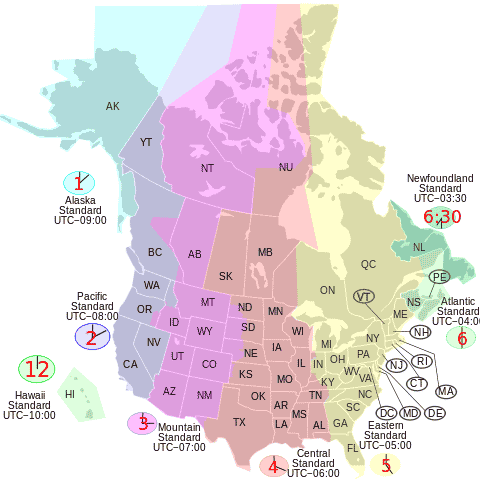
This tutorial will explain how to get started with Greasemonkey by creating a simple script that shows a date & time in a different time zone. Specifically, we will convert the local Eastern Daylight Time (EDT) into Mountain Daylight Time (MDT) using the amazing Luxon Date Library.
How to Install Greasemonkey
Greasemonkey is a Firefox extension. As such, it’s installed in the same way as any other Firefox extensions:
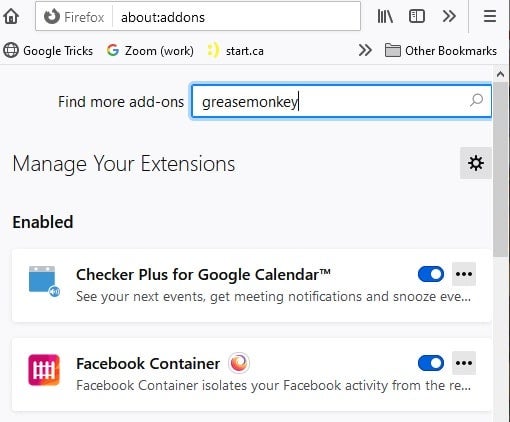
- Select Tools > Add-ons and Themes from the main menu to open the Addons page:
- Type “greasemonkey” in the Find more add-ons input fields, and click the magnifying glass icon, or hit the ENTER key.
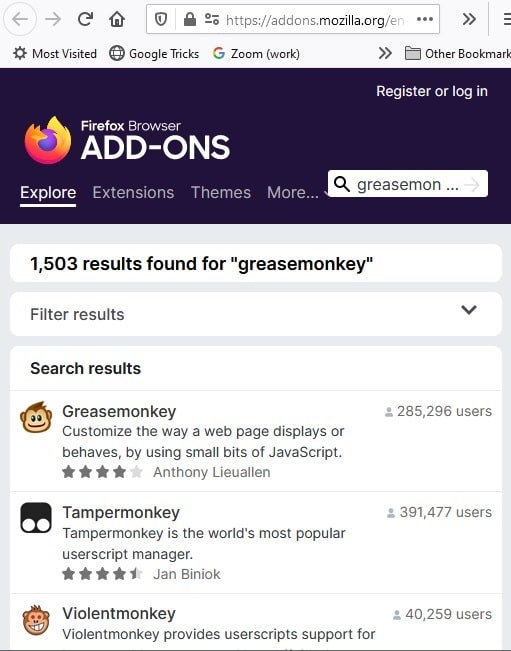
- Greasemonkey should appear at the top of the search results:
- Click on the Greasemonkey result to open the Install page.
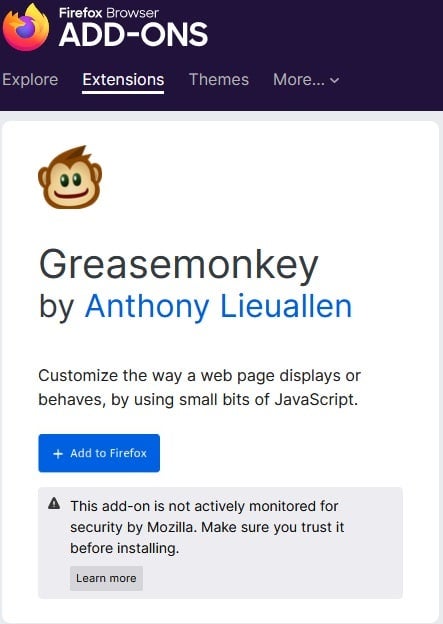
- From the Greasemonkey page, click the blue “+ Add to Firefox” button to install the extension. Firefox will show a warning and ask you to confirm adding the extension. Click “Add”:
- Once it has finished, you should see Greasemonkey’s monkey icon at the top of the browser window, near the address bar:
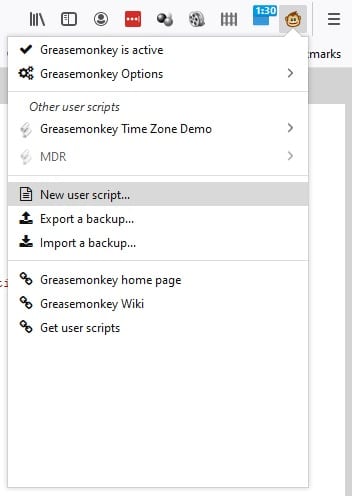
To create a new script, click on the Greasemonkey icon and select New user script… from the menu:
The Metadata Block
The metadata block is a section of a user script that describes the script. In addition to typical metadata such as the script name, namespace, and description, it can also include and exclude rules. The metadata block may appear anywhere in the top level Greasemonkey code scope of the script, but is usually at the top of the file. Greasemonkey supports lots of keys, so we’ll concentrate on what we need in our script:
// ==UserScript== // @name Greasemonkey Time Zone Demo // @version 1 // @include https://www.worldtimeserver.com/current_time_in_CA-ON. aspx?city=Kanata // @require https://ajax.googleapis.com/ ajax/libs/jquery/3.6.0/jquery. min.js // @require https://cdnjs.cloudflare.com/ ajax/libs/luxon/1.26.0/luxon. min.js // ==/UserScript==
Of particular importance to us are the @include, and @require items.
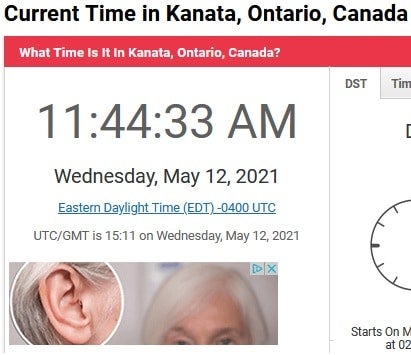
The @include is a URL filter for when to run the script. It supports wildcards, but to attach the script to a specific page, the more exact the URL, the better. Here is the current date and time for my local time zone:
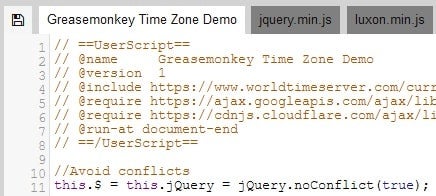
The @require metadatum is a ridiculously easy way to include external scripts. Each @require resource is downloaded once, when the script is installed, and stored on the user’s hard drive alongside the script. The URL specified may be relative to the URL the script is being installed from. There can be any number of @require keys in a script as well. You’ll see each script in its own tab:
Note that the Query noConflict mode is enabled so that our local script doesn’t interfere with the web page’s own scripts.
Manipulating the DOM
I included jQuery specifically for its superlative DOM methods. Here’s some code that creates a new DIV element and appends the paragraph that will contain the time in MDT:
var timeDiv = $('<div><h4>Time in Calgary</h4></div>')
.css('border', 'solid red 1px')
.insertAfter($('.local-time p').last());
var timeP = $('<p></p>').appendTo(timeDiv)
We can omit the document ready handler because, by default, Greasemonkey runs after the main page is loaded, but before other resources (images, style sheets, etc.) have loaded.
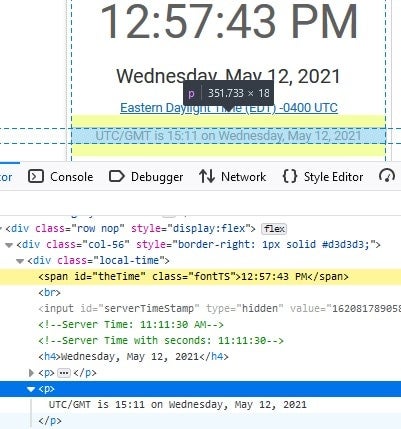
To obtain the ‘.local-time p’ selector string, I simply right-clicked the element and selected Inspect (Q) from the context menu:
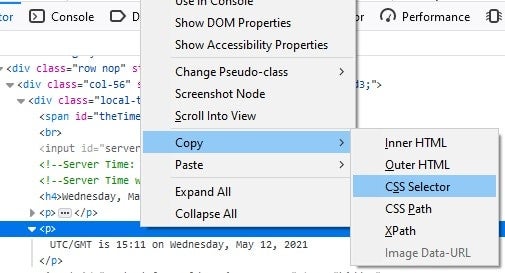
If I couldn’t figure it out that way, I could also copy the CSS selector using the built-in browser utility:
Showing the Converted Time
The challenge here is not showing the converted time, but rather, in synchronizing it with the one in the web page. It’s just a plain ole SPAN tag whose innerText is refreshed every second. SPANs don’t emit an onchange event, so we need to find another way to monitor it. I settled on the DOMSubtreeModified event. Although it’s been deprecated in favor of Mutation Observers, the later requires more code, so I stuck with the easier approach:
$("#theTime").on('
Calgary is in Mountain Daylight Time, but Luxon takes its time zone parameters in the form of “America/New York”. There is no “America/Calgary”, but I was able to find a time zone with the equivalent UTC Offset in the Wikipedia List of tz database time zones.
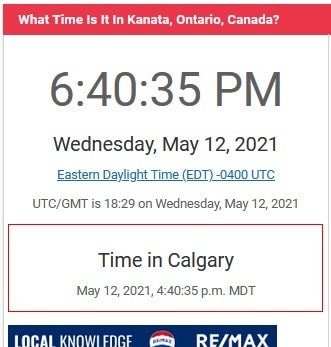
For the date & time format, I chose one of Luxon’s many offerings that included all of the information I was looking for, but with a reasonably compact output. Here is a screenshot of the final result:
Unfortunately, it does not properly convey the time synchronization. To bask in the script’s full glory, I would urge you to insert the following code into your own Greasemonkey script, and then navigate to worldtimeserver.com to try it out:
// ==UserScript== // @name Greasemonkey Time Zone Demo // @version 1 // @include https://www.worldtimeserver.com/current_time_in_* // @require https://ajax.googleapis.com/ ajax/libs/jquery/3.6.0/jquery. min.js // @require https://cdnjs.cloudflare.com/ ajax/libs/luxon/1.26.0/luxon. min.js // ==/UserScript== //Avoid conflicts this.$ = this.jQuery = jQuery.noConflict(true); var timeDiv = $('<div><h4>Time in Calgary</h4></div>') .css('border', 'solid red 1px') .insertAfter($('.local-time p').last()); var timeP = $('<p></p>').appendTo(timeDiv) ; $("#theTime").on(' DOMSubtreeModified',function() { var now = luxon.DateTime.fromObject({ zone: 'America/Boise'}); timeP.text(now.toFormat("FFF") ); });
I included a wildcard in the @include URL so that you can try it with your own location, but you’ll have to modify the script if you’d like to see a different target time zone.
Conclusion
In this tutorial, we got a taste of Greasemonkey’s tremendous capabilities by creating a simple script that shows a date & time in a different time zone. For someone who is enamored with Bookmarklets like myself, Greasemonkey is a gift that keeps on giving. It’s pretty powerful stuff when you consider that our script is less than ten lines long, not including the metadata block.


