
9/25/13
This version of OptimizePress has been rebuilt, and is a major upgrade from the previous version. When I read that I was excited, because it heralded some new advancements. One of the things you’ll see is that that you have several installation options, which will be covered below.
Once you purchase OptimizePress you’ll need to log into the members hub. Inside the hub you’ll be presented with seven major steps:
1.
The first step is to download OptimizePress. Note that you have several options here, to use the theme to use the theme to create your sales and marketing pages as well as your blog. If you want the sales and marketing capability but prefer to use another theme for the blog, download the plugin, instead
2.
The next step is to install OptimizePress. Note that when you do so, your maximum upload has to be 40MB or larger. If not, you’ll need to make use of other installation methods, such as FTP.
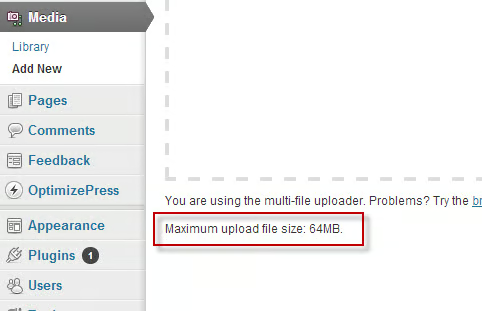
To find out what the maximum upload is, go to your dashboard in WordPress, then Media: Add New. As you can see, my maximum upload is 64MB, which is more than enough. Note that when you install the OptimizePress theme or plugin that it can take several minutes.
3.
The next step is to authorize OptimizePress with one of the API keys you were given when you created your account.
4.
In this step you configure the global settings, including the header, footer, typography, etc.
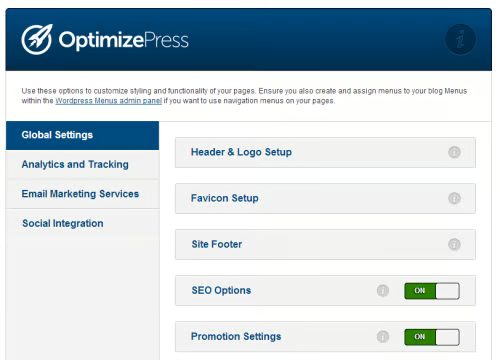
The Global Settings panel
Note that if you want to use the blog feature, you’ll need to go to OptimizePress: Blog Setup.
5.
In this step you integrate your Email marketing service at the API level, all within OptimizePress. This gives you access to various different opt-in forms, webinar registration forms and more.
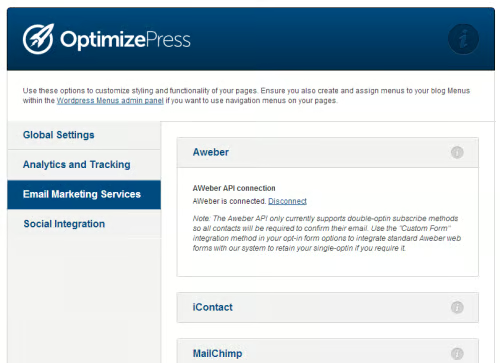
Above, the Email Marketing Services panel is open, where you can integrate your email marketing program. In this case, I use Aweber, so that section is open.
6.
Add pages with PageBuilder: This is where you use PageBuilder to create your pages and select layouts and templates.
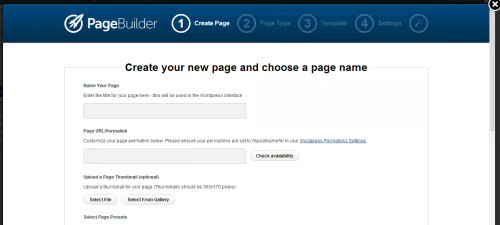
This opens up a lightbox within the WordPress administration area. The wizard guides you through the process of building your pages, one step at a time. If you want to make corrections, you can do so after the fact.
7.
The last step is to customize your pages with LiveEditor, which allows you to add content and other elements to your pages.
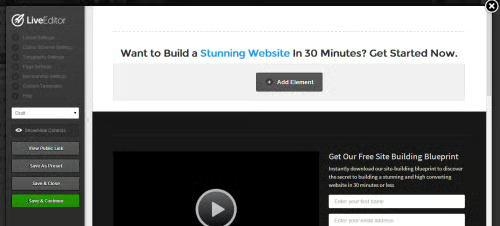
LiveEditor. The page controls are on the left and elements within the interface are on the right, which can be easily customized.
Note: The LiveEditor isn’t compatible with Safari. Instead, use Google Chrome or Firefox. Also, all of these steps are supported with video, which shows you what to do.
Setup
Installing OptimizePress was straightforward, but this version also came with some baffling problems and the instructions/videos didn’t help in resolving the issues. When I contacted support they were unable to replicate my problem and asked me to disable all the plugins. I did so. The problem remained.
After several fruitless attempts to fix the problem they told me to delete the entire installation, including the database. I did and reinstalled the software. When I went to rebuild my site I didn’t activate any of the plugins and reconfigured the section where I had the problem before. When I did, the layout fractured, in the same way it had previously.
Note the position of the widget at the far right. This is much lower than it should be. On the posts, it was fine but on any of the pages I had this problem.
Frustrated, I contacted support again. This Is what I learned:
·
If you have an existing site running another theme such as Thesis, Woothemes etc., and you want to keep that site look and design, use the plugin. This will not affect your existing pages and you can build new landing pages, sales pages and membership sites without affecting your existing site. Please note you will not have access to the blogging functions of OP2 with the plugin.
·
If you have a new site and want to benefit from our blog theme functionality as well as the other page building features, you can use the theme. Please note you cannot use more than one theme on your WordPress site at the same time so if you plan on using a different theme we recommend using the plugin.
·
Do not install the theme and plugin on the same site at the same time as this will cause issues.
·
You CAN install the OptimizePress 2.0 plugin on a site running OptimizePress 1.0 theme as this will work fine and this is a great way to be able to build pages on the new system and gradually migrate your content over great way to be able to build pages on the new system and gradually migrate your content over.
Still, I was having trouble because I was unable to get the blog to work with PageBuilder. In one of my messages to support, I found out that these systems aren’t actually designed to work together but separately. If that’s confusing, here’s a message I received from support:
There are two core parts to OptimizePress (if using the theme version):
1. The Blog Theme System
This allows you to create pages and posts which share a consistent design. The pages here would be typical blog pages and posts – not to be used for sales pages and opt-in forms. You can use the blog settings to add things like an opt-in form to the sidebar and other content. To create pages for this section you would use the Pages: Add New function and to create Posts you would use Posts: Add New.
These would all use the main design settings and navigation settings as setup within the normal OptimizePress Blog settings.
2. The PageBuilder/LiveEditor System
This is designed to be used for creating custom pages (or sets of Pages) which would be used for sales and marketing sites, membership sites or landing pages. These pages are independent from the main blog theme and pages – because these are designed to be conversion pages which often may not have a header or logo on them, they have been designed to be completely customizable and because of this (depending on which template you choose) the header width may vary.
The only difference between the plugin and theme is that the theme version includes the blog system. The plugin has everything else and you can even switch between either so if you built your site using the plugin and then decided you also wanted to use our blogging features you could switch your site to use the OP2 Theme and the liveeditor pages would still work fine.
The main power of the system is in the pagebuilder and liveeditor system – and it has been designed so you can use other blog themes with it – we have started the Op2 system off with 3 basic blog themes and will be expanding this range in the future also.
Additional Notes
After going back and forth with support, I learned that the only theme that works with my blog installation is theme number one. The other two themes cause my layout to break. According to OptimizePress this seems to be a problem with my installation, which they were unable to replicate on their servers.
The seven step process is what you would use if you’re planning to build pages that are a part of a sales funnel, such as a squeeze page, landing page or sales page but this is not the process you would use to build a blog as the main component of your site. If that’s the case, you would stop after step five and go back to set up the blog. You wouldn’t make use of PageBuilder or LiveEditor at all.
Mobile
From what I could see in OptimizePress, your layout is automatically converted to mobile, which has both advantages and disadvantages. On the up side, there’s no coding. On the down side, you don’t have control over the layout. One other thing I found is if you use the banner function with the blog (975px wide), it’s compressed to fit the mobile layout, which could make it hard to read. You might want to use the logo instead.
Conclusion
Overall, I like the look and feel of this new version, but the single biggest problem was the lack of clear documentation, which really confused me. If you choose to buy OptimizePress you’ll need to keep this in mind.
Also, while the advertising mentions that there are 30 templates to choose from, there are actually only 3 for the blog. Where you do get many templates is in PageBuilder, which offers over 30 templates but these are not the same as themes. The wording is confusing here and it’s easy to make a mistake when reading the copy.
If you want to get more themes and advanced training, you’ll need to join the Club House. Membership is currently $17/month. As for OptimizePress itself, there are three packages available.
