HTML5 and Blueimp jQuery-File-Upload Plugin Event Handling
As we saw in the Using HTML5 and the Blueimp jQuery-File-Upload Plugin To Upload Large Files article, uploading files in HTML5 is a complex enough undertaking that it’s worth your while to use a plugin rather than try to write everything yourself. That article provided an overview of how the Blueimp Plugin works and how to achieve a minimal setup to get up and running quickly. By contrast, today’s follow-up will be a lot more code intensive as we’ll be writing the event handlers to display file information, image thumbnails, and individual file progress bars.
Creating a Chunked Upload
On the surface, it seems pretty easy. You let the user pick a file on their system, break it into chunks and make multiple Ajax calls to send the data up to the server. Simple, except for one thing. Due to the asynchronous nature of both the FileReader and XMLHTTPRequest objects, the chunks are often sent in the wrong order! That means that you need a server-side process that can create temporary files and keep track of the chunks so that they can be reassembled into the original files. I’d rather not write that code, thanks.
We’ll make our call to the fileupload widget once the page has finished loading, via the $(document).ready() function. It also includes code to add the remove button’s event handler. I renamed the jQuery-File-Upload’s index.php file to something more descriptive, but that is not a necessary step.
The maxChunkSize can be set to upload large files in smaller chunks, but note that in order for chunked uploads to work in Mozilla Firefox, the multipart option has to be set to false. This is due to the Gecko 2.0 browser engine – used by Firefox 4+ – adding blobs with an empty filename when building a multipart upload request using the FormData interface. Moreover, several server-side frameworks, such as PHP and Django, also cannot process multipart file uploads with empty filenames.
The fail option sets the callback for jQuery ajax() errors. These should not be confused with JSON responses which contain an error property. Those still count as successful requests even though an error did occur somewhere along the way. We’ll see how to deal with those a little later on:
$(document).ready( function() {
    $('#remove').click(function() {
        $("#filePreview").find('li').remove();
    });

    $('#file_upload').fileupload({
        url: 'php/upload.php',
        multipart: false,
        fail: function (ev, data) { console.log(ev); }
    });
});
The Onchange Event Handler
The change option sets the handler for the file input’s onchange event. We can process individual files using the jQuery $.each() function. The following code creates an unordered list and sets each list item’s ID to the filename so that we can refer to it later. Note that, for the record, this is not considered a best practice because, according to the W3C spec:
ID tokens must begin with a letter ([A-Za-z]) and may be followed by any number of letters, digits ([0-9]), hyphens (“-“), underscores (“_”), colons (“:”), and periods (“.”).
Each list item contains some file information and a progress bar.
change: function (ev, data) {
  $.each(data.files, function (index, file) {
    $("#filePreview").append(
      $('<li>').attr('id', file.name)
        .append($('<h3>').text(file.name))
            .append($('<p>')
                .append('type: ' + (file.type || 'unknown'))
                .append($('<br>'))
                .append('size: ' + Math.round(file.size / 1024) + 'KB' ))
        .append($('<div>').addClass('loadingIndicator')
        .append($('<p>').addClass('loader').text('Uploading...'))));
  });
}
The Onprogress Event Handler
The progress handler option is a good place to provide feedback about an individual file’s upload progress. For a global progress handler, use the progressall option instead.
As I mentioned earlier, we need to refer to the list item which contains a file’s loading indicator. The data.files[0] element contains the file information because the progress event is only ever called for one file. Either data.files[0][‘name’] or data.files[0].name will return the current file name. The li[id=’filename’] CSS selector locates the correct list item. Not surprisingly, the more standard li[‘#filename’] doesn’t work because it expects the ID to be standards compliant. From there, we can supply the tag name and class (‘div.loadingIndicator’) to the find() method to locate the loading indicator <DIV>:
progress: function (ev, data) {
  if (data.lengthComputable) {
    var loader = $('li[id="'+data.files[0]['name']+'"]').find('div.loadingIndicator');
    var progress = parseInt(data.loaded / data.total * 100, 10);
    loader.css('width', progress + "%");
  }
}
The Ondone Event Handler
Once a file has completed loading, we update the progress indicator and display a thumbnail for images. My original test page had the image preview appearing before the upload, but the jQuery-File-Upload plugin makes that difficult because the FileReader’s onloadend handler is not available to us and there is no “public” property to my knowledge which contains the file’s full path. However, the response does. Speaking of which, here is what a typical response looks like:
[{"name":"Champ.bmp","size":8302,"type":"image\/bmp","url":"http:\/\/localhost\/FileUpload\/blueimp\/php\/files\/Champ.bmp","delete_url":"http:\/\/localhost\/FileUpload\/blueimp\/php\/upload.php?file=Champ.bmp","delete_type":"DELETE"}]
Once we’ve run it through the json_parse() function, we can access its attributes just like any object. The relevant ones to us are the name, type, and the url. Although there were none in the above code, the presence of the error property can be tested for and displayed easily enough:
done: function (e, data) {
  var results = json_parse(data.result);
  var fileInfo = results[0];
  var li = $('li[id="'+fileInfo['name']+'"]');
  var pUploadMessage = li.find('p.loader');
  if (fileInfo['error']) {
    pUploadMessage.css('color', 'red').text("Ajax error encountered: '" + fileInfo['error'] + "'");
  } else {
    if (/image\/.*/.test(fileInfo['type'])) {
      var thumb = $('<img>').attr('src', fileInfo['url']);
      li.prepend(thumb);
    }
    li.find('div.loadingIndicator').css('width', '100%').css('backgroundColor', '#0f0');
    pUploadMessage.css('color', '#3DD13F').text("Upload complete");
  }
}
The End Result
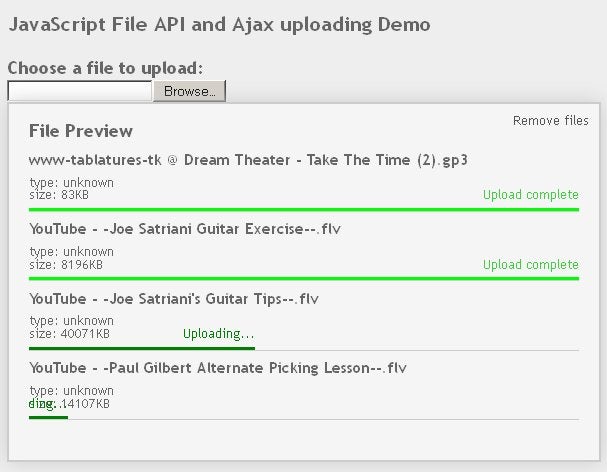
Multiple file upload with a single file-select control is supported in current versions of Firefox, Safari, Opera, and Chrome, but not Internet Explorer. I did most of my testing in Firefox 9. Here is a screenshot of an upload of some large video files in that browser. You can see the progress indicators in action:
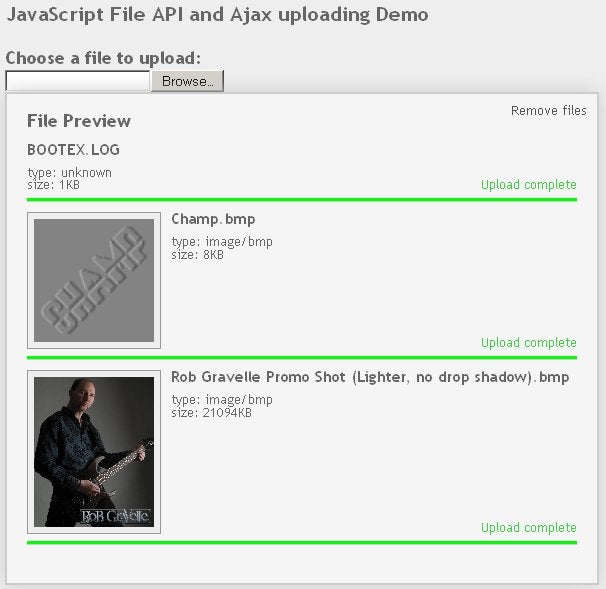
This is what the page looks like after uploading some images. Notice the thumbnails!
Here are the files from today’s article, not including the blueimp jQuery-File-Upload library and JSON JS parser.


