Thursday, March 28, 2024

How to Create an HTML Form

Learn how to create, implement and style HTML Forms via CSS. You will also see how to upload them to a server.

Through HTML forms, forms that are inserted into web pages, we can enter text, numbers, we can select a single option from a list, we can check a check box or choose a radio button. These forms can be simple or extensive, attractive and easy to use, with an elegant design or complex features, but the most important thing is that the forms created are functional.

After the introduction above, I’d like to start with a definition of an HTML form. So, an HTML form is part of a document that has form elements, selection boxes, menus, radio buttons, text fields, submit buttons, markup and so on. Through HTML forms, users can send to the website and to the web server.

Here’s an example of a form that contains a submit button, a reset button, radio buttons, and labels:

<html>
<body>
<h1>HTML form</h1>
<form action="post">
    <p>
    <label for="firstname">First name: </label>
              <input type="text" name="firstname"><br>
              <br>
    <label for="lastname">Last name: </label>
              <input type="text" name="lastname"><br>
              <br>
    <label for="email">E-mail: </label>
              <input type="text" id="E-mail"><br>
              <br>
    <input type="radio" value="Male"> Male<br>
    <input type="radio" value="Female"> Female<br>
    <br>
    <input type="submit" value="Submit"> <input type="Reset">
    </p>
 </form>
</body>
</html>

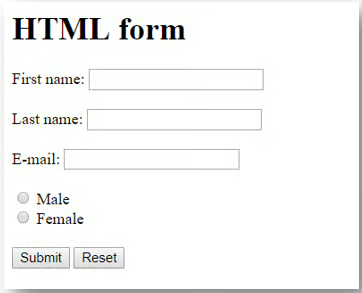
So, all HTML forms start with the <form> element. This element defines a form , having different optional attributes.

The <input> element is a meaningful element and can be displayed differently by the attribute that we distribute to it: the “radio” attribute, the “text” attribute, the “submit.” “reset,” “e-mail,” “choose file,” “password.” Let’s take a few examples in the lines below:

Radio Button

<html>
<body>
<h1>Text Input = "radio" </h1>
<form>
  <p>Please select your favorite season:</p>
  <div>
    <input type="radio" name="season"
     name="season" value="spring" >
    <label for="season">Spring</label>
    <input type="radio" name="season"
     name="season" value="Summer" checked>
    <label for="season">Summer</label>
    <input type="radio" name="season"
     name="season" value="fall"  >
    <label for="season">Fall</label>    
    <input type="radio" name="season"
     name="season" value="Winter"  >
    <label for="season">Winter</label>
  </div>
  <div>
    <button type="submit">Submit</button>
  </div>
</form>
</body>
</html>

Submit Button

<html>
<body>
<h1>Submit button example </h1>
<form> 
  <div>
    <label for="example">Write your name, then submit</label>
    <input name="example" type="text" name="text">
  </div>
  <br>
  <div>
    <input type="submit" value="Submit">
  </div>
</form> 
<p>That's the only way we know who we're getting in touch with</p>
</body>
</html>

Reset Button

<html>
<body>
<h1>Reset button example </h1>
<form> 
  <div>
    <label for="example">Write some text</label>
    <input name="example" type="text">
  </div>
  <br>
  <div>
    <input type="reset" value="Reset form">
  </div>
</form> 
<p>If you want to reset the form, then click on the reset button</p>
</body>
</html>

Checkbox

<html>
<body>
<h1>Checkbox example </h1>
<form>
  <div>
    <input type="checkbox" name="subscribeforupdates" name="subscribe" value="updates">
    <label for="subscribe">Subscribe for updates?</label>
  </div>
  <br>
  <div>
    <button type="submit">Subscribe now!</button>
  </div>
</form>
<p>Subscribe for the latest and fresh updates</p>
</body>
</html>

Password

<html>
<body>
<h1>Password example </h1>
<label for="Password">Password: </label>
<input name="Password" type="password" required>
<input type="submit" value="Submit">
<p><h3>Enter your password<h3> </p>
</body>
</html>

Choose File

<html>
<body>
<h1>Choose file example</h1>
<form method="post">
  <div>
    <label for="photo">Choose file for upload</label>
    <input type="file" name="photo" name="photo"
          accept=".gif, .bmp, .png, .jpg, .jepg,">
  </div>
  <div>
    <button>Submit</button>
  </div>
</form> 
<p>FILE UPLOAD FORM</p>
</body>
</html>

The <textarea> element defines a text area. This element called <textarea> offers a portion of text input. We can define even how many lines to be available: through the row attribute, specify a visible number in an area and through the cols attribute, specify the visible width of the text area. Here’s an example:

<html>
<body>
<h1>  Textarea element</h1>
<form action="/action_page.php">
  <textarea name="textarea" rows="12" cols="45" >write something here</textarea>
  <br>
  <input type="submit">
</form>
</body>
</html>

In the example above, I used action attribute, which defines the action when the form is sent. In our example, data is sent to a page on the server called “/action_page.php.”

We also have the “target” attribute that specifies the location where the document will open. If the value is default, it will open in the current window. If target = “_blank” then the document will open in a new window. We have other values of the target attribute beside _ blank, namely:

_parent(open the link in the parent frame), _self(open the link in the current frame), _top(open  the link in the top-most frame) 

The method attribute specifies how to submit the form, which can be sent as URL variables (method = “get”) or as an HTTP post transaction (method = “post”).

The list attribute identifies a list of predefined options to suggest the user what to choose. Here’s an example:

<html>
<body>
<h1>The List attribute</h1>
<form>
 <label for="tennis player">Favorite tennis player?</label><br>
 <input name="tennis" name="tennis" list="names">
<datalist id="names">
 <option>Roger Federer</option>
 <option>Stan Wawrinka</option> 
 <option>Alexander Zverev</option> 
 <option>Rafael Nadal</option> 
 <option>Juan Martin del Potro</option> 
 <option>Novak Djokovic</option> 
 <option>Kei Nishikori</option> 
 <option>Milos Raonic</option> 
 <option>Marin Čilić</option> 
</datalist>
<input type="submit">
</form>
</body>
</html>

The select element allows users to choose between multiple options from a selected list. Depending on the value of this multiple attribute, the behavior of this element changes substantially. A label may be provided under the name of a substitute for the selected commands using the option item. This option must be the first of the control and must not belong to any group. The substitution tag option is required when the selection element is declared atrium , being displayed in the drop-down mode.

<html>
<body>
<h1>The Select element</h1>
<p>A drop-down list:</p>
<form action="../form-result.php" target="_blank">
  <p>
   Favorite sport:
    <select name="sport">
      <option>Football</option>
      <option>Tennis</option>
      <option>Basketball</option>
      <option>Swimming</option>
      <option>Voley-ball</option>
    </select>
    <input type="submit" value="Submit">
  </p>
</form>
</body>
</html>

In the example below, we will make a selection control to choose at the same time several options, adding the element’s multivalued attribute and the square brackets ([]) at the end of the value in the name attribute.

<html>
<body>
<h1>The Select element</h1>
<form action="../form-result.php" target="_blank">
  <p>Your favorite F1 drivers:</p>
  <p>
    <select name="favoriteF1drivers[]" multiple>
      <option>Mika Häkkinen</option>
      <option>Kimi Räikkönen</option>
      <option>Sergio Pérez</option>
      <option>David Coulthard</option>
      <option>Nick Heidfeld</option>
      <option>Takuma Sato</option>
    </select>
  </p>
  <p><input type="submit" value="Submit"></p>
</form>
</body>
</html>

Conclusion

This article has attempted to examine the features of HTML forms and the most elementary constituents. Now that you have the basic knowledge to structure HTML forms correctly, you can go to work. Good luck!

Get the Free Newsletter!

Subscribe to Developer Insider for top news, trends & analysis

Popular Articles

Featured