


The <dialog> element was added to HTML in order to identify a part of a web page or application that a user interacts with such as a dialog box, window, or inspector.
This is a newer element, so it is not supported in all browsers. At the time this article was written, <dialog> was supported in the following:
- Chrome
- Chrome Android
- Android WebView
- Opera
- Samsung Internet Android
Note that this was not supported in Firefox, Edge, Safari, or Internet Explorer at the time this was written. Because <dialog> is not yet supported by all browsers, if you choose to use it, you should include fallback logic.
The best way to learn about an HTML element is to jump into a bit of markup code! Listing 1 presents a very simple listing that you can launch in your browser to see the basics of this element in action.
Listing 1: Using the HTML <dialog> element
<html>
<body>
<h1>A Simple Dialog....</h1>
<dialog open>
  <p>Greetings, one and all!</p>
</dialog>
</body>
</html>
In this listing, you can see that a simple page is presented with a single heading and a paragraph greeting that is embedded in a dialog box. When you execute this on a browser that supports this new command you will see something similar to Figure 1. On a browser that is not supported, the <dialog> element will be ignored and you’ll either not see the greeting, or it will be presented as standard text after the heading.
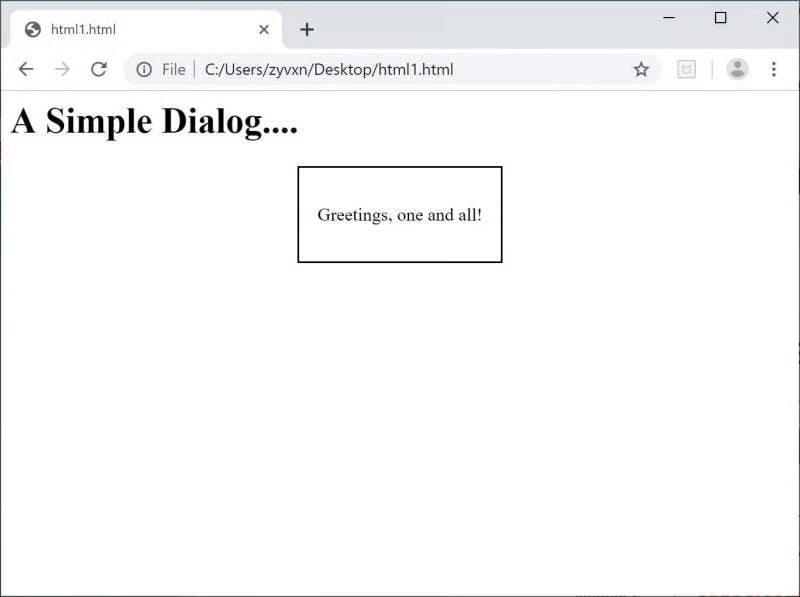
Figure 1: Basic use of HTML <dialog>
There is one more important item you should have noted in Listing 1. The dialog element has an attribute included. If you don’t include an “open” attribute to state that the dialog should be rendered as open, then the assumption will be for a closed dialog and thus it won’t be displayed. You can try this by removing the “open” from the code and rendering the page again.
The dialog presented in Listing 1 simply displayed text. The <dialog> element can contain more complex markup. One of the intents is to allow webpages to create and display popup or model windows without launching a new browser tab or window. This is helpful when building mobile applications. This functionality can be accomplished by combining a little bit of JavaScript with the <dialog> element as shown in Listing 2.
Listing 2: Opening and Closing an HTML <dialog> element
<html>
<body>
<h1>My Page with a Dialog!</h1>
<hr />

<dialog>
  <p>This is informative information, a menu, or
  some other functionality you want in a model window
  or dialog!</p>
  <button id="closeMe">Close Dialog</button>
</dialog>

<button id="openMe">Show Me the Dialog!</button>

<script>
  var dialog = document.querySelector('dialog');
  document.querySelector('#openMe').onclick = function()
  {
     dialog.show();
  };
  document.querySelector('#closeMe').onclick = function()
  {
     dialog.close();
  };
</script>
<p>This web page shows a simple pop-up dialog</p>
</body>
</html>In this new listing, you can see that a <dialog> element is included without the ‘open’ attribute. This means the dialog will not be displayed initially as shown in Figure 2.
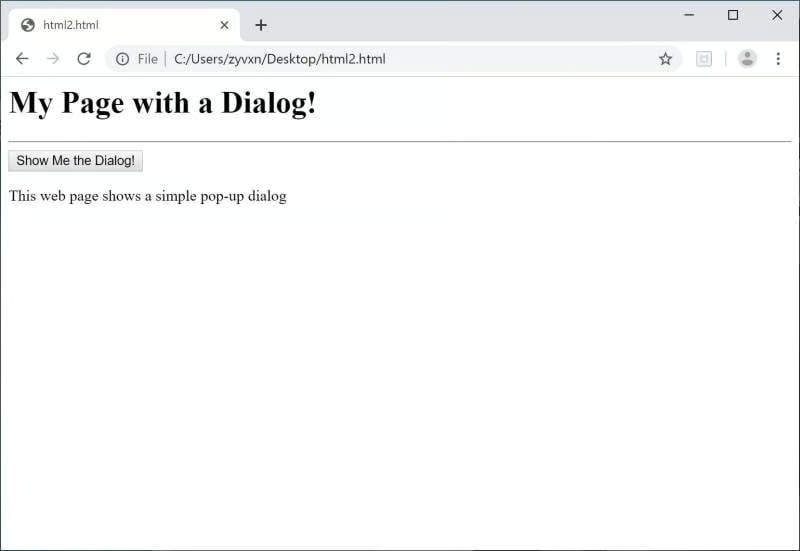
Figure 2: A webpage with a closed dialog
In this example, the dialog is opened using a bit of JavaScript. By clicking on the “Show Me the Dialog” button, you cause code to execute that opens the dialog with a call to a “show()” method. This method is basically the same as setting the attribute of the dialog to “open”. Once you click the button and call show(), you end up with a page that looks like Figure 3.
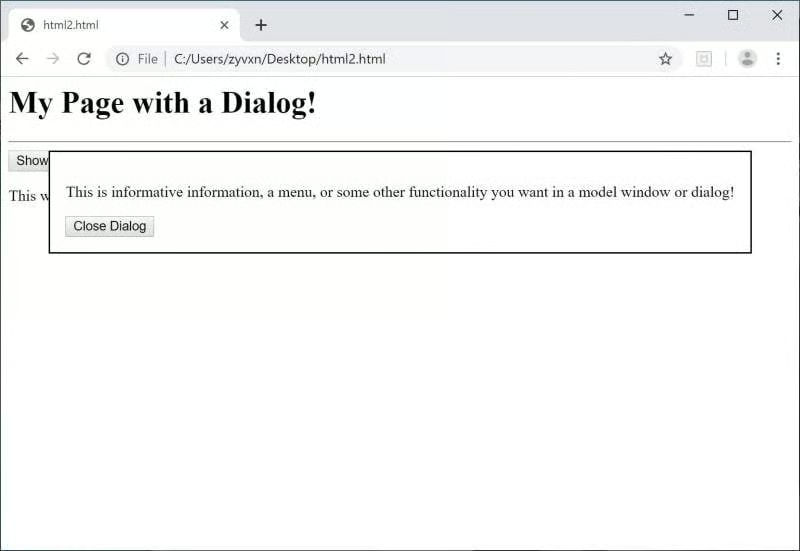
Figure 3: The opened dialog
The dialog in this listing contains more than just text. It also includes a button that is also associated to the JavaScript in the listing. Thus, when you click on the “Close Dialog” button, a call to the close() method of the dialog is executed and the dialog shuts down.
With a few lines of code that include some JavaScript and the <dialog> element, you can create pop-ups that stay within the context of the current webpage. This functionality should help make user experiences much better on mobile web apps once it has rolled out to all of the major browsers. Until then, as with any new functionality use with care by making sure you check for compatibility!
