
6/11/13
The key to making dynamic web applications interactive in Java is the use JSP pages. They do so by including special tags that are parsed and evaluated by the server, thus allowing the page to provide up to the second content. We’re going to include two special tag libraries called c and fmt. The “c” stands for core, and includes tags such as choose, if, forEach, and out. The “fmt” library contains various tags for formatting data such as numbers and dates. There are also specialized tag libraries for SQL, XML, and to perform functions. In today’s article we’ll be delivering dynamic content to the user via a JSP page that we’ll be constructing in Eclipse Juno.
Creating the Project
The type of project that we will be working with here today is called a “Dynamic Web Project”. You’ll find it under File > New > Dynamic Web Project from the main menu. This bring up the Dynamic Web Project wizard that will guide you through the project creation process.
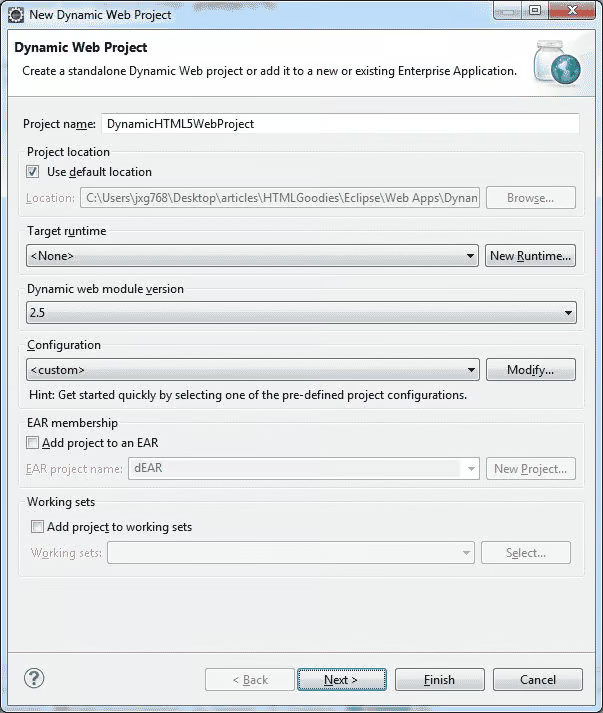
On the Dynamic Web Project screen, you’ll be asked to give your project a name. Among the many properties on the screen, you’ll need to change the Dynamic web module version from 3.0 to 2.5, because our server – Jetty 6 – does not support version 3.0. At this point, your screen should look something like the following:
Click the Finish button because we don’t need to go to the Java or Web Module screens.
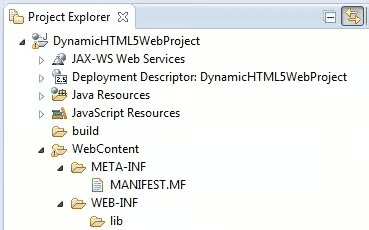
That will create the following folders and files, which you can view in the Project Explorer view:
Creating the index.jsp File
To create the JSP page:
Creating JSP pages in eclipse is quite straight-forward, thanks to the wizard:
- Right-click on the WebContent folder in the Project Explorer and select New > JSP File from the popup menu. That will bring up the New JS File wizard.
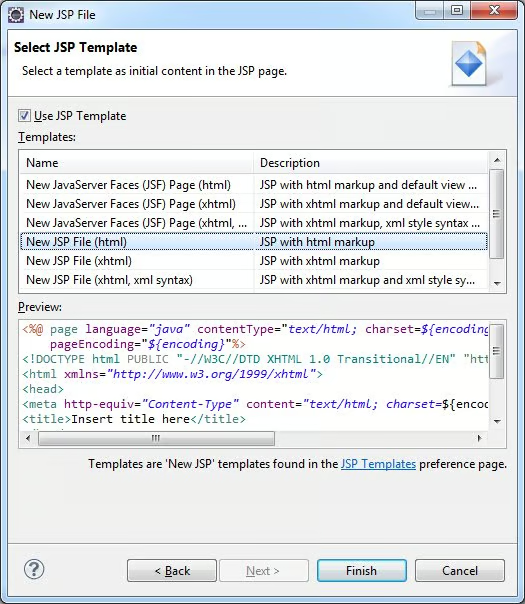
- On the New JSP File screen, give the file the name “index.jsp”, so that it’s the default page for your web app.
- Select the “New JSP File (html)” template from the Templates list and click Finish to create the file:
To include the c and fmt libraries in the page, add the following two tags below the page tag at the top:
<%@ taglib prefix="c" uri="http://java.sun.com/jstl/core" %>
<%@ taglib prefix="fmt" uri="http://java.sun.com/jsp/jstl/fmt" %>
You should also truncate the DOCTYPE tag to new simplified version, in order to make the page HTML5 compliant:
<!DOCTYPE html>Feel free to give your page a title, and include the c and fmt tags in the document body as follows:
<c:out value="Hello World!"/>
<p>It is now: <fmt:formatDate value="<%=new java.util.Date()%>" pattern="E, yyyy-MM-dd h:mm:ss a" /></p>
In order to use the special JSP tags, you’ll need to download the jstl and standard jar files. There are lots of download sites to choose from. I used the Apache site.
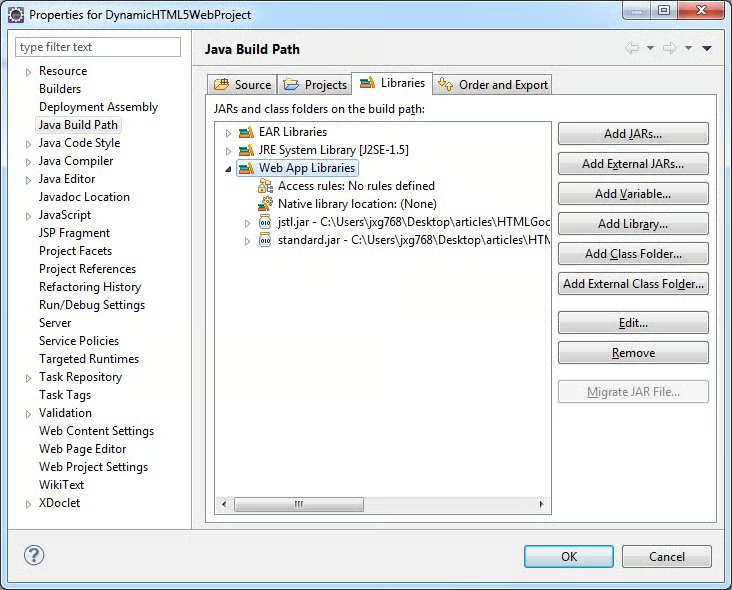
Place the jar files in the WebContent\WEB-INF\lib folder. At that point, you may get an error in your JSP page stating that eclipse can’t find the tag library descriptor for “http://java.sun.com/jstl/core”. From what I can tell, this is related to a bug caused by eclipse automatically adding the jars to the Web App Libraries. That results in eclipse looking for a local copy of the c-1_0.tld file. Luckily, this issue is easily remedied:
- Open your Project Properties by right-clicking it in the Project Explorer and selecting Properties from the context menu.
- Navigate to Java Build Path in the left-hand tree of the Properties dialog.
- Click on the Libraries tab.
- Expand the Web App Libraries item to see that the jstl.jar and standard.jar files have been added.
- Select Web App Libraries and click the Remove button to delete the reference to the Web App Libraries:
6. Click OK to close the Properties dialog.
The error should be gone from the JSP page now.
Configuring the Server
Rather than follow the typical steps for configuring a Web server, I opted to try something a little different. Instead, I installed the run-jetty-run plugin. It allows you to launch Jetty from Eclipse in one click, and includes other extras, such as full maven support. To be honest, I did initially download and configure Jetty as per the usual way, but it wouldn’t run. Every time I tried, the following error filled the console:
java.lang.NoClassDefFoundError: Apps/jetty-distribution-9/0/3/v20130506
Caused by: java.lang.ClassNotFoundException: Apps.jetty-distribution-9.0.3.v20130506
	at java.net.URLClassLoader$1.run(Unknown Source)
	at java.security.AccessController.doPrivileged(Native Method)
	at java.net.URLClassLoader.findClass(Unknown Source)
	at java.lang.ClassLoader.loadClass(Unknown Source)
	at sun.misc.Launcher$AppClassLoader.loadClass(Unknown Source)
	at java.lang.ClassLoader.loadClass(Unknown Source)
Exception in thread "main"
The run-jetty-run plugin was a lot less hassle-prone!
To download it:
- Select Help > Install New Software… from the main menu.
- Click the Add… button beside the “Work with” textbox.
- On the Add Repository dialog, enter “run-jetty-run” in the Name field, and “http://run-jetty-run.googlecode.com/svn/trunk/updatesite” in the Location:
- Click OK to close the Add Repository dialog, and return to the Install screen.
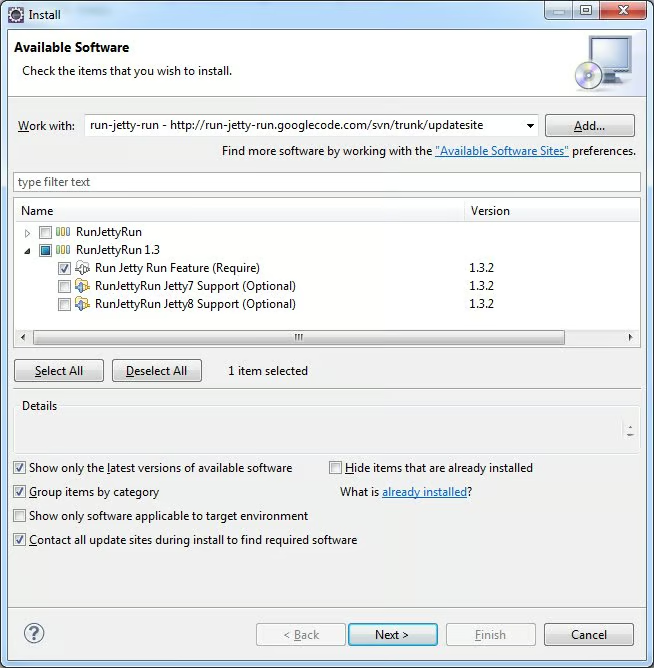
- Expand the RunJettyRun 1.3 item and click the checkbox beside “Run Jetty Run Feature (Require)”:
- Click the Next > button.
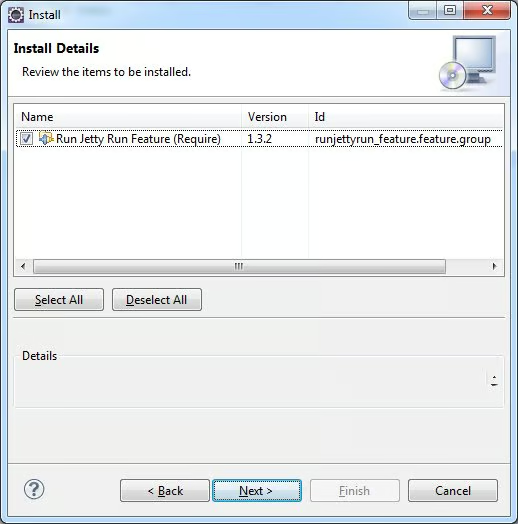
- On the Install Details, review the information and click Next >:
- Read over the license information, click the radio button to accept the terms of the license agreement, and click the Finish button to install the plugin.
- Once the installation is complete, restart Eclipse for the changes to take effect.
Now to run jetty, all you have to do is select the new Run Jetty menu command:
Viewing the Page
To view your page in the browser:
- Choose which browser you want to use via the Window > Web Browser menu items.
- Click the Open Web Browser button on the main toolbar (It has the Earth icon).
- Type “http://localhost:8080/DynamicHTML5WebProject/” in the browser’s Address box.
If all is well, something very much like this should come up (except with the actual date and time):
Hello World!
It is now: Thu, 2013-06-06 5:02:07 PM
Exciting!
Conclusion
While it’s true that we could have done the same thing using client-side JavaScript, JSP’s integration with Server-side components such as Servlets and Java Beans makes it far better suited for certain tasks. We’ll explore some of these in a future instalment.
