
Adobe Edge is a program which is used to create interactive animated content for the web. It makes use of HTML5, CSS3 and JavaScript. According to Adobe, this means that content from Edge will display consistently across modern browsers, tablets and smartphones. While it’s possible to create many of the design elements in Edge chances are you’ll be using other programs such as Photoshop, Illustrator or Fireworks.

When you launch Edge, you’ll see that there’s not much there, except information for getting started which you’ll see at the top right of the interface. There are four headings: Getting Started, What’s New, Resources and Quiet. Under the Getting Started heading there are six major lessons which are: Start, Create, Animate 1, Animate 2, Extend and Reuse.
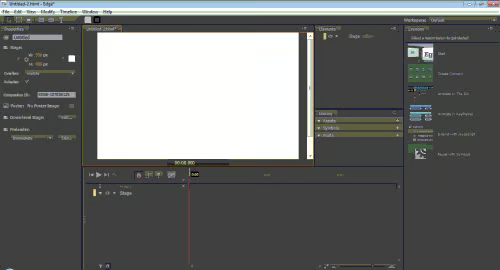
When you click on File: New, you’ll see the workspace above. Note that all the lessons from the previous view have been moved to the far right of the interface.
The best way to get started is to watch the lessons and if you’ve ever worked with animation before, some of this will be familiar and will make it easier for you to learn some aspects of Edge. Others which involve JavaScript, are more complex. Some of the things that you can expect to learn with Edge are: The basics of creating animations, working with existing HTML, Creating assets with Photoshop, Illustrator and Fireworks, symbols, interactivity, looping, code, web fonts and type in motion.
The first lesson (Start) shows you how to create a one second animation of a rectangle that changes color as it moves. When you click on the lesson header it brings up the lesson on the far right of the workspace. The lesson itself will only take a few minutes to complete.
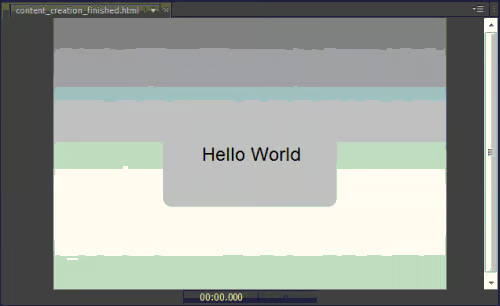
The next lesson is about creating content. Here, you’ll create a rounded rectangle, center it using the handy guides that pop up when you’re positioning an element, create some text, center it in the rounded rectangle, add a background and order the elements in preparation for animating.
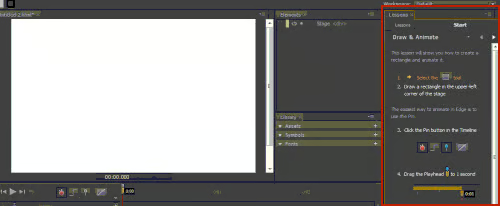
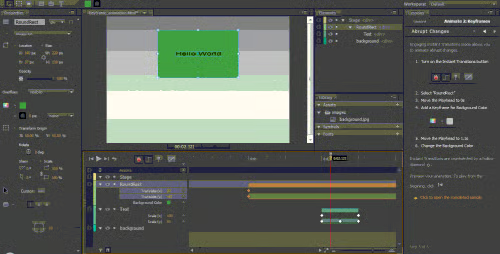
Lesson three shows you the basics of animation using the “Pin,” a tool which you use with the Playhead. The purpose is to make animation easier.
In this animation you’ll work with the timeline, different elements and the “Pin.” In the screen shot above you can see part of the animation in motion. It’s important to pay careful attention here because it’s easy to make mistakes. Fortunately the lesson gives you a finished animation to look at and to compare your results.
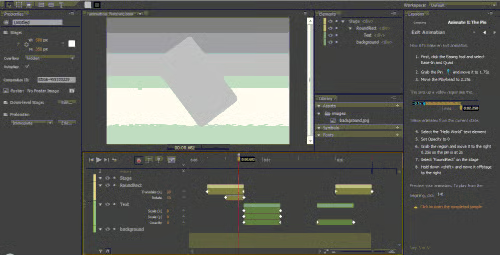
Animate 2 is about creating animation by using keyframing. Keyframes are a really important to controlling your animation(s). You’ll learn how to position keyframes and add different properties to each one.
Lesson 5 (Extend) shows you how to extend your animations using JavaScript. This is where you’ll add triggers to the animation. Triggers are functions that are called at a specific time and are added to the timeline where the playhead is located.
There are many JavaScript steps and panels used to build the animation. If you’re not conversant with JavaScript, this will be challenging to follow. Don’t be surprised if your animations don’t match the samples. Like many a programming language, the syntax needs to be created in a certain way. If not, the results will be unpredictable.

Lesson 6 (Reuse) opens with a some colorful circles. When you play them back as an animation the result is both striking and attractive. In the lesson, you’re shown how to copy an existing animation so that multiple instances play back. Then the lesson gets into the JavaScript again. It was difficult to follow, partly because Edge uses many popup windows with no clear explanation of why they’re used in this way. One thing is clear, this program is meant for someone who knows what they’re doing. If you’ve never used JavaScript before, it would be wise to pass on this program
Also, when working with animation a great deal of focused energy and patience is required, partly because it’s easy to make a mistake. It’s really important to check your work frequently and take nothing for granted. When creating animations, it’s a good practice to make use of a storyboard, where everything is plotted out in advance. If there are problems, they will occur during the storyboarding process. And when you’re done, that’s it for the animation. All you have to do is build it for real.
Resources
One of the things that will help you to understand what Adobe is doing is to visit the site: HTML.Adobe.com
Another is this page: http://edge.adobe.com/resources.html. Note that not all of the content on this page is current for Edge Preview 6.
