The latest version of Microsoft Internet Explorer, version 9, introduces some dramatic new changes. Users now get HTML5 support, CSS 3 support, SVG support, and a new Geolocation API, among many other new features.
All of the big new changes present big new opportunities for developers. But probably the lowest-hanging, juiciest fruit is the set of features of Pinned Sites. With a few simple tweaks to your website, you can not only offer your visitors a rich new experience, but also potentially increase your site’s success by integrating it with the Windows 7 desktop via the taskbar.
Overview of IE 9 Pinned Sites
IE 9 offers users several new features under the category of “Pinned Sites”:
- Draggable Pin Images: images that the user can drag to the taskbar to pin the site.
- Jump Lists: similar to Jump Lists for Windows 7 apps, but even easier to implement; once your site is pinned to the taskbar, right-clicking it will give the user instant access to parts of your site, dynamic content or different sites altogether.
- Jump List Categories: custom groups of Tasks in the Jump List.
- Overlay Icon Notifications: event surfacing for your web app that appears in the taskbar overlay.
- Thumbnail Buttons: mini-controls that appear in the site’s taskbar thumbnail, giving the user access to custom app functions, such as player controls or social networking buttons.
- UI Tweaks: colored navigation buttons, colored overlays, larger favicon.
- JavaScript API: for detecting whether the site is pinned or not, for creating dynamic Jump Lists, and for a ton of other stuff.
If you want to know the benefit of adding a few lines of code to your site, look at the sites already doing it. Huffington Post, for example, found that users who pinned the site to their taskbar spent almost 50 percent more time on HuffPo. On top of that, they were 14 percent more likely to stay on the site and viewed 11 percent more pages.
The metrics hold up across other sites, as well. On both hi5 and LIVESTRONG, IE 9 users viewed 15 percent more pages than users of other browsers. And on hi5, users responded to three times more social requests like friend and game invites.
Figure 1.
This is the low hanging fruit: improved site numbers with comparatively low effort. You don’t have to convert your site to HTML5 to take advantage of this. With some extra meta tags and a few lines of JavaScript, you can effectively turn your website into a Windows 7 desktop app, capable of giving users a content-rich experience without even opening their browser.
Here are several basic Pinned Site features that you can incorporate right now.
64×64 favicon.ico File
One of the first things you’ll want to do to upgrade your site is to focus on your favicon. If you haven’t already added a favicon to your site, now’s the perfect time to do so. If you have one, chances are high you’re currently using a 32×32 image, or possibly an .ico file that includes both 32×32 and 16×16. This looks great in the browser, as well as the Start menu. But when pinned to the taskbar it might look a bit pixilated. That’s because the taskbar uses a 64×64 icon.
You’ll find is that smaller favicons don’t scale up well for the taskbar, but a 64×64 favicon may not scale down for the address bar, either. If you have software that generates an .ico file with multiple sizes in it, that’s your best option. Otherwise, the icon could be jagged in either the larger or smaller sizes.
Once you have the file, upload it to your site. While it can be located anywhere, it’s traditionally put in the root of your site. Add a meta tag to your <head> section:
<link rel="icon" href="/favicon.ico" type="image/x-icon">
Create a Draggable Image
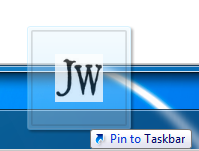
Previously, users pinned your site by dragging the icon from the address bar, if they knew to do so. That’s a big If. Draggable images give you much more flexibility and creativity in encouraging your users to make your site a part of their taskbar.
Draggable images can be any image, not just the site icon. IE 9 recognizes common graphics format, such as jpg or png. Microsoft’s Site Pin Radio, a Site Pinning demo site, has a great example of an svg object being used as a pinnable image.
Add an image to the top of your site. Here is some sample code:
<div id="pinMeContainer ">
      <img src="images/siteIcon.jpg" height="125" weight="125" />
      <span id="pinMe">You appear to be using IE9. Drag the image on
      the left onto your Task Bar for a richer experience.</span>
</div>
This example uses the following CSS styles:
#pinMeContainer {
      width: 50%;
      position: relative;
      text-align: center;
}

#pinMe {
      margin-top: 40px;
      position: absolute;
      text-align: center;
      font-size: 1.2em;
      padding-left: 40px;
      padding-right: 40px;
}
In this example, I’ve gone with the source image for the icon. You could just as easily use favicon.ico itself or even a completely unrelated image.
Figure 2.
If you load up your changes, you’ll notice that dragging the image does nothing toward pinning the site. No big surprise there. But to turn it into a draggable image, all you need is one bit of code, added to your <img> tag:
class="msPinSite"
Voila. Draggable.
Figure 3.
You can take your user experience a step further by adding a cursor, either a custom .cur file or one of the prebuilt cursors available:
style="cursor: move;"
By now your <img> tag should look something like this:
<img class="msPinSite" style="cursor: move;" src="images/siteIcon.jpg" height="125" weight="125" />
Detecting Pinned Status
To kick it up a notch, you should check for your site’s current Pinned status to determine whether to display this message or not. To do this, IE 9 recognizes the msIsSiteMode() method.
Take out your <div> nest and add the following instead:
<script type="text/javascript" language="javascript">

if (!window.external.msIsSiteMode()) {
       document.write('<div id="pinMeContainer"><img class="msPinSite" style="cursor: move;" src="images/siteIcon.jpg" height="125" weight="125" /><span id="pinMe">You appear to be using IE9. Drag the image on the left onto your Task Bar for a richer experience.</span></div>');
}

</script>
Try pinning and unpinning your site. You should see your draggable image and instructions appear or disappear based on whether or not the site is pinned to the taskbar. You’ll also notice an interesting quirk around how IE 9 treats pinned sites. When you first load your unpinned site in IE 9, you should see the image and text instructions. Pin the site and the site gets refreshed automatically. The image and message disappear. This shows you that the site mode is being detected correctly.
However, unpin the site and nothing changes. Refresh the site in the current browser and still nothing changes. But close the browser, reopen it and navigate to the site. Now its status as “unpinned” is detected once again. At this point, the image and message should reappear.
For more on Draggable Images, including an example of a custom cursor and some additional callout functionality, check out the MSDN documentation. You can also learn more specifically about the msIsSiteMode method.
Adding Jump Lists
Now that your site is pinned, what do you do next? How do you add that richer experience you’ve been promising?
Your first, and easiest, task is to add Jump Lists. These give your users places to go and things to do directly through the taskbar, whether the browser is open or not. Of the collection of meta tags that IE 9 now recognizes, msapplication-task, the one used to create Jump Lists, will probably be used more than any other.
As an example, go to your <head> section and add three new destinations, such as:
<meta name="msapplication-task" content="name=LinkedIn;action-uri=http://www.linkedin.com/in/justinwhitney;" />
<meta name="msapplication-task" content="name=Twitter;action-uri=http://twitter.com/ap0110;" />
<meta name="msapplication-task" content="name=Vimeo;action-uri=http://www.vimeo.com/justinwhitney;" />
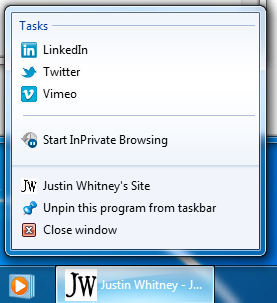
Note the “name” and “action-uri” parameters within “content”. Pin your site to the taskbar, then right-click your pinned icon and you’ll see three links under “Tasks.” It’s a start, but to help with branding and navigation, you should add icons, as well, using the “icon-uri” parameter:
<meta name="msapplication-task" content="name=LinkedIn;action-uri=http://www.linkedin.com/in/justinwhitney;icon-uri=http://www.linkedin.com/favicon.ico" />
<meta name="msapplication-task" content="name=Twitter;action-uri=http://twitter.com/ap0110;icon-uri=http://twitter.com/favicon.ico" />
<meta name="msapplication-task" content="name=Vimeo;action-uri=http://www.vimeo.com/justinwhitney;icon-uri=http://www.vimeo.com/favicon.ico" />
Right-click your pinned site again and you should see the new icons. If the icons don’t appear, try closing the browser and right-clicking the pinned app. Note that the icons you use here don’t necessarily have to be in the root of the site. This gives you a good opportunity to brand different activities based on your site identity.
Figure 4.
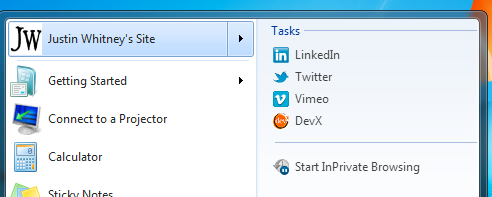
As an added bonus, this Jump List will also appear as a flyout menu if your visitors pin the site to the Start Menu.
Figure 5.
It’s important to note the difference between two types of Tasks. The type shown here, implemented through meta tags, is a static Task. These get updated only when the user loads or refreshes your site. For example, make sure your browser is closed and right-click again on the icon. You’ll see three Tasks in the Jump List. Now add one more meta tag:
<meta name="msapplication-task" content="name=DevX;action-uri=http://search.devx.com/search.cfm?q=justin+whitney&sa.x=10&sa.y=8&a=1&f=1&s=0;icon-uri=http://www.devx.com/favicon.ico" />
Right-click the app again. Still three Tasks. Now click the app to open the site. After it loads, right-click the app again and you’ll see the fourth Task has been added.
For many sites, this may be all you need. But if you manage a content-driven site, you’ll want to explore Dynamic Jump Lists. Implemented through JavaScript APIs, these allow you to customize your Jump List for individual users based on browsing experience or highlighted content. If you’re not convinced about the benefit of doing this, consider that when LIVESTRONG.COM implemented dynamic Jump Lists, they discovered that IE 9 users spent 53 percent more time on the site and were 40 percent more likely to come back.
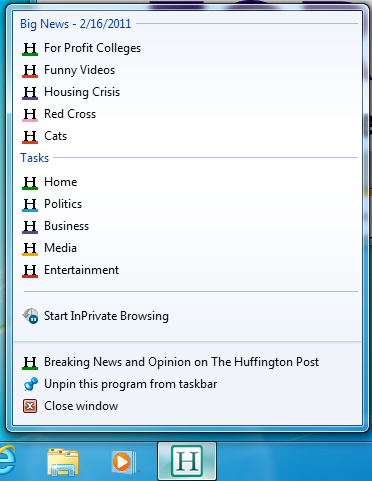
Huffington Post makes especially good use of dynamically adding tasks. In fact, they’ve successfully implemented a lot of IE 9 Site Pinning tricks.
Figure 6.
Learn more about How to Create Dynamic Jump Lists or Add Tasks to a Jump List. Also check out Microsoft’s tweetfeed demo while you’re at it.
Additional Meta Tags
As mentioned, you have several new meta tags available to help turn your site into a desktop application. In addition to using msapplication-task to define a static Task in a Jump List, you can use the following:
application-name

Sample code:

<meta name="application-name" content="Justin Whitney's Site" />
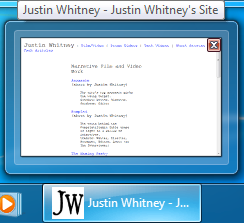
This adds a name that will appear in several places, such as the tooltip for the taskbar thumbnail and the Start Menu.
Figure 7.
msapplication-tooltip
Sample code:
<meta name="msapplication-tooltip" content="Justin Whitney: Coder, Filmmaker, Renaissance Man" />
This adds an additional tooltip that appears over the desktop icon. Note that the name may be a little confusing. When hovering over the app icon on the taskbar, you get the “application-name” text. However if you drag the site to the desktop and hover over that icon, that’s when you get the “msapplication-tooltip” text.
Figure 8.
masapplication-navbutton-color

Sample code:

<meta name="msapplication-navbutton-color" content="#660066" />
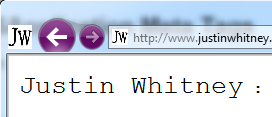
This changes the color of the user’s navigation buttons while on the site. Note, however, that this does not affect the overlay color on the taskbar, which is automatically calculated based on the dominant color of the favicon.
Figure 9.
You have several more meta tags available for your use. For more, look at Declaring Pinned Site Metadata.
Where To Go Next
Site Pinning gives you the chance to reposition your site as a desktop experience with surprisingly little effort. To make the most of IE 9’s Site Pinning features, check out these resources:
- Site Pinning Test Drive
- Introduction to Pinned Sites
- Creating a Thumbnail Toolbar
- Working with Custom Icon Overlays
This tutorial is brought to you by one of our sponsors!


