
One of the best things about YouTube videos is the ability to embed them in your own site so that you don’t have to host the video files. Can you imagine if everyone who wanted to show a video had a copy of it on their server? Talk about disk wastage! The iFrame element, which is what makes embedding possible, may be used to display just about any Web content from an HTML table, image, to an entire document. The downside is that the more complex the embedded context becomes, the more likely that you will run onto issues, whether in sizing, formatting, or even behavior. The good news is that you have complete control over embedded content, thanks to the Document Object Model. In today’s article, we’ll get a taste of how you can reuse your own site content by embedding it in an iFrame and then filtering out the relevant parts with a little help from jQuery.
A Closer Look at the iFrame Element
One of the reasons for the iFrame’s popularity is its simplicity: just an HTML tag with a few attributes:
<iframe width="420" height="315" src="//www.youtube.com/embed/6r6GZ7nAUZ4" frameborder="0" allowfullscreen></iframe>There are more supported properties than those in the above example, but those are some of the most common ones. They are all so straight forward that really the only point worth mentioning is that the src attribute URL here is missing the protocol. This is done so that either HTTP or HTTPS may be utilized.
Reusing Menus
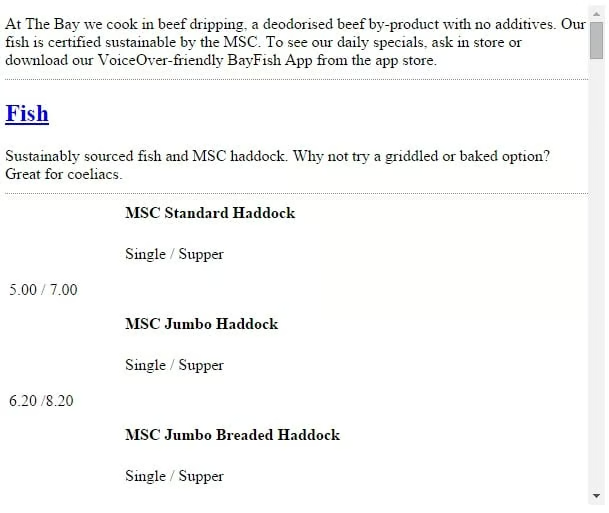
I’d like to display a restaurant menu within another page on my site, but I don’t want to duplicate all of the code that fetches the menu content. This is a perfect task for the iFrame. I just add the iFrame element to the document where I want to display the menu and set the src to the menu page’s URL:
<iframe width="600" height="500" src="/menu/the-bay-fish-chips-menu/" frameborder="0" allowfullscreen></iframe>Works like a charm, except that the entire page is now being displayed within another page:

jQuery to the Rescue!
jQuery makes it easy to filter out the content that we want from the rest of the embedded page using the DOM element collection contents() method. It searches through the immediate children of the element collection and constructs a new jQuery object from the matching elements. It’s similar to the children() method, except that contents() includes text nodes as well as HTML elements in the resulting jQuery object.
In the following snippet from the embedded document the menu content DIV begins at line 4; it’s the one with the “entry-content” class:
<div id="primary" class="site-content">
  <div id="content" role="main">
    <article class="post-2560 menu type-menu status-publish hentry">
      <div class="entry-content">
        <p class="" style="margin-bottom:10px;padding-bottom:10px;margin-top:10px;border-bottom:1px dotted #878787;">
        At The Bay we cook in beef dripping, a deodorised
        beef by-product with no additives.
        </p>
        <h2 class="menu-header color6 expanded" style="" onclick="toggleSection(event, this)" title="Click to expand/close.">
          <a href="#">Fish</a>
        </h2>
        <div class="menu-sub-container" style="display: none;">
          <p style="margin-bottom:10px;padding-bottom:10px;;border-bottom:1px dotted #878787;">
          Sustainably sourced fish and MSC haddock. Why not
          try a griddled or baked option? Great for coeliacs.
          </p>
          <div class="menuitem-container">
            <img class="menuitemimage" src="/wp-content/plugins/gft/images/menu-item.png" align="left">
            <p class="menu-title color1" style="margin:0;padding-bottom:5px;font-weight:bolder;">
            MSC Standard Haddock
            </p>
            <p class="color4" style="margin-bottom:0px;width:100%;text-align:justify;font-size:1rem;line-height:1.4rem;">
            Single / Supper
            </p>
            <p class="menu-price color1">
              5.00 / 7.00
            </p>
            <div style="clear:both;"></div>
          </div>
          ...
        </div>
      </div><! -- .entry-content -- >
    </article><! -- #post -- >
  </div><! -- #content -- >
</div>
The easiest way to remove all of the extraneous content is to fetch the content DIV using the find() method and then replace the entire HTML node of the embedded document with it. This can be accomplished in one line of code, but it’s best to reduce redundancy by storing DOM nodes to variables:
var $iFrameContents = $('iframe').contents(),
    $entryContent   = $iFrameContents.find('div.entry-content');

$iFrameContents.find('html').replaceWith($entryContent);
Now all we have left in the iFrame is the one DIV. That will prevent scripts in the HEAD or bottom of the BODY from loading. However, it will also stop stylesheets from being loaded. Hence, we have a very plain looking menu!
But that’s OK because we can simply parse out the stylesheet that we need and then prepend it to the top of our content DIV. Ideally, a stylesheet with an ID works best, but as long as you know the file name and path, you can narrow it down easily enough.
var stylesheet = $('iframe').contents().find('head > link[rel="stylesheet"][href$="/css/style.css"]');
$('iframe').contents().find('div.entry-content').prepend(stylesheet);
Here is the menu again with the styles re-applied:

var jsScript= $('iframe').contents().find('head > script[type="text/javascript"][src$="/myScript.js"]')
$('iframe').contents().find('div.entry-content').append(jsScript);Turning Off Script Events
Sometimes you want to display content in a static way. The original menu page features section toggling that we may not want to enable in the iFrame. In that case, we can expand each section and then remove the click handler, reset the mouse cursor, and remove instructions to “click to expand”.
/* this is the HTML
<h2 class="menu-header color6 expanded" style="" onclick="toggleSection(event, this)" title="Click to expand/close.">
  <a href="#">Fish</a>
</h2>
*/
//expand all menus
$contentDiv.children('h2.menu-header:first()').trigger('click');

//reset the mousepointer
$contentDiv.find('h2, h1, a').css( 'cursor', 'text');

//turn off expand functionality
$contentDiv.find('h2[onclick^="toggleSection"]').attr('onclick', null).removeAttr('title');
The iFrame load() Event
Just as we must wait for the main document to finish loading before we can manipulate the DOM, we must also wait for embedded documents in the same way. Otherwise, we risk trying to manipulate elements that have not yet loaded. Whereas the $( document ).ready( handler ) is meant for document loading, the Element.load( handler ) function may be applied to any element, including iFrames.
$('iframe').load( function(){
  //put your iframe code here
});
Conclusion
The techniques covered here today will work wonders on content that is served from you own site. Displaying content that originates from another Web host necessitates a different approach because, although cross-site content is permitted within iFrames, cross-site scripting is not. In the next article, we’ll take a look at ways to circumvent this limitation.
