

“Shall We Make a Game?”

This is the third in a series of posts that will show you to create a (very) simple Windows 8 game. We’ll be using HTML5, JavaScript, WinJS, and some helpful libraries from CreateJS along the way.
The game is based on the XNA sample game “Catapult Wars Lab”. We’ll reuse the assets from that game as we develop a new version for Windows 8 that’s based on web technologies.
In this article, we’ll bring things to life with some game logic and JavaScript.
The Game Loop
The heartbeat of any game is the game loop. It’s a function that runs many times per second and has two primary jobs – update what’s going on then draw the new scene.
In Part 2, we already put the outline in place:

Now the question is, how do we get the gameLoop() function started, and keep it running many times per second?
EaselJS Ticker Class
Fortunately, EaselJS has a Ticker class that has some features we’ll use:
- Manage the timing of the game loop
- Pause/resume the game loop
- Measure elapsed time
It’s a static class, so we can just start using it. In default.js, add a new startGame() function and call it at the end of prepareGame():

Here we’re telling Ticker to use window.requestAnimationFrame to control how frequently the gameLoop function is called. 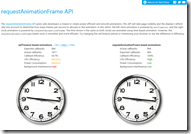
requestAnimationFrame is a relatively new API for web applications that helps ensure work isn’t being done unnecessarily.
To understand why this can be better than setting a fixed timer (e.g. with setTimeout()), see the requestAnimationFrame sample on the IE Test Drive site.
Every time the RequestAnimationFrame is ready, our game loop will run.
“Ready, Aim, Fire!”
Okay, now we have a game with a running game loop, so it’s time to add some fun!
Each player/catapult is going to be firing the ammo/rock toward the other. We need to know if a shot is currently flying, who’s turn it is, and how the shot is moving.
First, let’s add more variables to default.js:

Now let’s use some of them by adding the following to the update() function:

For now, both players automatically fire (at a random velocity) on their turns. The ammoBitmap is moved to the top center of the firing catapult, and shotVelocity is given a random value within a bounded range (adjusted for screen resolution.)
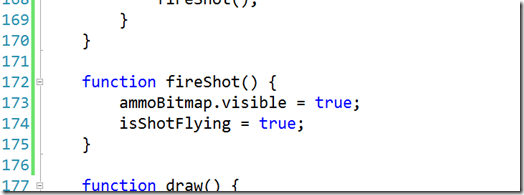
We’ll also add a fireShot() function to show the shot and tell the game it’s in the air:
Updating the Display
Before we move the shot through the air, let’s focus on the 2nd half of the game loop equation – drawing to the screen. This can often be very complex, but EaselJS Stage takes care of drawing our content (all of the children – Bitmaps, Text, etc. – we added to Stage) to the canvas, so this is all we need:

That’s it! If you run the game, player 1 will automatically fire and the shot will appear over the red catapult…
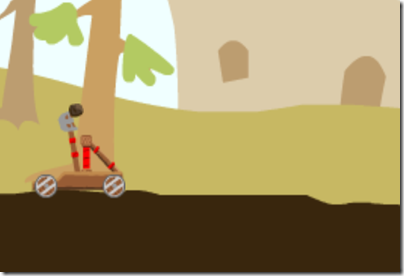
… but it won’t budge. Let’s get things moving.
Moving the Shot
Let’s return to the update() function and add logic to the if (shotIsFlying) statement:

Don’t run it yet, we still need two functions, but here’s what’s going on:
- Lines 149 & 150 – Move the shot by adding velocity (which may be negative to go up and/or left)
- Line 151 – Apply gravity to slow velocity
- Lines 153-155 – Has the shot hit the ground or gone of the left or right edge of the screen?
- Lines 157-160 – Missed – end the shot and change players
- Lines 162-168 – Player 1’s shot – see if it hit player 2. If so, update player 2’s lives.
- Lines 169-175 – Player 2’s shot – see if it hit player 1. If so, update player 1’s lives.
Let’s add the checkHit(Bitmap) function:

What’s that talk of hitTest? EaselJS DisplayObjects (on which Bitmap is based) supports a hitTest() method, which makes it very easy to see if a point is over the current object’s position. Unfortunately, we’re scaling objects and hitTest only works with the original sizes, so we’ll need to check for hits ourselves. Just a bit of math and we’re set.
Handling Hits
Now, add the processHit() function:
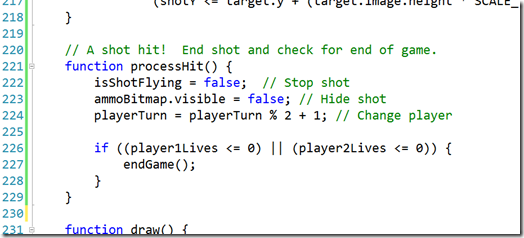
This simply ends the shot, changes players, and makes sure the game isn’t over.
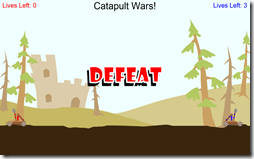
Ending the Game
Let’s end this post by ending the game. Add the endgame(Image) function:

That’s it! Now you can run the game and see who wins.

What’s Next?
We’ve added a lot in this part – things are drawing, moving, hitting, ending… but there are two gaping holes. First, the player doesn’t actually play, so we’ll add input processing next. Second, things are awfully quiet, especially for a war, so we’ll toss in some sounds as well so stay tuned for Part – 4, coming soon.
This article was reprinted with permission from Microsoft Corporation. This site does business with Microsoft Corporation.
