Aptana Studio is one of the most comprehensive tools in the free Web editor market. Though its primary function is as an Ajax development environment, it is equally adept at working with PHP, Ruby, Rails, .Net, Titanium, PyDev (Python, Jython, Iron Python).
In this tutorial, we’re going to get better acquainted with Aptana Studio 3 by creating a hypothetical newsletter subscription page. The page will contain a text field that accepts an email address and a button for submitting it to the server using jQuery. On the server-side, a PHP script will verify that the email was received and sends a message back to the browser for displaying. In building this project, we will learn how to include JavaScript libraries in our projects, how to configure Aptana Studio to use our Web server, and how to set up our own Server/Runtime Configurations and Preview Settings.
What You’ll Need
If you haven’t already done so, download Aptana Studio 3 as a standalone application or plug-in for Eclipse 3.5+. Aptana Studio requires a few third party tools; some come with the installation package, some don’t. Sun/Oracle Java 1.5.x or later must be installed separately on Mac and Linux, while the Windows installer includes a compatible version of Java. Git is used internally to update your scripting environment. On Windows, Aptana recommends PortableGit from msysgit because it has a bash shell for executing commands. The first time that you open Aptana Studio, it will offer to install it for you.
You’ll also be needing a web server which supports PHP. The built-in server that comes with Aptana is only suitable for Ajax calls and basic web page serving. I would recommend Wamp or Xampp. I will be using Wamp at my end.
Once you’re certain that you’ve installed all of the necessary tools, start up Aptana Studio and roll up your sleeves!
Choosing a Project Type
Aptana Studio offers an array of Project types to choose from. However, rather than select the obvious PHP Project, I would suggest selecting “Web Project” instead, because it gives you easy access to some very useful templates and files within the excellent HTML5 boilerplate framework:

Click Next> and enter “NewsletterSubscription” for the Project name. Uncheck “Use default location” in order to enter the web root of our web server.
Use the Browse button to locate your web server’s document root. For Wamp it’s the “www” folder.
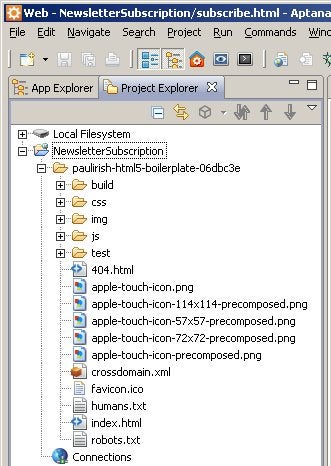
After you click the Finish button, your new project will appear in the Project Explorer pane. If you expand the project by clicking on the plus [+] sign on the left of the project name you’ll see the HTML5 boilerplate folder directly below it, from which we’ll be borrowing some files for our project:
Creating the subscribe.html Page
The sign up page is called subscribe.html. We could go through the File=>New menu items to create an empty HTML page from a template, but there’s no need, since the boilerplate framework already contains a perfectly usable index.html page.
In the Project Explorer pane, drag the index.html file to the root of your project folder and rename it to subscribe.html by right-clicking the file and selecting Rename from the context menu. You’ll also need to drag the CSS and JS folders to the root as they are referenced by the index.html file. I performed some cleanup of the latter by moving the jquery-1.5.1.min.js file up a level and deleting everything else in the js folder.
Double-click the renamed subscribe.html file to open it in the editor.
Defining Editor Properties
One thing that stands out right away when you open a file in the editor pane is that the colors are pretty radical. Instead of the typical black text on a white background, the colors are reversed. Some people might like that color scheme; I find it a little depressing myself. This is easily remedied from the Themes screen on the Preferences dialog. To get there, select Window=>Preferences from the main menu and go to Aptana Studio=>Themes in the tree:
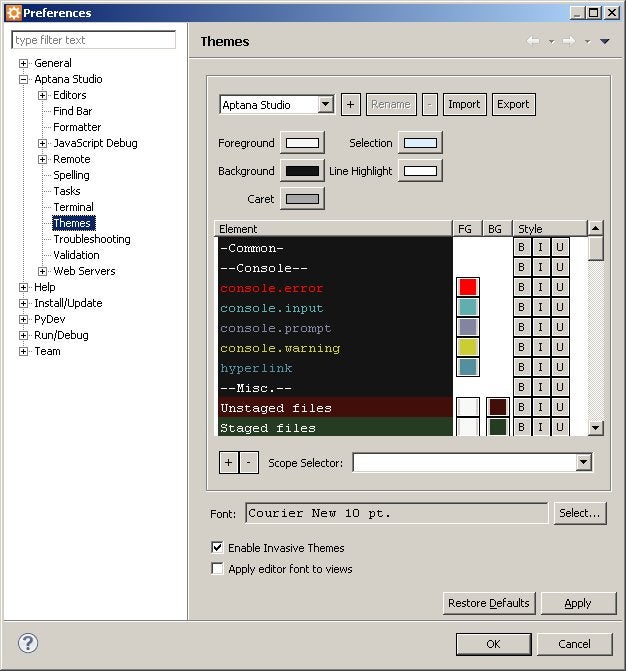
There are a few themes that are typical black on white, including Aptana Studio 2.x, Eclipse, and Dreamweaver. Individual colors are changeable as well.
There are a couple of other features that I like to set in my editor, including “Insert spaces for tabs” and “Show line numbers”. Both of these can be found on the “Text Editors” screen. It’s accessible via General=>Editors=>Text Editors from the tree:
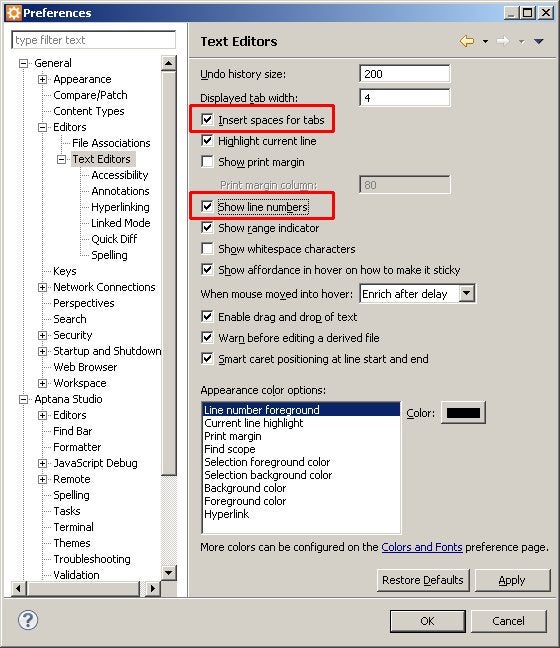
Note that there are some definable colors in the “Appearance color options” list on the bottom. Those only affect the general look & feel of the editors themselves and not that of the code.
Using Your Server for Previews
As mentioned earlier, we need to preview our subscribe.html page on a server that supports PHP. Here’s how to do that.
Right-click the NewsletterSubscription project in the Project Explorer pane and select Properties at the bottom of the context menu. That will bring up the a dialog for setting properties that apply to that specific project.
Select “Preview Settings” from the left-hand tree and choose the “Use specific server” radio button. Of course, there are no servers in the list as we haven’t defined any yet. Click the “New” button on the right to do that.
On the “Choose server type” dialog, select “Simple Web Server” (the only item in the list), and click “OK”.
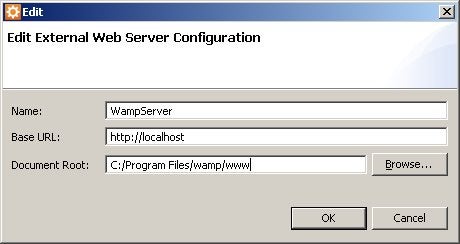
The “Edit External Web Server Configuration” dialog is where we can enter the particulars about our web server. It has three fields that should be filled in as follows:
- Name: This is the name that will appear in the lists of external web servers, so give it any name that will help you to differentiate it from any other server that you might want to use, e.g., one for Perl, or Java. I called mine “WampServer”.
- Base URL: The Web path to the server’s document root. This is very important as Aptana will append the project folder(s) and page name to this path. Yours may require an IP or domain name as well as a port number, such as “http://127.0.0.1:8080”. When in doubt, stick with localhost as in “http://localhost”.
- Document Root: The absolute path to the server’s document root. Use the Browse button to locate it on the hard drive. In Windows, it would look something like “C:Program Fileswampwww”, although the exact path depends on what server you use and where you installed it:
Coding the Subscribe Page
One nice thing about the boilerplate HTML template is that it handles the loading of the jQuery and Modernizer libraries for you. We don’t need the latter here, so we can remove the reference to it. Here is the complete HTML markup, not including the JavaScript that sends the form contents to the server (we’ll be getting to that in part 2):
<!doctype html>
<html class="no-js" lang="en">
<head>
<meta charset="utf-8">
<meta http-equiv="X-UA-Compatible" content="IE=edge,chrome=1">
<title>Newsletter Subscription Page</title>
<meta name="viewport" content="width=device-width, initial-scale=1.0">
<link rel="stylesheet" href="css/style.css?v=2">
</head>
<body>
<div id="container">
<header>
Newsletter Subscription Page
</header>
<br>
<br>
<div id="main" role="main">
<form id="subscribe">
<input id="email" type="text" class="input_bg" placeholder="Add your e-mail address" />
<button type="submit" class="button">Submit</button>
</form>
</div>
<footer>
<div id="result" style="display: none"></div>
</footer>
</div>
<script src="//ajax.googleapis.com/ajax/libs/jquery/1.5.1/jquery.js"></script>
<script>window.jQuery || document.write("<script src='js/jquery-1.5.1.min.js'>x3C/script>")</script>
</body>
</html>