


5/14/13
Since Helios release 2 of the Eclipse IDE for Java EE Developers added support for HTML5 development, many web developers have embraced Eclipse as their editor of choice. In the Create an Static HTML5 Web Project in Eclipse article, we saw how to setup a static HTML5 Web project in Eclipse Juno. In today’s follow-up, we’ll be taking a look at how to use the auto-complete feature, the WYSIWYG (What You See Is What You Get) Editor, and even how to create our own HTML5 templates!
In the last article, we created a new Static Web Project as well as an HTML5 page. Now it’s time to add some content to our page.
Choose Your Editor
Normally, when you double-click on an HTML file in the Project Explorer, it opens it using the text-based HTML Editor. Like the Java Editor, the HTML Editor uses color coding to highlight different page elements and also supports auto-completion. For instance, if you insert an opening tag bracket (<), you’ll get an auto-complete list containing relevant suggestions:
However, if you right-click the HTML file instead, and select Open With from the popup menu, you’ll see an item called the Web Page Editor. This editor contains a WYSIWYG designer as well as source editor. That can help you to visualize your page while you build it.
If you right-click anywhere in the designer you’ll get a popup menu with a few items. The last one is Show. It in turn contains two or three items, depending on what’s selected in the designer: Properties, Palette, and Outline. The first two items are the ones that you’ll find yourself going to over and over again.
The Properties appears as a View – usually at the bottom – of the IDE. It in turn has two tabs called Quick Edit and Attributes. The latter is especially useful here because it provides an easy way to set tag attributes. For instance, you can set an input’s auto-focus property:

The Palette appears on the right-hand side of the IDE and contains a number of HTML4 elements. Unfortunately, there are no HTML5-specific elements as of yet. These can be dragged & Dropped into the editor and are especially useful for quickly designing forms.
Web Page Editor Options
The look & feel of the Web Page Editor can be altered using the buttons on the main toolbar:
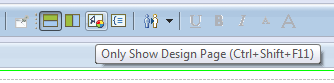
The four buttons are, from left to right:
- Show Design page and Source Page as Horizontal Panes
- Show Design page and Source Page as Vertical Panes
- Only Show Design Page
- Only Show Source Page
Previewing the Page
There is a Preview tab at the bottom of the Web Page Editor, but be forewarned, it doesn’t support HTML5 elements. Thus, a canvas looks like this:

A better way to view your HTML5 pages is to right-click the file in the Project Explorer and select Open With > Web Browser from the popup menu. This will use whatever browser is configured as default – usually the Internal Web Browser. It does support HTML5:

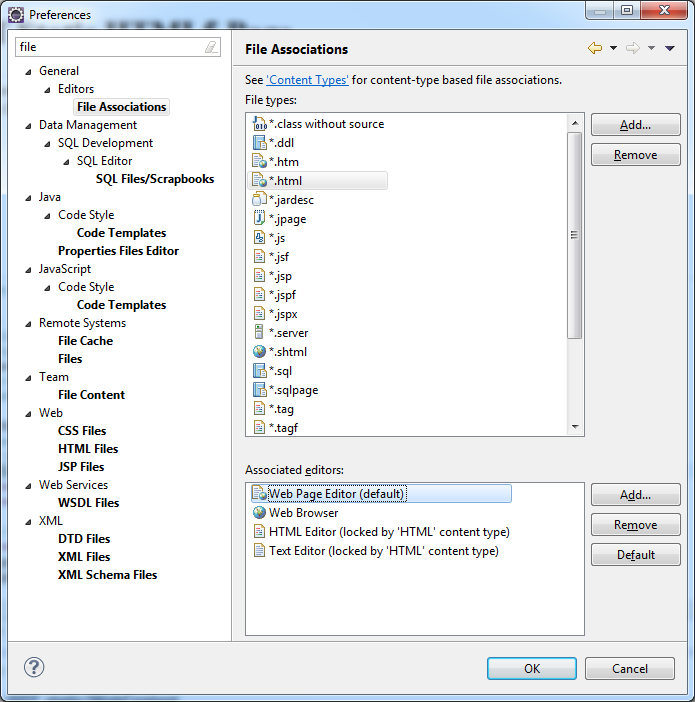
If you agree that the Web Page Editor is the preferred one for HTML editing and design, why not make it the default? Here’s how:
- Select Window > Preferences from the main menu.
- Type “file” in the Type filter text box to narrow down the list of options.
- Click on General > Editors > File Associations.
- Select a File Type that you’d like to associate the Web Page Editor with, such as .htm or .html.
- Select the Web Page Editor item in the Associated editors list box.
- Click the Default button to the right of it. The word “default” will appear next to the “Web Page Editor” in parentheses.
- Repeat steps 4 through six for every file type that you’d like the Web Page Editor to be associated with.
Create Your Own Page Template
Although there is only on HTML5 template available, you are free to edit it or create your own via the HTML Templates dialog. To open it, select Preferences from the Window menu, expand the Web > XML > HTML Files items in the tree, and click HTML Templates.
On there, you’ll find a list of all kinds of templates, including “New HTML”. Selecting a row will cause the page markup to appear in the Preview window. Form there, you can choose to edit it or export it as XML. What I like to do is use the existing HTML5 template as the basis for new ones. Here’s one that I created for myself:

See the variables between the “${}” characters; they insert context-related information at runtime such as the date, character encoding, and the cursor position. The list of available variables is accessed via the Insert Variable… button.
If you have a template that you do not want to remove but you no longer want to see in the content assist list, uncheck the check box next to the Template Name.
Conclusion
In today’s article, we learned how to use Eclipse Juno’s auto-complete feature, the WYSIWYG (What You See Is What You Get) Editor, and how to create our own HTML5 templates for Web projects. I’ll be the first to admit that Eclipse is no DreamWeaver in the HTML editing department, but for a free open source tool, it’s no slouch either! In the next article, we’ll be delving further into JavaScript Development Tools (JSDT) for Eclipse.
