
In an earlier article we looked at setting up the Genesis framework and the Genesis sample. In this article we delve deeper into the process by using the Generate theme.
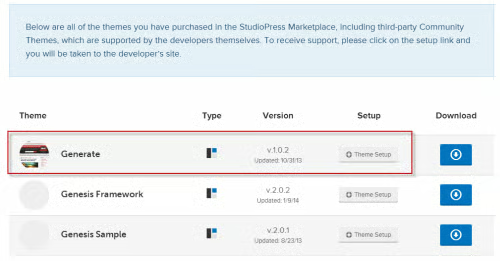
To begin, you need to log into the StudioPress site and access the tutorials for the theme. Here, click on the Theme Setup button as seen on the far right in the screen shot above.
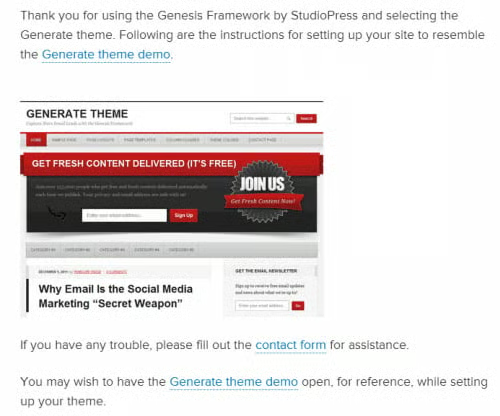
On this page are several links, some of which are: How to Configure the Generate Box, How to Truncate Posts and How to Change the Header/Logo. There’s also a link to the finished demo image which you can use as a guide while setting up your theme.
How to Configure the Generate Box
On the surface, this appears to be a straightforward task. It’s not. There are several mistakes in the instructions and it took a long time to figure out what to do. Here’s how to make it work.
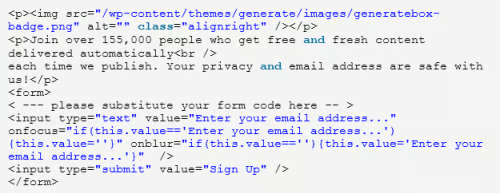
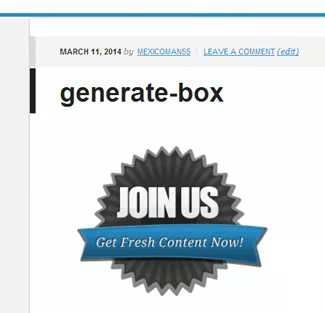
First off, when you go to set up the generate box, you’ll need to go to the Widgets page and select a text box. There, you’ll need to paste the above code (which you can change later to suit your own design.
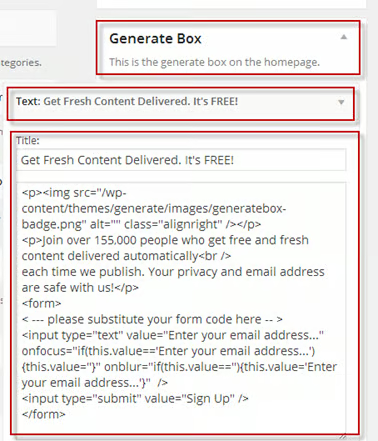
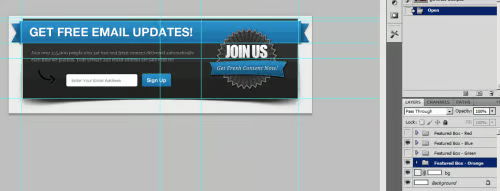
Next, you’ll need to drag the text box to into the Generate box and add a title to the text box, which will look like the above.

Once you save the file your theme will look like the above. This is the basic layout with the default colors. Note that this layout isn’t complete. You need to add your own text and code for the autoresponder you want to use. Since there are several configurations, I won’t cover them here, but one of the most popular is by aweber and if you use this autoresponder, you’ll need to use some custom code to make it work.
How to Change the Header/Logo
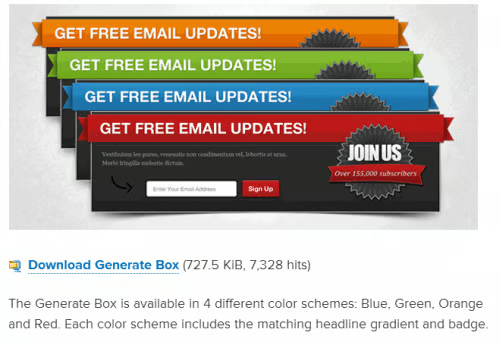
As part of this tutorial, you’re given a PSD (Photoshop file) with four different color schemes as in the screenshot above.
According to the instructions, all you have to do is unzip the file, open it in Photoshop, choose the color scheme you’d like to use and save it as a .PNG file and you’re ready to use the image in your layout.
This is where I ran into several problems with the instructions, which are not correct. First off, the instructions talk about changing the header/logo. Unfortunately, the directions for the pathway to install the generate box are not clear and don’t work.
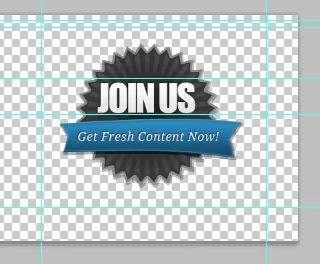
Secondly, you don’t use all of the elements in the Photoshop file, only the badge itself. The rest of the components are there for illustration, not use. What you need to do is turn of all of the unnecessary elements in the file until only the badge itself remains, which looks like the above screen shot. From there you need to crop the image and save it as a transparent .PNG for use in the layout.
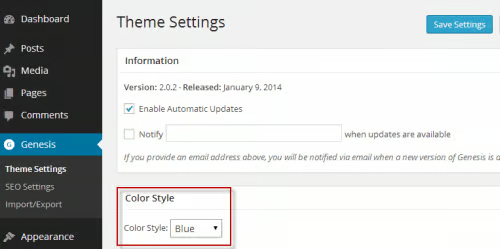
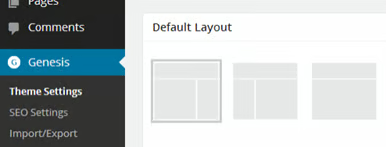
Next you need to back up a step and go to Genesis: Theme Settings. Under Color Styles, choose Blue for this layout and save the settings.
Once that’s done, go to Media: Add New and upload the badge created earlier. Once the file is uploaded, you’ll see it in the Media Library, but if you attempt to use the link to the file given there, it won’t work in the theme.
Here’s how to make it work. Click on View, underneath the uploaded badge in the library.
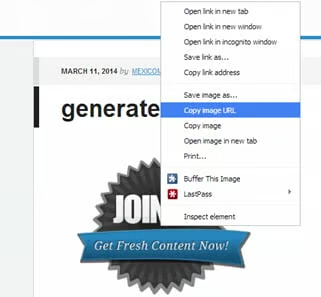
In the page above, right click on the badge and in the popup choose Copy Image URL. This will give you the correct path to the image.
Go to the Widgets page and under the Generate widget, paste the code into the text widget and save it.
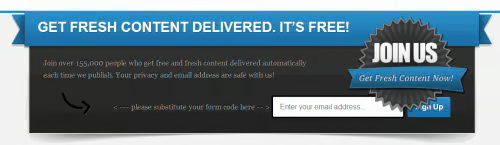
Here’s the result.
One the Generate box is set up, you can start working on other aspects of your site. One of these is the Truncate Posts feature, which is discussed below.
How to Truncate Posts
This is one of the simplest tasks you’ll ever take within WordPress. Let’s say you have a post and you only want to show a quick teaser, part of the opening statement on your blog page.
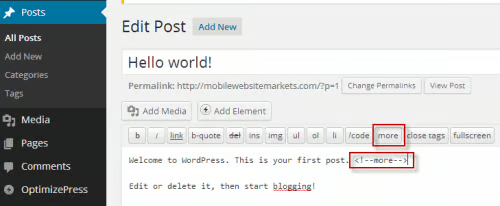
You would insert the tag into the text at that point. When you save the file, only the text that appears before the tag will show up on the blog snippets page.
Here’s an example of what truncated posts look like using the tag from my travel site.
Other Tasks
For the most part, this is all that’s needed to set up the Generate theme. After that you can customize it further. We’ll look at a few of those here.
Blog Appearance
To change the blog appearance, go to Genesis: Theme Settings and choose the blog layout you want.
Setting Up a Landing Page
If you’re involved in Internet marketing, you’ll probably want to set up a landing page. To do so, go to Pages: Add New. On the far right of the page, choose Default Template. Further down, in the Layout Settings, choose option number three at the far right. Update your page and you now have the basics in place to build a custom sales page.
Conclusion
What you’ve seen are the basic instructions for setting up the Generate theme. Outside of some glitches in the instructions it was relatively simple to configure. If you’re looking for a simple theme that will allow you to build a list, I recommend looking at the Generate theme and if this doesn’t match your vision, StudioPress has many more themes to choose from.
