In our previous tutorial we looked at WordPress Categories, Pages and Posts and showed you how to set up the structure of your blog. After that, I added several more articles to complete the last project. This is where things went off the rails. What happened is that all of the content of each post (including AdSense information and my social media tags) was being displayed with each post, causing a big mess on my blog.
Solving My WordPress Problems
It turns out that one of those problems was a settings error with the social media tags. I corrected it and the problem was resolved.
Not so with AdSense issue. I tried using other themes. No luck. Then, it seemed that downgrading to an earlier version of WordPress would solve the problem (3.0). That didn’t work either. Nor did it work when I used the same theme I have on my travel blog. I went to several forums for help (including the WordPress, Warrior and Web Developer Forums), but no one was able to help me.
Then I remembered the name of another writer for HTML Goodies, a wonderful fellow by the name of David Fiedler, who I thought was good with WordPress. I was right. In a short conversation, David determined that my installation of WordPress (the one I did manually) wasn’t functioning properly. He advised me to back up any important posts, then delete the database, the entire installation and then start again by using an automatic installation.
I did this and the end result was the elimination of my display problem – sort of. I was able to use my travel theme (Vista) and it worked, but when I went to use the Dovetail theme I used earlier, I encountered the same problem. Then I had an idea. I had a closer look at the theme preview and experienced a classic DUH! moment. Looking at the preview, I saw an image of the layout I was trying to get rid of. In other words, the display was built-in and wasn’t a flaw, after all.
On To Google AdSense Issues
The next thing concerned Google AdSense ads. In my travel blog (TravelswithNathan.com) I’m able to insert AdSense ads at the top and bottom of my posts and that information doesn’t show up on the main page preview. Not so with my current installation (WordPress 3.1.1). Fortunately, there’s a workaround. In each post I make use of the <–More–> tag to show that more information is coming. I can then insert the AdSense code at the end of the post and it works just fine. You’ll see what I mean when you click on any of the posts on CoffeeShop Dating.
Adding Images to Pages and Posts
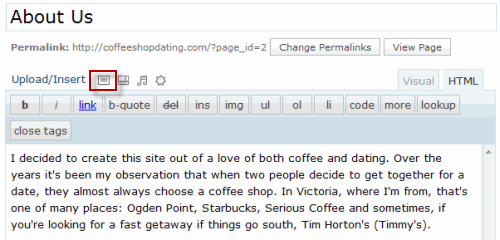
To insert an image in to a post or page, open either one, then click ont he Upload/Insert button in the text editor, as shown above.
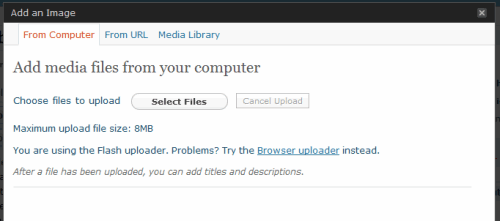
This brings up the Add media window. Note that you have three tabs at the top of the window: From Computer, From URL and Media Library. Since I already have the image uploaded on another site, I’ll click on the From URL tab.
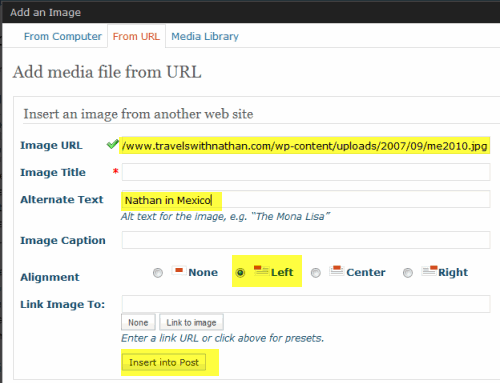
Note that in this section I’ve pasted in the path from my travel blog, a left alignment and ALT text. At the bottom of the window, I clicked on Insert into Post.
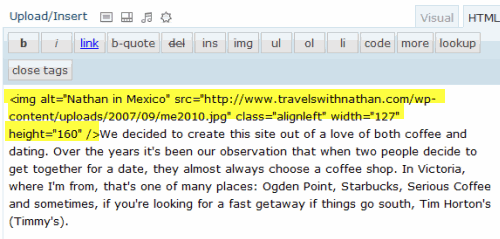
The image above shows what the code looks like in the text editor window. To see what it looks like on the front page, click on View Post at the top of the editor window. Note: When the image was inserted into WordPress it was done so under the HTML tab. If you want to see the image in your post, click on the Visual Tab. If you want to make a minor adjustment to the size of the image you can do so here, but for major adjustments, I recommend that you use an image editing program such as Gimp or Paintshop Photo Pro. Part of the reason is degradation of the image. The other reasons concern quality and file size.
Adding Image Galleries
To find some plugins that would do the job, I clicked on the Plugins link under the Plugins panel. At the top of that page is the Header: Plugins. Beside that is the Add New button. Click on it.
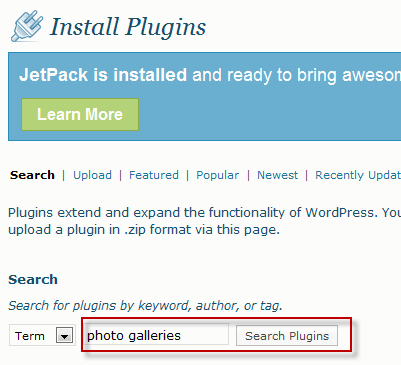
This brings up the Install Plugins page. I entered photo galleries for the search.
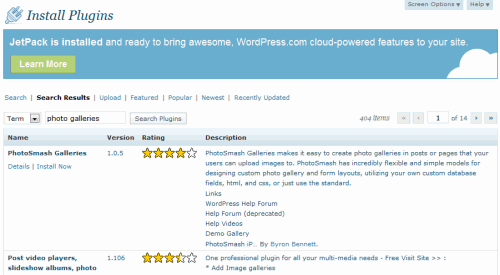
On this page there are links to 404 galleries, which is huge number. Before you install any of these plugins, take some time and click on the Details link for more information and to see if the installation will work with your version of WordPress. In some cases the plugin is out of date and hasn’t been tested with your version of WordPress. Avoid these.
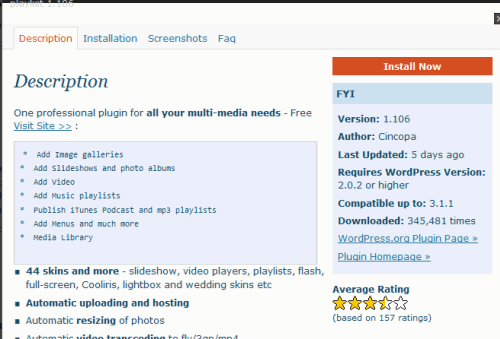
Of the galleries I looked at, the Cincopa plugin seemed a good bet, partly because it’s compatible with WordPress 3.1.1 and it was updated only five days before this article was written. To install it, click on the install button in the page above, then click on the Activate button once it’s installed.
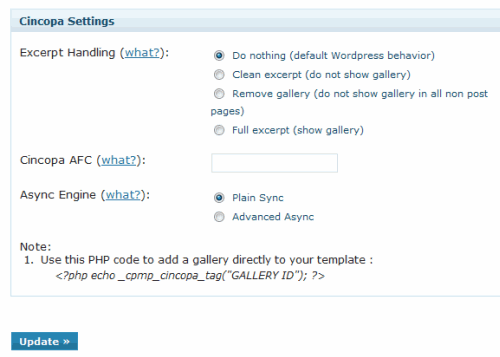
Next, have a look at the configuration page. In this case, since I’ve never used this plugin before, I decided to leave the settings at their defaults. To use the plugin, open either the Pages or Posts editor. You’ll notice a small icon. Clicking on that icon will activate the Cincopa plugin. The first time you do this, you’ll be taken through a registration process, where you’ll have to use your email address and enter a password. Once you’ve done so, you’ll be able to use the plugin. The next time you click on the Cincopa icon, a popup window will appear. While this method is effective, you’ll have to close the window after creating the gallery, which I find cumbersome.
A better method is to log into Cincopa in your browser and build your galleries that way. Click on the Create a New Gallery link to get started.
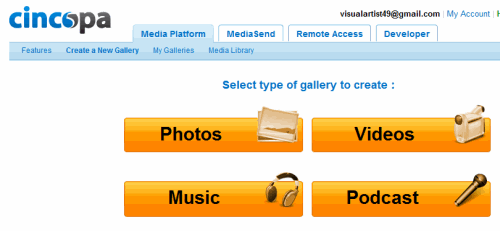
Click on the Photos button.
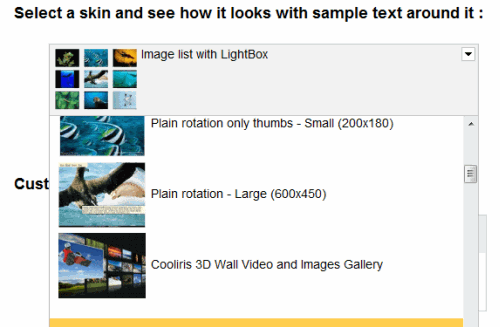
This brings up a list of image skins. You have a wide range of choices here, including: Simple slide shows, Flash photo galleries, videoplayers, podcasts and more. I chose the Smooth Gallery. The size is 600×450 pixels, but that’s too large for my page so I’m going to reduce the size to 500×375 pixels. Click on the orange Save settings and continue button.
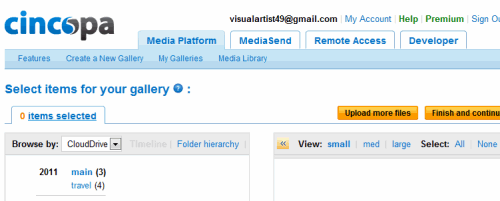
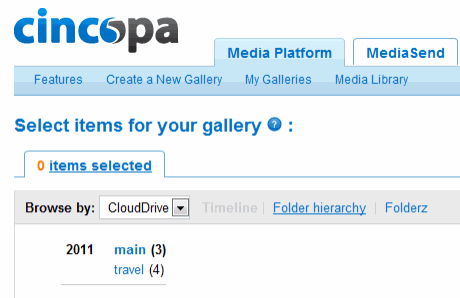
This brings up Select items for your gallery window, with images that I’d loaded from an earlier gallery that I’d created. If you want to use these images, great, though if you want to load more images, click on the orange Upload more files button.
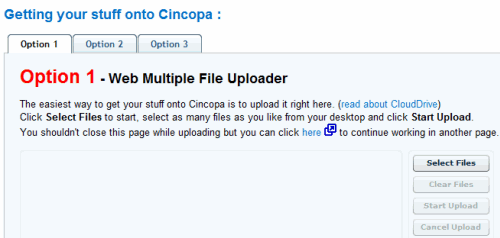
This brings you to the section where you upload your files into Cincopa. As you can see, there are three options: The first option is where you select and upload multiple files. The next option is to upload files using a media agent, an application that you install for this purpose.
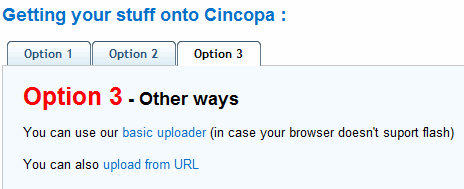
The third option is where you upload files by using the Cincopa basic uploader or by URL. I chose the URL option, since I want to use some images from my travel blog for this example.
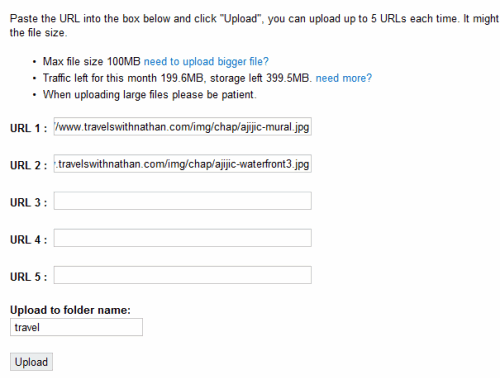
Click on the link to load by URL, then paste in the URL’s on the next page and upload them. When the files have been uploaded, you can upload more files or click on Continue. In this case, click on the Continue link.
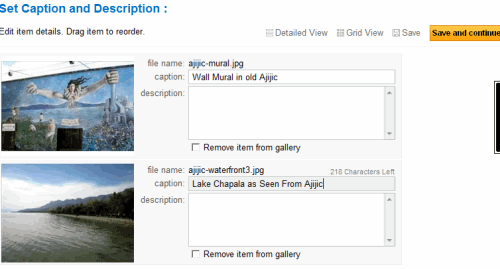
On this page you can enter a caption and description. When you’re done, click on the orange Save and continue button.
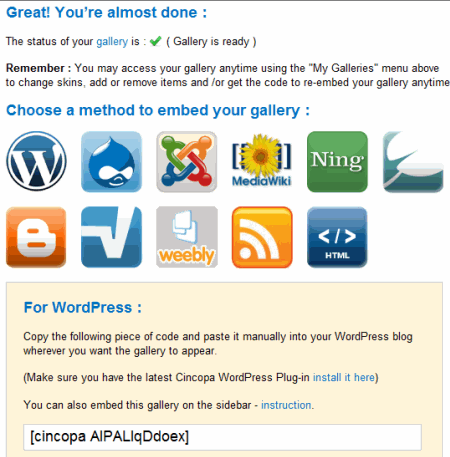
On this page you’re given the code (at the bottom of the page) to embed your gallery into WordPress.
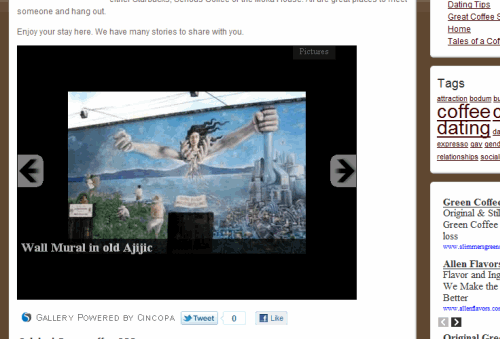
Here’s the completed gallery. This is only one of many options. I’m not too fond of the large black border, so I would choose another gallery that doesn’t have this effect. Another one which I experimented with earlier is is a small thumbnail which rotates the images. To truly see what this plugin will do, you’ll have to experiment with it. There are a lot of options.
Adding Video to Your WordPress Blog
The last thing we’ll look at is how to add video to your blog. While you can use the Cincopa plugin for this (and there are skins available), I upload a video to YouTube, then copy the embed codes into my blog. Here’s how it works.
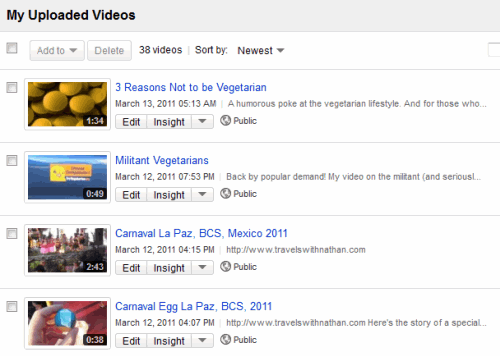
I log into my account, click on the videos link under my account, and in the list of videos, I click on one so I can get the embed codes.
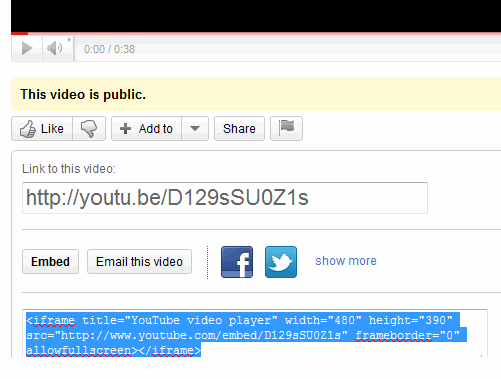
In this case I chose Carnaval Egg La Paz, which opens in its own window. To get the code, I click on the Share button first, then on the Embed button, which reveals the code. I copy the code, then return to WordPress,
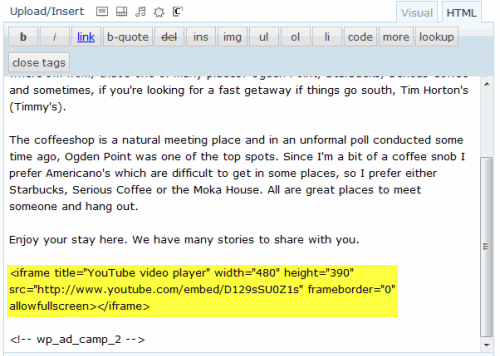
and insert the code into a page or post. Next, I click on the blue Update button on the right and then the View Page botton to see the finished result.
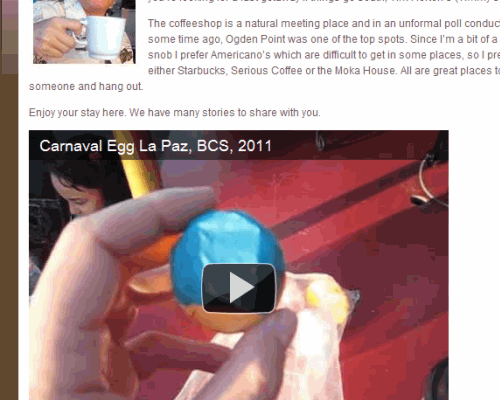
And here it is. It’s that easy. Enjoy your explorations!


