Code and Deploy a Simple Angular 2 Application in Eclipse
In the Developing Angular 2 Apps In Eclipse tutorial, we learned how to set up our Eclipse IDE for Angular 2 development. Now the time has come to put our environment to good use and code our first Angular 2 app. Although this first exercise won’t produce much more than the ubiquitous Hello World app, it will give us a chance to become acquainted with all of the parts and steps required to get an Angular 2 application up-and-running.
The Application Code
At the end of the last tutorial, we had created our project named “MyFirstAngular2App”. The next step is to create our application folder and files. I will describe what each of them does as we go through each step.
- Add a folder named “app” in the project root. It will hold our application files.
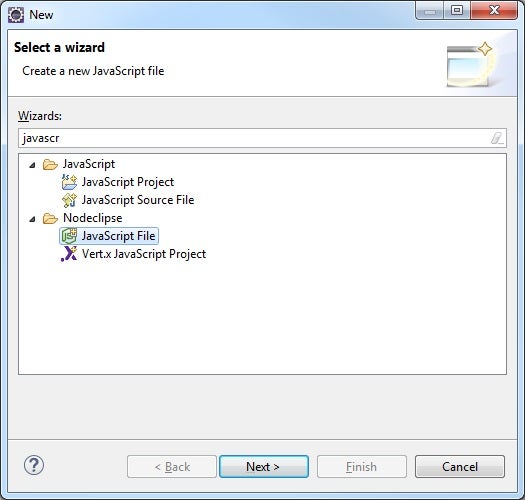
- Inside the app folder, create two JS files: one named “app.component.js” and another named “main.js”. You can find the .js file type under Nodeclipse in the “New” wizard:
A component is a class that manages a view template, which is a piece of the web page where we display information to the user and respond to feedback. This view is quite simple and only displays a heading. It’s the template property in step three below. The selector stores the name of the custom tag into which the template will be inserted.
- Paste the following code into the files and save them:
app.component.js
(function(app) {
app.AppComponent =
ng.core.Component({
selector: 'my-app',
template: '<h1>My First Angular 2 App!</h1>'
})
.Class({
constructor: function() {}
})
})(window.app || (window.app = {}))
main.js
This script loads the above application view on the DOMContentLoaded event. You can see that it refers to our app.AppComponent:
(function(app) {
document.addEventListener('DOMContentLoaded', function() {
ng.platform.browser.bootstrap(app.AppComponent)
})
})(window.app || (window.app = {}))
- Create a new file named “index.html” in the project root. It loads all of the required script files and acts as the application container.
- Copy and paste the following code into the file:
<!DOCTYPE html>
<html>
<head>
<title>My First Angular 2 App</title>
<script src="node_modules/es6-shim/es6-shim.min.js"></script>
<script src="node_modules/angular2/bundles/angular2-polyfills.js"></script>
<script src="node_modules/rxjs/bundles/Rx.umd.js"></script>
<script src="node_modules/angular2/bundles/angular2-all.umd.js"></script>
<script src='app/app.component.js'></script>
<script src='app/main.js'></script>
</head>
<body>
<my-app>Loading...</my-app>
</body>
</html>
- We need one more file before running our application. In the root of your project, create a file named “server.js”. In it, include the following one line to use the lite-server that comes packaged with nodeclipse:
require('lite-server');
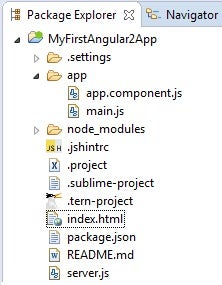
Here is what our project file structure looks like at this point:
Running our Application
Upon launching, the server knows to load the index.html file along with the contents of the /app/ directory. Therefore, all you have to do is right-click the server.js file in the Package Explorer and select Run As > Node Application from the popup menu. You should then see the following output in the console as the server picks up our project files:
[BS] Access URLs:
 ----------------------------
 Local: http://localhost:3000
 ----------------------------
    UI: http://localhost:3001
 ----------------------------
[BS] Serving files from: ./
[BS] Watching files...
.[90m16.12.06 11:49:46.[0m .[32m200.[0m .[35mGET.[0m .[90m/./index.html.[0m (.[90m.[31mUnknown.[0m - .[90m225ms.[0m)
.[90m16.12.06 11:49:50.[0m .[32m200.[0m .[35mGET.[0m .[90m/app/app.component.js.[0m (.[90m.[31mUnknown.[0m - .[90m3ms.[0m)
.[90m16.12.06 11:49:50.[0m .[32m200.[0m .[35mGET.[0m .[90m/app/main.js.[0m (.[90m.[31mUnknown.[0m - .[90m4ms.[0m)
.[90m16.12.06 11:49:50.[0m .[32m200.[0m .[35mGET.[0m .[90m/node_modules/es6-shim/es6-shim.min.js.[0m (.[90m.[31mUnknown.[0m - .[90m31ms.[0m)
.[90m16.12.06 11:49:50.[0m .[32m200.[0m .[35mGET.[0m .[90m/node_modules/angular2/bundles/angular2-polyfills.js.[0m (.[90m.[31mUnknown.[0m - .[90m83ms.[0m)
.[90m16.12.06 11:49:50.[0m .[32m200.[0m .[35mGET.[0m .[90m/node_modules/rxjs/bundles/Rx.umd.js.[0m (.[90m.[31mUnknown.[0m - .[90m226ms.[0m)
.[90m16.12.06 11:49:51.[0m .[32m200.[0m .[35mGET.[0m .[90m/node_modules/angular2/bundles/angular2-all.umd.js.[0m (.[90m.[31mUnknown.[0m - .[90m402ms.[0m)
.[90m16.12.06 11:49:57.[0m .[33m404.[0m .[35mGET.[0m .[90m/favicon.ico.[0m (.[90m.[31mUnknown.[0m - .[90m5ms.[0m)
Amazingly, our app will launch in the default browser. It’s not magic; nodeclipse is using browser-sync (a.k.a. Browsersync). It’s a tool that keeps multiple browsers and devices synchronized when building websites. That’s what the “[BS]” prefixes in the console output are referring to. (And you thought it stood for a different kind of BS”!)
Here is a screenshot of the app in Internet Explorer 11:
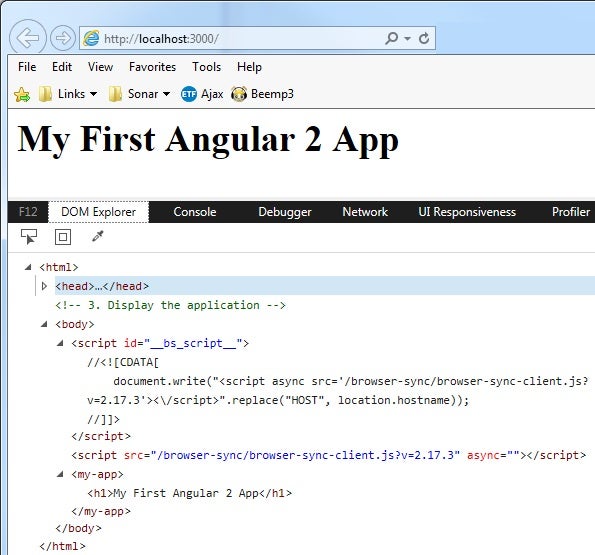
I included the DOM Explorer tab so that you can see that Browsersync inserts its own script and that the my-app element contains our template.
Conclusion
That covers the basics to building and launching an Angular 2 app in Eclipse using the Nodeclipse plugin. Aching for something a little more substantial? We’ll get to that soon enough…
Rob Gravelle resides in Ottawa, Canada, and has been an IT guru for over 20 years. In that time, Rob has built systems for intelligence-related organizations such as Canada Border Services and various commercial businesses. In his spare time, Rob has become an accomplished music artist with several CDs and digital releases to his credit.


