On September 7, 2011 Adobe released preview 2 for Edge, which they describe it as, “…a new web motion and interaction design tool that allows designers to bring animated content to websites, using web standards like HTML5, JavaScript, and CSS3.” From what I can tell at this point, there is no Flash in Adobe Edge. For those of you who think Adobe is going to sink right along with Flash, think again.
Adobe is meeting the post-PC era by creating new development tools that does not rely on Flash. Therefore, as Apple and Microsoft turn their backs on Flash–and are doing so for the right reasons–Adobe is developing tools that embrace the future, namely: HTML5 and CSS3. So, how does Adobe Edge work?
To follow this article along at home, it is highly recommended that you
download the free preview here.
What baffles me, and if you
’
ll excuse the off-topic rant, is why someone at Adobe doesn
’
t hire a web designer for their own sites. Seriously. That Adobe Labs site appears several generations old. Especially the hover effect they use for links. So last century. If you can get beyond the aesthetics of Adobe Labs and download and install Adobe Edge, then we will carry on with the tutorial.
If you
’
re like me, the first thing you
’
re going to do is start clicking buttons on the menu without any idea of what you
’
re doing. Also, if you
’
re like me, you
’
re bound to break something. And then you
’
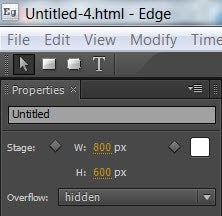
re going to want to fix it. For example, there
’
s a Properties box that
contains the tools you
’
ll use when creating animations. It looks like this:
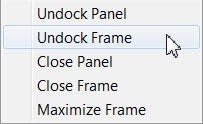
Please direct your attention to the right side of the screenshot, where the mini drop down arrow is, next to a stack of horizontal lines. Clicking that gives you the option to do one of the following:
I made the mistake of undocking the frame. I then spent far more time then I should have figuring out how to dock it back in place. I
’
ll save you the trouble of figuring it out and just tell you. From the main menu:
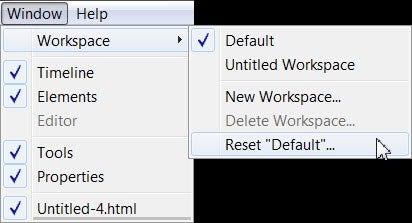
By clicking
“
Reset Default,
”
you can restore the original configuration of the screen layout.
After you’re done trying to learn Adobe Edge on your own, you might want to watch the video from Adobe Fellow Mark Anders. While this video is well done, there are a couple of issues with it. First, Mark talks and works very fast. You’ll probably want to watch the video several times. The second issue is that he rarely tells you what he’s clicking or where he’s clicking it from. Regardless, the video does show you how to get started. Although, you might have a hard time trying to follow along and create the same work Mark creates while watching. It’s not a see-and-do video without having to do much pausing and playing. With all that said, I’ll attempt to document the video here, which will be broken up in a two-part series.
Start by opening a blank new document in Adobe Edge. The first thing Mark does is draw a grey box. To do so, click the Rectangle
Tool:
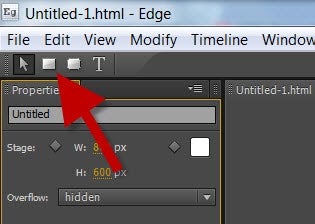
Then click and drag a box in the workspace. The Properties box will then populate with tools:
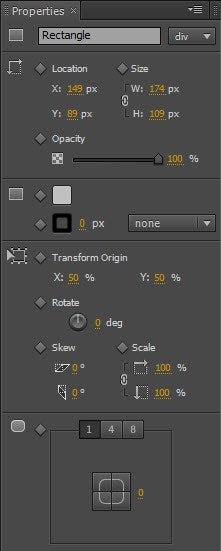
Mark then changes the color of the box, but he does this very quickly. You
’
ll need a sharp eye to see where he clicked to do this. If you look in the above screen shot, in the third section, you
’
ll see a grey box, a couple of diamonds and two more boxes. Click the top box to open a color picker. The box below that opens a color picker for the border. Click the orange 0 to define the border thickness. The drop down arrow allows you to define the border as solid or dashed.
When you change the color of the box, this creates what Adobe calls a keyframe, which appears as a diamond in the timeline. The timeline appears at the bottom of the screen.
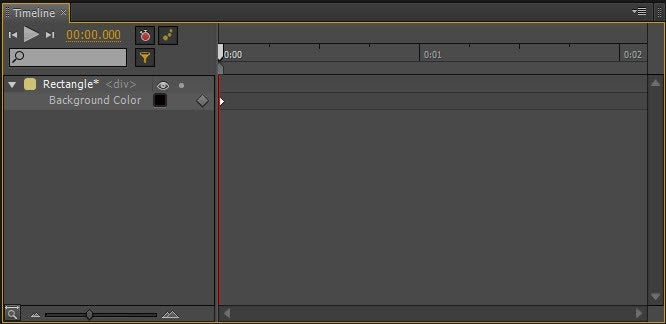
You
’
ll see the diamond along the red vertical line. Mark defines the keyframe as pinning the value of the object at that particular point in time. He then deletes that keyframe but doesn
’
t explain how. The trick is to select the diamond by clicking and dragging with the mouse to select it and then using the keyboard shortcut Ctrl-X. You can also use the Edit menu from the main menu. He then explains that you can turn off keyframes from automatically appearing by turning off the Auto-Keyframe Properties button. If you look at the above screenshot, this button is the red circle with what appears to be two small dots off-centered from the top. I
’
m guessing it
’
s supposed to represent a stop watch.
Next, Mark repeats the process of creating a box. While he clicked the Rectangle Tool a second time, it is possible to copy and paste the first box. Now that you have two objects on the screen you can see how easy it is to align them together. After you copy and paste the box, the second box will appear directly over the first box. Click to select, then drag away. Then slowly drag the second box close to the bottom of the first box. You should notice how smoothly and easily the two elements align. They almost snap together, but it’s not a completely forced snap in that you can’t easily adjust it. This is an unbelievably nice feature that designers should love. If you’ve ever tried to align objects in PowerPoint without the aid of grid lines, you’ll appreciate how nice this feature is.
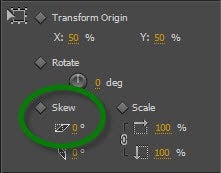
For the second box, Mark adds a skew affect. This is also done from the Properties box.
Now is when we get to the animation
…
which will be covered in part two of this series.


