


12/13/12
In this article we’re going to look at building forms with CSS3. While you can do this from scratch, it’s easier to use software programs and templates then modify the design after the fact. Still, for those of you want to build CSS3 forms from the ground up, here’s a site that illustrates the process in detail.
In the next section, we’re going to look at a program for building CSS3 web forms.
How to Build Web Forms with Software
In this section we’re going to look Caspio, a software application which you can use to build web forms.
To get started, sign up for an account and when you get your confirmation email, you can log in using the confirmation page in your email account or on the page where you entered your registration.

You’ll see the above log in form.

Once you log in, you’ll be taken to the Caspio Bridge Web Interface and you’ll see some help information on the right, including several getting started videos. We will be making a basic web contact form.
There are three major steps involved, which are: Create a table, create a data page to reference that table, then deploy the data page on your web page.

To get started, click on the Tables name under the Objects menu. Next, click on the New button on the menu bar which brings up a dialog box. Enter Contact_Us, then click on OK. Note that you cannot use spaces in the names so an underscore is used instead. Note that the table is similar to a spreadsheet and it holds all of the data.

This opens the table in the design view. Now, we’re going to add some fields to the table. These are similar to the columns in a spreadsheet.

In the table above I’ve entered the following: First_Name, Last_Name, email, Newsletter and Comments. Under the Data Type heading you can choose the corresponding field. To elaborate, for the First_Name, Last_Name and email, the text (255) option will do the trick. 255 refers to the number of characters. For the newsletter, we’ll choose the Yes/No option and for the comments, we’ll choose Text (64000) which allows for a longer message. The description section allow you to add notes, if necessary. This is for internal use and isn’t visible to the user.

To save your changes, click on the red close button at the top right. You’ll be prompted to save the file. Click on Yes and your table will be saved to the tables section.

The next step is to create a DataPage. To do so, click on the DataPages heading, then the New button.

This opens the DataPages wizard. Note that on this page you have several options for the DataPages to create. Since we’re working with a form, the next step is to click on the Submission Form icon, note the Submission Form setting at the bottom of the screen, and click on the Next button at the bottom.
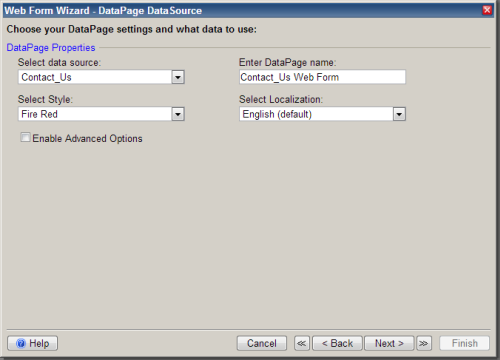
This takes you to the next page where you want to select the data source, which is the Contact_Us page we just created. We’ll change the Style to Fire Red and leave the Enter DataPage Name and Select Localization at the default settings, then click on the Next button.

In the Select Fields screen you can choose which fields to use in the form. In this case want all of them. Click on Next to continue.

This brings up the Configure Fields screen, which allows you to customize the display. To explain this better, I’ll use a couple of screen shots. The first is for the First_Name. Note that in the Label section the space has been removed. In this case the Form Element is set to Text Field and the checkbox has been enabled in the section below because the first name is a reqiured item.

In the Comments section, I’ve changed the Form Element to Text Area, which allows a longer message. You’ll note that the Field Width is 40 and the Field Height is 5. When you’re satisfied with all your settings, click on the Next button.

This takes you to the Destination and Triggers screen and this controls what happens after the user presses the “Submit” button. By default this page is set to Display a message, but you can change that to: Same form: Go to a new page, Go to a DataPage or Close window. As an example, Go to a new page can redirect the user to another page on your site, such as a sales page, after they’ve submitted the form. Other options at the bottom of the page are: Acknowledgement email to the email address submitted in form and Notifiction email to specifict email recipient. It’s a good idea to send a confirmation message to the user after signing up and this is what happens when using an autoresponder, as an example. Once you’re satisfied with your settings, click on the Finish button.
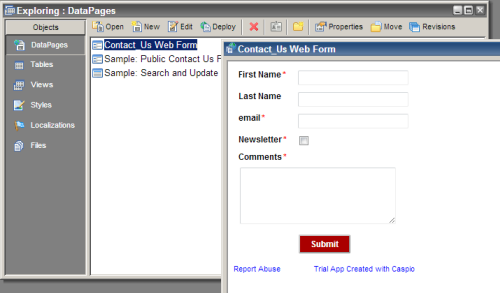
This closes the wizard and takes you back to the Caspio Bridge and you see the Contact_Us_Web_Form saved in the DataPages area. Double-clicking on the file name will open the form as you can see above.

At this point, you would normally deploy the form for use on your web site, but we’re going to look at another section, on how to stylize your CSS. Under the Objects menu, click on Styles. In our form, I used Fire Red, so that’s highlighted here.
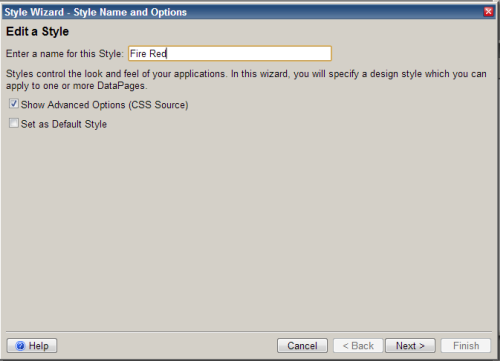
Next, click on the Edit button. This opens the Style Wizard. Enable Show Advanced Options (CSS Source) and click on the Next button.

On this screen, make sure the Contact_Us Web Form is enabled, then click on Next.

This brings up the Style Wizard Settings page, which allows you to stylize your CSS and HTML.

One other setting to check out is the Source code in the Style Wizard, which you can edit directly. Once you’re satisfied with your changes, click on the the Finish button. To aid you with your CSS and HTML customizations, here are a couple of tutorials to check out:
• Tech Tip: 5 Techniques to Create Web 2.0 Style Design
• Tech Tip: Optimize Your Web Forms for Maximum Usability

The last step is to deploy the form. To do so, go back to the DataPages setting and make sure that the Contact_Us Web form is selected, then click on Deploy on the menu bar above.

This brings up the Deploy DataPage screen. On this page, leave the settings as they are and then copy the code to your web page.

This is what the contact form looks like in Google Chrome. And that’s it. Tutorials on Building CSS3 Forms Manually
• 20 Superb CSS3 Web Forms Tutorials
• Clean and Stylish CSS3 Web Form.
On this site you’ll see what goes into building a simple CSS3 form. Software to Build CSS3 and HTML Forms
• Caspio: Powerful, Stylish Forms in Minutes
