

One of the advantages for developing Windows Store apps is that you can utilize your existing knowledge of HTML, CSS and Javascript. This tutorial teaches you how to create a simple “Hello, world” Windows Store app built for Windows using JavaScript. (It’s the first tutorial in a series of 4 that teach you what you need to know to build Windows Store apps.)
In this tutorial, you learn how to:
- Create a new project
- Add HTML content to your start page
- Handle touch, pen, and mouse input
- Switch between the light and dark style sheets
- Create your own custom styles
- Use a Windows Library for JavaScript control
- We show you how to create a Windows Store app using HTML, JavaScript, and CSS.
Note that you can also create Windows Store apps using other technologies. To write a Windows Store app using C# and Visual Basic, or C++ and XAML. For graphics-intensive apps, you can use DirectX and C++.
- Getting Started
- Step 1: Create a new project in Visual Studio
- Step 2: Launch the app
- Step 3: Modify your start page
- Step 4: Create an event handler
- Step 5: Register the event handler when our app launches
- Step 6: Style our start page
- Step 7: Add a Windows Library for JavaScript control
- Step 8: Register an event handler for a Windows Library for JavaScript control
- Summary
- See the complete code
Getting Started
To complete this tutorial, you need Windows 8 and Microsoft Visual Studio Express 2012 for Windows 8. To download them, see Get the tools. You also need a developer license. For instructions, see Get a developer license.
Step 1: Create a new project in Visual Studio
1. Let’s create a new app named HelloWorld. Here’s how:
2. Launch Visual Studio Express 2012 for Windows 8.
3. The Visual Studio Express 2012 for Windows 8 start screen appears.
4. From the File menu select New Project.
5. The New Project dialog appears. The left pane of the dialog lets you pick the type of templates to display.
In the left pane, expand Installed, then expand Templates, then expand JavaScript and select the Windows Store template type. The dialog’s center pane displays a list of project templates for JavaScript.

For this tutorial, we use the Blank App template. This template creates a minimal Windows Store app that compiles and runs, but contains no user interface controls or data. We’ll add controls and data to the app over the course of these tutorials.
1. In the center pane, select the Blank App template.
2. In the Name text box, enter “HelloWorld“.
3. Uncheck the Create directory for solution checkbox.
4. Click OK to create the project.
Visual Studio creates your project and displays it in the Solution Explorer.
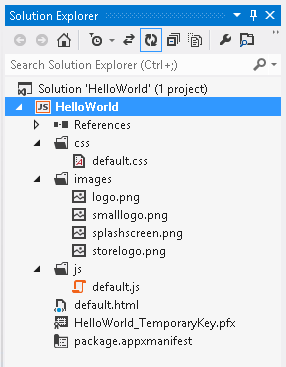
Although the Blank App is a minimal template, it still contains a handful of files:
- A manifest file (package.appxmanifest) that describes your app (its name, description, tile, start page, splash screen, and so on) and lists the files that your app contains.
- A set of large and small logo images (logo.png and smalllogo.png)to display in the start screen.
- An image (storelogo.png) to represent your app in the Windows Store.
- A splash screen (splashscreen.png) to show when your app starts.
- CSS and code files for the Windows Library for JavaScript (inside the References folder).
- A start page (default.html) and an accompanying JavaScript file (default.js) that run when your app starts.
These files are essential to all Windows Store apps using JavaScript. Any project that you create in Visual Studio contains them.
Step 2: Launch the app
At this point, we created a very simple app. If you want to see what it looks like, press F5 to build, deploy, and start your app. A default splash screen appears first. The splash screen is defined by an image (splashscreen.png) and a background color (specified in our app’s manifest file). We don’t cover it here, but it’s easy to customize your splash screen. (To find out how, see Adding a splash screen.)
The splash screen disappears, and then our app appears. It contains a black screen with the text “Content goes here”.

There is no button or command to close the app. To close the app, slide from the top edge toward the bottom edge of the screen or press Alt-F4. Go to the Start screen; notice that deploying the app adds its tile to the last group on the Start screen. To run the app again, tap or click its tile on the start screen or press F5 in Visual Studio to run the app in the debugger.
It doesn’t do much—yet—but congratulations, you’ve built your first Windows Store app!
Step 3: Modify your start page
One of the files that Visual Studio created for us is default.html, our app’s start page. When the app runs, it displays the content of its start page. The start page also contains references to the app’s code files and style sheets. Here’s the start page that Visual Studio created for us:
<!DOCTYPE html>
<html>
<head>
<meta charset=”utf-8″ />
<title>HelloWorld</title>
<!– WinJS references –>
<link href=”//Microsoft.WinJS.1.0/css/ui-dark.css” rel=”stylesheet” />
<script src=”//Microsoft.WinJS.1.0/js/base.js”></script>
<script src=”//Microsoft.WinJS.1.0/js/ui.js”></script>
<!– HelloWorld references –>
<link href=”/css/default.css” rel=”stylesheet” />
<script src=”/js/default.js”></script>
</head>
<body>
<p>Content goes here</p>
</body>
</html>
Let’s add some new content to your default.html file. Just as you would add content to any other HTML file, you add your content inside the body element. You can use HTML5 elements to create your app (with a few exceptions). That means you can use HTML5 elements like h1, p, button, div, and img.
To modify our start page
- Replace the existing content in the body element with a first-level heading that says “Hello, world!”, some text that asks the user’s name, an input element to accept the user’s name, a button, and a div element. Assign IDs to the input, the button, and the div .
<body>
<h1>Hello, world!</h1>
<p>What’s your name?</p>
<input id=”nameInput” type=”text” />
<button id=”helloButton“>Say “Hello”</button>
<div id=”greetingOutput“></div>
</body>
- Run the app.
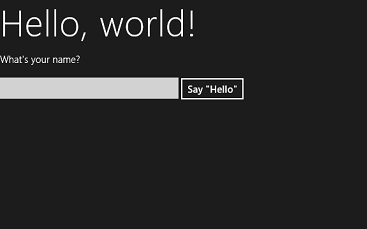
Right now, clicking the button doesn’t do anything. In the next steps, we create an event handler for the button that displays a personalized greeting. We add our event handler code to our default.js file.
Step 4: Create an event handler
When we created our new project, Visual Studio created a /js/default.js file for us. This file contains code for handling your app’s lifecycle, a concept that we explain in Part 2: Manage app lifecycle and state. It’s also where you write additional code that provides interactivity for your default.html file.
Open the default.js file.
Before we start adding our own code, let’s take a look at the first and last few lines of code in the file:
(function () {
“use strict”;
// Omitted code
})();
You might be wondering what’s going on here. These lines of code wrap the rest of the default.js code in a self-executing anonymous function.
Now that you know what it does, you’re probably wondering why we wrap our code in a self-executing anonymous function. It’s because this makes it easier to avoid naming conflicts or situations where you accidently modify a value that you didn’t intend to. It also keeps unnecessary identifiers out of the global namespace, which helps performance. It looks a little strange, but it’s a good programming practice.
The next line of code turns on strict mode for your JavaScript code. Strict mode provides additional error checking for your code. For example, it prevents you from using implicitly declared variables or assigning a value to a read-only property.
Take a look at the rest of the code in default.js. It handles your app’s activated and checkpoint events. We go into more detail about these events later. For now, just know that the activated event fires when your app starts.
Let’s define an event handler for your button. Our new event handler gets the user’s name from the nameInput input control and uses it to output a greeting to the greetingOutput div element that you created in the last section.
Using events that work for touch, mouse, and pen input
With Windows 8, you don’t need to worry about the differences between touch, mouse, and other forms of pointer input. You can just use events that you know, like click, and they work for all forms of input.
Tip Your app can also use the new MSPointer* and MSGesture* events, which work for touch, mouse, and pen input and can provide additional info about the device that triggered the event. For more info, see Responding to user interaction and Gestures, manipulations, and interactions.
Let’s go ahead and create the event handler.
To create the event handler
- In default.js, after the app.oncheckpoint event handler and before the call to app.start, create a click event handler function named buttonClickHandler that takes a single parameter named eventInfo.
- Inside our event handler, retrieve the user’s name from the nameInput input control and use it to create a greeting. Use the greetingOutput div to display the result.
function buttonClickHandler(eventInfo) {
var userName = document.getElementById(“nameInput“).value;
var greetingString = “Hello, ” + userName + “!”;
document.getElementById(“greetingOutput“).innerText = greetingString;
}
We added our event handler to default.js. Now we need to register it.
Step 5: Register the event handler when our app launches
The only thing we need to do now is register the event handler with the button. The recommended way to register an event handler is to call addEventListener from our code. A good place to register the event handler is when our app is activated. Fortunately, Visual Studio generated some code for us in our default.js file that handles our app’s activation: the app.onactivated event handler. Let’s take a look at this code.
WinJS.Binding.optimizeBindingReferences = true;
var app = WinJS.Application;
var activation = Windows.ApplicationModel.Activation;
app.onactivated = function (args) {
if (args.detail.kind === activation.ActivationKind.launch) {
if (args.detail.previousExecutionState !== activation.ApplicationExecutionState.terminated) {
// TODO: This application has been newly launched. Initialize
// your application here.
} else {
// TODO: This application has been reactivated from suspension.
// Restore application state here.
}
args.setPromise(WinJS.UI.processAll());
}
};
Inside the onactivated handler, the code checks to see what type of activation occurred. There are many different types of activations. For example, your app is activated when the user launches your app and when the user wants to open a file that is associated with your app. (For more info, see Application lifecycle.)
We’re interested in the launch activation. An app is launched whenever it is not running and then a user activates it.
If the activation is a launch activation, the code checks to see how the app was shut down the last time in ran. Then it calls WinJS.UI.processAll.
app.onactivated = function (args) {
if (args.detail.kind === activation.ActivationKind.launch) {
if (args.detail.previousExecutionState !== activation.ApplicationExecutionState.terminated) {
// TODO: This application has been newly launched. Initialize
// your application here.
} else {
// TODO: This application has been reactivated from suspension.
// Restore application state here.
}
args.setPromise(WinJS.UI.processAll());
}
};
It calls WinJS.UI.processAll regardless of whether the app had been shut down in the past or whether this is the very first time it’s being launched. The WinJS.UI.processAll is enclosed in a call to the setPromise method, which makes sure the splash screen isn’t taken down until the app’s page is ready.
Tip The WinJS.UI.processAll function scans your default.html file for Windows Library for JavaScript controls and initializes them. So far, we haven’t added any of these controls, but it’s a good idea to leave this code in case you want to add them later. To learn more about Windows Library for JavaScript controls, see Quickstart: Adding WinJS controls and styles.
A good place to register event handlers for non-Windows Library for JavaScript controls is just after the call to WinJS.UI.processAll.
To register your event handler
- In the onactivated event handler in default.js, retrieve helloButton and use addEventListener to register our event handler for the click event. Add this code after the call to WinJS.UI.processAll.
app.onactivated = function (args) {
if (args.detail.kind === activation.ActivationKind.launch) {
if (args.detail.previousExecutionState !== activation.ApplicationExecutionState.terminated) {
// TODO: This application has been newly launched. Initialize
// your application here.
} else {
// TODO: This application has been reactivated from suspension.
// Restore application state here.
}
args.setPromise(WinJS.UI.processAll());
// Retrieve the button and register our event handler.
var helloButton = document.getElementById(“helloButton“);
helloButton.addEventListener(“click”, buttonClickHandler, false);
}
};
Here’s the complete code for our updated default.js file:
// For an introduction to the Blank template, see the following documentation:
// http://go.microsoft.com/fwlink/p/?linkid=232509
(function () {
“use strict”;
WinJS.Binding.optimizeBindingReferences = true;
var app = WinJS.Application;
var activation = Windows.ApplicationModel.Activation;
app.onactivated = function (args) {
if (args.detail.kind === activation.ActivationKind.launch) {
if (args.detail.previousExecutionState !== activation.ApplicationExecutionState.terminated) {
// TODO: This application has been newly launched. Initialize
// your application here.
} else {
// TODO: This application has been reactivated from suspension.
// Restore application state here.
}
args.setPromise(WinJS.UI.processAll());
// Retrieve the button and register our event handler.
var helloButton = document.getElementById(“helloButton“);
helloButton.addEventListener(“click”, buttonClickHandler, false);
}
};
app.oncheckpoint = function (args) {
// TODO: This application is about to be suspended. Save any state
// that needs to persist across suspensions here. You might use the
// WinJS.Application.sessionState object, which is automatically
// saved and restored across suspension. If you need to complete an
// asynchronous operation before your application is suspended, call
// args.setPromise().
};
function buttonClickHandler(eventInfo) {
var userName = document.getElementById(“nameInput“).value;
var greetingString = “Hello, ” + userName + “!”;
document.getElementById(“greetingOutput“).innerText = greetingString;
}
app.start();
})();
Run the app. When you enter your name in the text box and click the button, the app displays a personalized greeting.

Note If you’re curious as to why we use addEventListener to register our event in code rather than setting the onclick event in our HTML, see Coding basic apps for a detailed explanation.
Step 6: Style our start page
It’s easy to customize the look and feel of your app. Windows Store apps let you use Cascading Style Sheets, Level 3 (CSS3), much like you would for a website.
The default.html that Visual Studio created for us contains a reference to the Windows Library for JavaScript style sheet:
<!– WinJS references –>
<link href=”//Microsoft.WinJS.1.0/css/ui-dark.css” rel=”stylesheet” />
What does this style sheet do? Quite a bit! It provides these benefits:
- A set of styles that automatically give our app the Windows 8 look and feel. Just including the style sheet will make our controls look great and they’ll work with touch-based displays, too.
- Automatic support for high-contrast modes. These styles were designed with high-contrast in mind, so when our app runs on a device in high-contrast mode, it displays properly.
- Automatic support for other languages. The Windows Library for JavaScript style sheets automatically select the correct font for every language that Windows 8 supports. You can even use multiple languages in the same app and they are displayed properly.
- Automatic support for other reading orders. It automatically adjusts HTML and Windows Library for JavaScript controls, layouts, and styles for languages that read from right to left.
By default, each HTML page in your project contains a reference to the dark style sheet. The Windows Library for JavaScript also provides a light style sheet. Let’s try it out and see what it looks like.
To switch to the light style sheet
- In your default.html file, replace the reference to the dark style sheet:
<!– WinJS references –>
<link href=”//Microsoft.WinJS.1.0/css/ui-dark.css” rel=”stylesheet” />
With this one:
<!– WinJS references –>
<link href=”//Microsoft.WinJS.1.0/css/ui-light.css” rel=”stylesheet” />
- Run your app. It now uses the light style sheet.

Which style sheet should you use? Whichever one you want. For apps that mostly display images or video, we recommend using the dark style sheet, and for apps that contain a lot of text, we recommend using the light style sheet. (If you’re using a custom color scheme, use the style sheet that goes best with your app’s look and feel.)
Creating your own styles
If you want to customize the look and feel from your app, you don’t have to throw out the Windows Library for JavaScript styles and start over from scratch. It’s easy to make incremental changes by overriding the styles you want to change.
In fact, it’s better to override the Windows Library for JavaScript styles rather than creating your own. When your app runs in high-contrast mode, any changes to the colors in the default styles are automatically overridden by a color scheme that supports high-contrast.
You can override any style in the default style sheet by creating your own style sheet and including it after the Windows Library for JavaScript style sheet. The Blank App template does this for you. It creates a style sheet named default.css that you can use to create your own styles.
<!– WinJS references –>
<link href=”//Microsoft.WinJS.1.0/css/ui-light.css” rel=”stylesheet” />
<script src=”//Microsoft.WinJS.1.0/js/base.js”></script>
<script src=”//Microsoft.WinJS.1.0/js/ui.js”></script>
<!– HelloWorld references –>
<link href=”/css/default.css” rel=”stylesheet” />
<script src=”/js/default.js”></script>
Let’s create some of our own styles.
- First, lets add some div elements and classes to our HTML to make it easier to style.
- In Visual Studio, open the default.html file.
- Set your page header’s class attribute to “headerClass“. Create a div element and use it to contain your page’s main content. Give it a class setting of “mainContent“.
<body>
<h1 class=”headerClass“>Hello, world!</h1>
<div class=”mainContent“>
<p>What’s your name?</p>
<input id=”nameInput” type=”text” />
<button id=”helloButton“>Say “Hello”</button>
<div id=”greetingOutput“></div>
</div>
</body>
- Now lets define our styles. Open the default.css file.
Let’s take a look at the file that Visual Studio generated for us:
body {
}
@media screen and (-ms-view-state: fullscreen-landscape) {
}
@media screen and (-ms-view-state: filled) {
}
@media screen and (-ms-view-state: snapped) {
}
@media screen and (-ms-view-state: fullscreen-portrait) {
}
The generated file contains a few stubs for defining styles for different views. We’ll ignore these stubs for now (but we play with them in a later tutorial).
- According to Layout out an app page, the heading has a top margin of 45 pixels and a left margin of 120 pixels. The content area also has a left margin of 120 pixels, a top margin of 31 pixels, and a bottom margin of 50 pixels.
Define the headerClass and mainContent classes and set their margins to follow these guidelines. Also, create a style for the greetingOutput div that sets its height to 20 pixels and its bottom margin to 40 pixels.
body {
}
.headerClass {
margin-top: 45px;
margin-left: 120px;
}
.mainContent {
margin-top: 31px;
margin-left: 120px;
margin-bottom: 50px;
}
#greetingOutput {
height: 20px;
margin-bottom: 40px;
}
@media screen and (-ms-view-state: fullscreen-landscape) {
}
@media screen and (-ms-view-state: filled) {
}
@media screen and (-ms-view-state: snapped) {
}
@media screen and (-ms-view-state: fullscreen-portrait) {
}
- Run the app. Notice the change in spacing.

Windows Store apps support CSS3, so there’s a lot you can do to customize your app. (For more info about styling your app, see Quickstart: Styling controls.)
Step 7: Add a Windows Library for JavaScript control
In addition to standard HTML controls, your Windows Store apps using JavaScript can use any of the new controls in the Windows Library for JavaScript, such as the WinJS.UI.DatePicker, WinJS.UI.FlipView, WinjS.UI.ListView, and WinJS.UI.Rating controls.
Unlike HTML controls, Windows Library for JavaScript controls don’t have dedicated markup elements: you can’t create a Rating control by adding a <rating /> element, for example. To add a Windows Library for JavaScript control, you create a div element and use the data-win-control attribute to specify the type of control you want. To add a Rating control, you set the attribute to “WinJS.UI.Rating“.
Let’s add a Rating control to our app.
<body>
<h1 class=”headerClass“>Hello, world!</h1>
<div class=”mainContent“>
<p>What’s your name?</p>
<input id=”nameInput” type=”text” />
<button id=”helloButton“>Say “Hello”</button>
<div id=”greetingOutput“></div>
<label for=”ratingControlDiv“>
Rate this greeting:
</label>
<div id=”ratingControlDiv” data-win-control=”WinJS.UI.Rating“>
</div>
</div>
</body>
For the Rating to load, your page must call WinJS.UI.processAll. Because our app is using one of the Visual Studio templates, our default.js already includes a call to WinJS.UI.processAll, as described earlier in Step 5, so you don’t have to add any code.
- Run the app. Notice the new Rating control.

Right now, clicking the Rating control changes the rating, but it doesn’t do anything else. Let’s use an event handler to do something when the user changes the rating.
Step 8: Register an event handler for a Windows Library for JavaScript control
Registering an event handler for a Windows Library for JavaScript control is a little different than registering an event handler for a standard HTML control. Earlier, we mentioned that the onactivated event handler calls WinJS.UI.processAll method to initialize Windows Library for JavaScript in your markup. The WinJS.UI.processAll is enclosed in a call to the setPromise method.
args.setPromise(WinJS.UI.processAll());
If Rating were a standard HTML control, you could add your event handler after this call to WinJS.UI.processAll. But it’s a little more complicated for a Windows Library for JavaScript control like our Rating. Because WinJS.UI.processAll creates the Rating control for us, we can’t add the event handler to Rating until after WinJS.UI.processAll has finished its processing.
If WinJS.UI.processAll were a typical method, we could register the Rating event handler right after we call it. But the WinJS.UI.processAll method is asynchronous, so any code that follows it might run before WinJS.UI.processAll completes. So, what do we do? We use a Promise object to receive notification when WinJS.UI.processAll completes.
Like all asynchronous Windows Library for JavaScript methods, WinJS.UI.processAll returns a Promise object. A Promise is a “promise” that something will happen in the future; when that thing happens, the Promise is said to have completed.
Promise objects have a then method that takes a “completed” function as a parameter. The Promise calls this function when it completes.
By adding your code to a “completed” function and passing it to the Promise object’s then method, you can be sure your code executes after WinJS.UI.processAll is complete.
- Let’s output the rating value when the user selects a rating. In your default.html file, create a div element to display the rating value and give it the id “ratingOutput“.
<body>
<h1 class=”headerClass“>Hello, world!</h1>
<div class=”mainContent“>
<p>What’s your name?</p>
<input id=”nameInput” type=”text” />
<button id=”helloButton“>Say “Hello”</button>
<div id=”greetingOutput“></div>
<label for=”ratingControlDiv“>
Rate this greeting:
</label>
<div id=”ratingControlDiv” data-win-control=”WinJS.UI.Rating“>
</div>
<div id=”ratingOutput“></div>
</div>
</body>
- In our default.js file, create an event handler for the Rating control’s change event named ratingChanged. The eventInfo parameter contains a detail.tentativeRating property that provides the new user rating. Retrieve this value and display it in the output div.
function ratingChanged(eventInfo) {
var ratingOutput = document.getElementById(“ratingOutput“);
ratingOutput.innerText = eventInfo.detail.tentativeRating;
}
- Update the code in our onactivated event handler that calls WinJS.UI.processAll by adding a call to the then method and passing it a completed function. In the completed function, retrieve the ratingControlDiv element that hosts the Rating control. Then use the winControl property to retrieve the actual Rating control. (This example defines the completed function inline.)
args.setPromise(WinJS.UI.processAll().then(function completed() {
// Retrieve the div that hosts the Rating control.
var ratingControlDiv = document.getElementById(“ratingControlDiv“);
// Retrieve the actual Rating control.
var ratingControl = ratingControlDiv.winControl;
// Register the event handler.
ratingControl.addEventListener(“change”, ratingChanged, false);
}));
- While it’s fine to register event handlers for HTML controls after the call to WinJS.UI.processAll, it’s also OK to register them inside your completed function. For simplicity, let’s go ahead and move all our event handler registrations inside the then event handler.
Here’s our updated onactivated event handler:
app.onactivated = function (args) {
if (args.detail.kind === activation.ActivationKind.launch) {
if (args.detail.previousExecutionState !== activation.ApplicationExecutionState.terminated) {
// TODO: This application has been newly launched. Initialize
// your application here.
} else {
// TODO: This application has been reactivated from suspension.
// Restore application state here.
}
args.setPromise(WinJS.UI.processAll().then(function completed() {
// Retrieve the div that hosts the Rating control.
var ratingControlDiv = document.getElementById(“ratingControlDiv“);
// Retrieve the actual Rating control.
var ratingControl = ratingControlDiv.winControl;
// Register the event handler.
ratingControl.addEventListener(“change”, ratingChanged, false);
// Retrieve the button and register our event handler.
var helloButton = document.getElementById(“helloButton“);
helloButton.addEventListener(“click”, buttonClickHandler, false);
}));
}
};
- Run the app. When you select a rating value, it outputs the numeric value below the Rating control.
Note This section and the last one just touched on what you need to know to start using Windows Library for JavaScript control. To learn more and to see a list of controls, see Quickstart: Adding WinJS controls and styles.
Summary
We’ve just seen how to add content to a Windows Store app, as well as how to add interactivity and how to style the app.
This tutorial is brought to you by the team at MSDN. To learn more about coding for Windows Store apps, please visit http://dev.windows.com
See the complete code
Did you get stuck, or do you want to check your work? If so, see complete code.
This article was reprinted with permission from Microsoft Corporation. This site does business with Microsoft Corporation.
